CRANKCASE
5-60
EAS25580
CHECKING THE CRANKCASE
1. Thoroughly wash the crankcase halves in a
mild solvent.
2. Thoroughly clean all the gasket surfaces and
crankcase mating surfaces.
3. Check:
• Crankcase
Cracks/damage → Replace.
• Oil delivery passages
Obstruction → Blow out with compressed air.
EAS25700
ASSEMBLING THE CRANKCASE
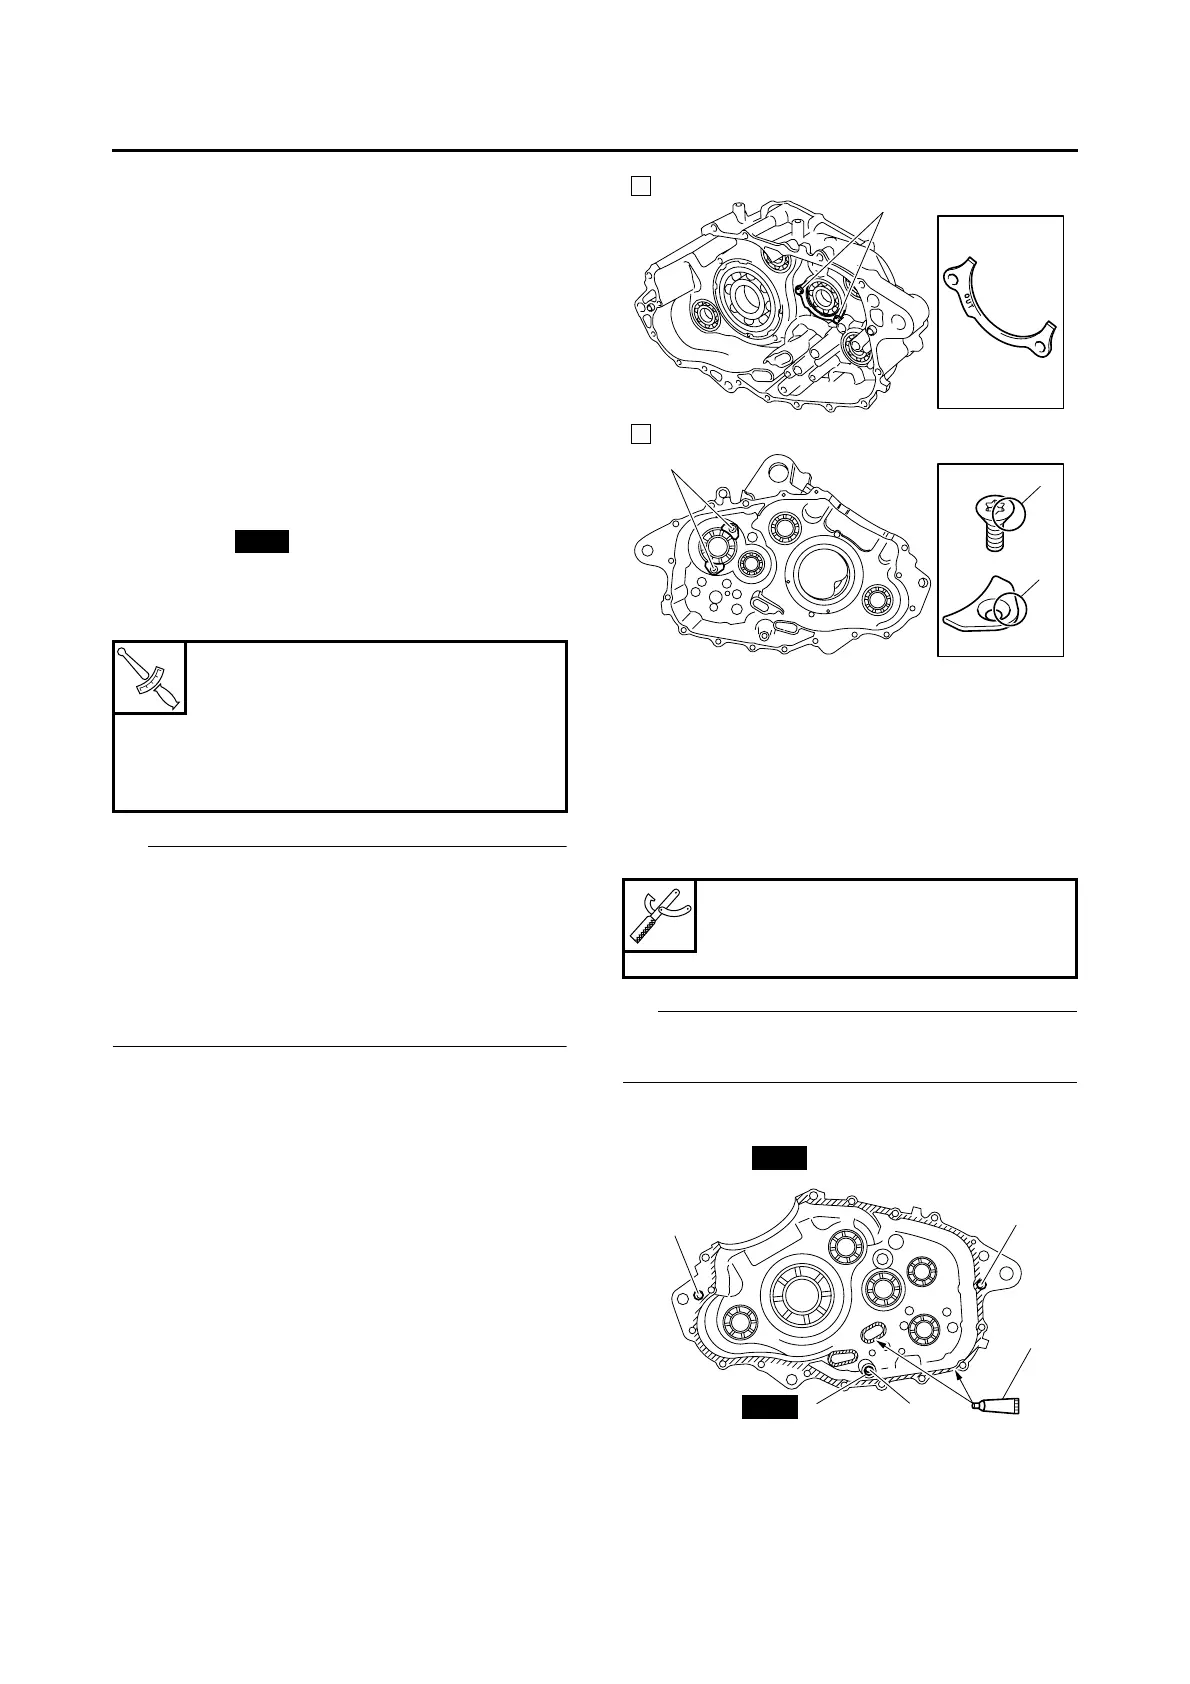
1. Install:
• Bearings
• Bearing retainers
• Bearing retainer bolts “1”
• Bearing retainer screws “2”
IP
• Install the bearing by pressing its outer race
evenly.
• To prevent the bearing retainer screws “2” from
becoming loose, flatten the edge “a” of each
screw into the depression “b” using a punch,
etc. Be careful not to damage the hole for the
screwdriver in the screw heads.
2. Thoroughly clean all the gasket mating sur-
faces and crankcase mating surfaces.
3. Apply:
• Sealant “1”
(onto the crankcase mating surfaces)
IP
Do not allow any sealant to come into contact
with the oil gallery.
4. Install:
• Dowel pins “2”
• O-ring “3”
T
R
.
.
Bearing retainer bolt
10 Nm (1.0 m·kg, 7.2 ft·lb)
LOCTITE®
Bearing retainer screw
10 Nm (1.0 m·kg, 7.2 ft·lb)
LOCTITE®
New
A. Right crankcase
B. Left crankcase
Yamaha bond No. 1215
90890-85505
(Three bond No.1215®)
1
A
a
2
b
B
New
2
3
2
1
2
New
 Loading...