FUEL TANK
7-2
EAS26630
REMOVING THE FUEL TANK
1. Extract the fuel in the fuel tank through the
fuel tank cap with a pump.
2. Remove:
• Fuel hose connector holder
• Fuel hose
NOTICE
ECA1S3L006
• Be sure to disconnect the fuel hose by
hand. Do not forcefully disconnect the
hose with tools.
• Although the fuel has been removed from
the fuel tank, be careful when removing the
fuel hose, since there may be fuel remain-
ing in it.
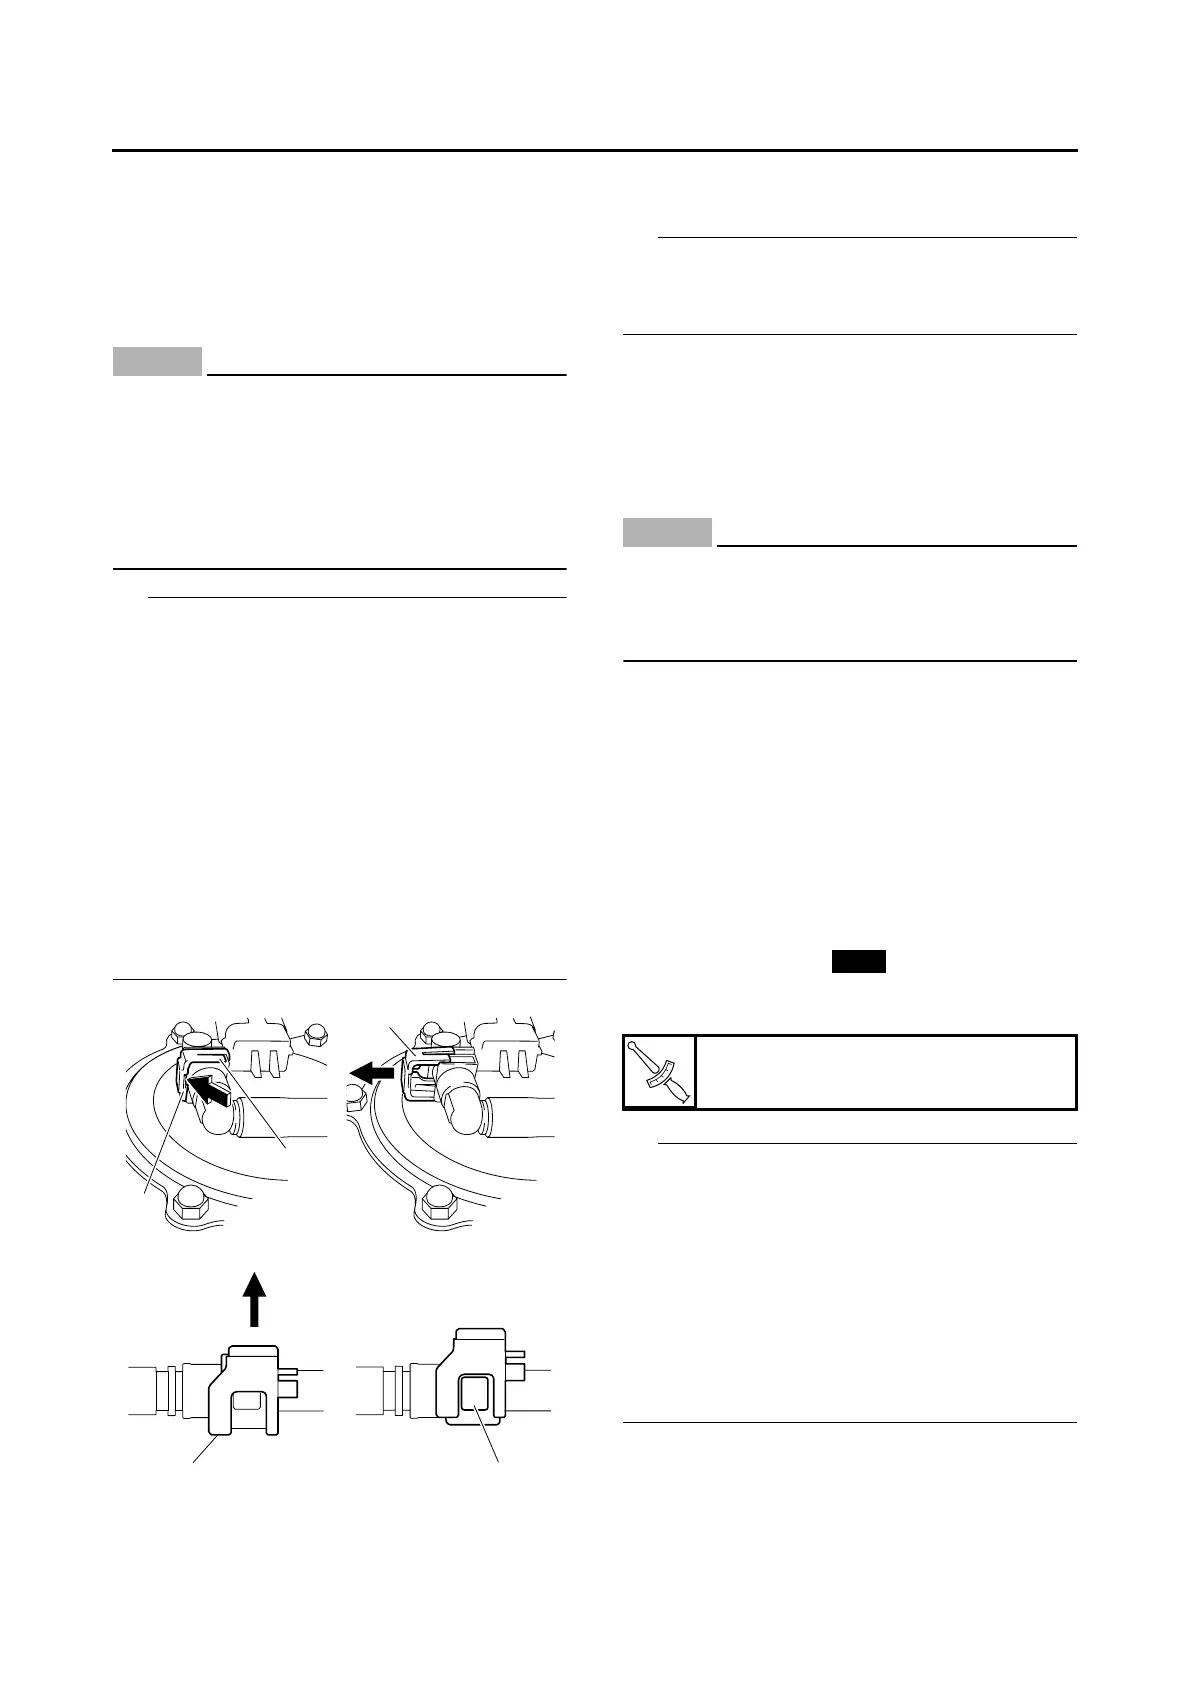
IP
• When removing the fuel hose from the fuel
pump, remove the fuel hose connector holder
first, and next, insert a slotted head screwdriver
etc. in the slot part “a” of the fuel hose connec-
tor cover “1”, then slide the screwdriver in the
direction of the arrow, and remove the fuel
hose.
• To remove the fuel hose from the throttle body,
slide the fuel hose connector cover “2” on the
end of the hose in direction of the arrow shown,
press the two buttons “3” on the sides of the
connector, and then remove the hose.
• Before removing the hoses, place a few rags in
the area under where it will be removed.
3. Remove:
• Fuel tank
IP
Do not set the fuel tank down on the installation
surface of the fuel pump. Be sure to lean the fuel
tank against a wall or like.
EAS26640
REMOVING THE FUEL PUMP
1. Remove:
• Fuel pump bracket
• Fuel pump
• Fuel pump gasket
NOTICE
ECA14720
• Do not drop the fuel pump or give it a
strong shock.
• Do not touch the base section of the fuel
sender.
EAS26670
CHECKING THE FUEL PUMP BODY
1. Check:
• Fuel pump body
Obstruction → Clean.
Cracks/damage → Replace fuel pump as-
sembly.
EAS1S3L010
INSTALLING THE FUEL PUMP
1. Install:
• Fuel pump gasket
• Fuel pump
• Fuel pump bracket
IP
• Do not damage the installation surface of the
fuel tank when installing the fuel pump.
• Always use a new fuel pump gasket.
• Install the fuel pump bracket by aligning the
projection “a” on the fuel pump with the projec-
tion on the fuel tank.
• Tighten the bolts to the specified torque in the
proper tightening sequence as shown.
• Install the fuel pump in the direction shown in
the illustration.
a
1
1
2
3
T
R
.
.
Fuel pump nut
7 Nm (0.7 m·kg, 5.1 ft·lb)
New

 Loading...
