• Setting for Each Group
a. Depress the “ZONE” switch and select the zone to set.
b. Depress the “GROUP” switch to select the group to set. Then, the Ref. Nº and I.U. Add. of the indoor unit
set as the master unit of selected group are indicated.
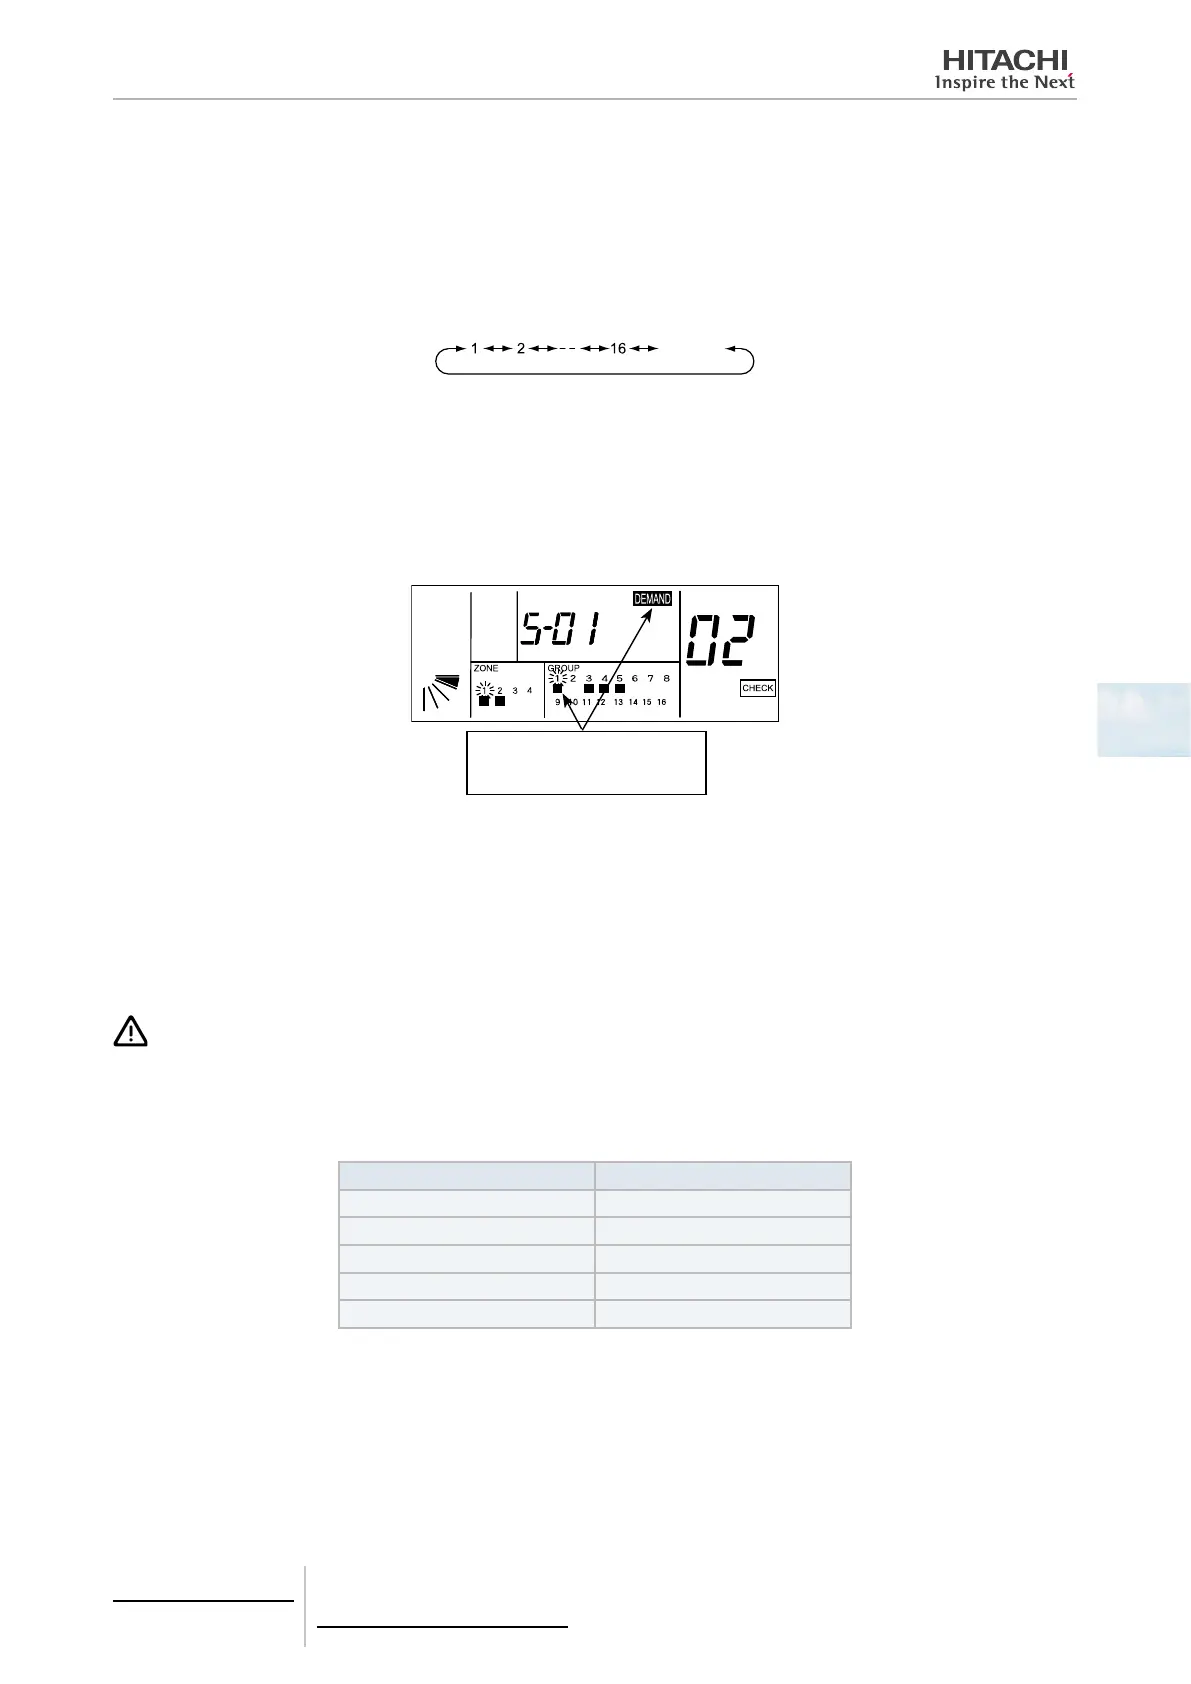
[Group Selection]
Depress the “GROUP” switch, and the ickering indication of group Nº is changed in order as shown below.
All
ickering
* Only the group Nº to set is indicated.
5 Setting Procedure
Depress the “RUN/STOP” switch and the selected group is set with demand control, and the “” and “DEMAND” indica-
tions appear.
In the case where there is one or more group with demand setting in the zone, the “” indication of zone turns ON.
(Every time the “RUN/STOP” switch is depressed, the demand control is set and canceled alternately.)
“” and ”SET” Indications: ON
(The demand control is set.)
5.3.4.4 Option setting
Changing to Option Setting Mode
1 Depress the “CHECK” switch for more than 3 seconds while all the groups are stopped. The central station is
changed to the option setting mode and the “CHECK” indication appears, and “1” (Master Unit Setting Mode) is indi-
cated on the 7-segment for check.
ATTENTION
When there is a group in operation, the central station can not be changed to the check mode.
2 Depress the “CHECK” switch and change the indication of the 7-segment.
7-Segment Function
A Fixing Operation Mode
b Fixing Setting Temperature
c Fixing Cooling Only
d Fixing Air Flow
E Auto COOL / HEAT
3 Depress the “RESET” switch and the central station is changed to the normal mode.
5 Centralised remote controls
PSC-A64S
TCGB0106 rev.0 - 12/2014
391
5

 Loading...