BRAKE SYSTEM
17-14
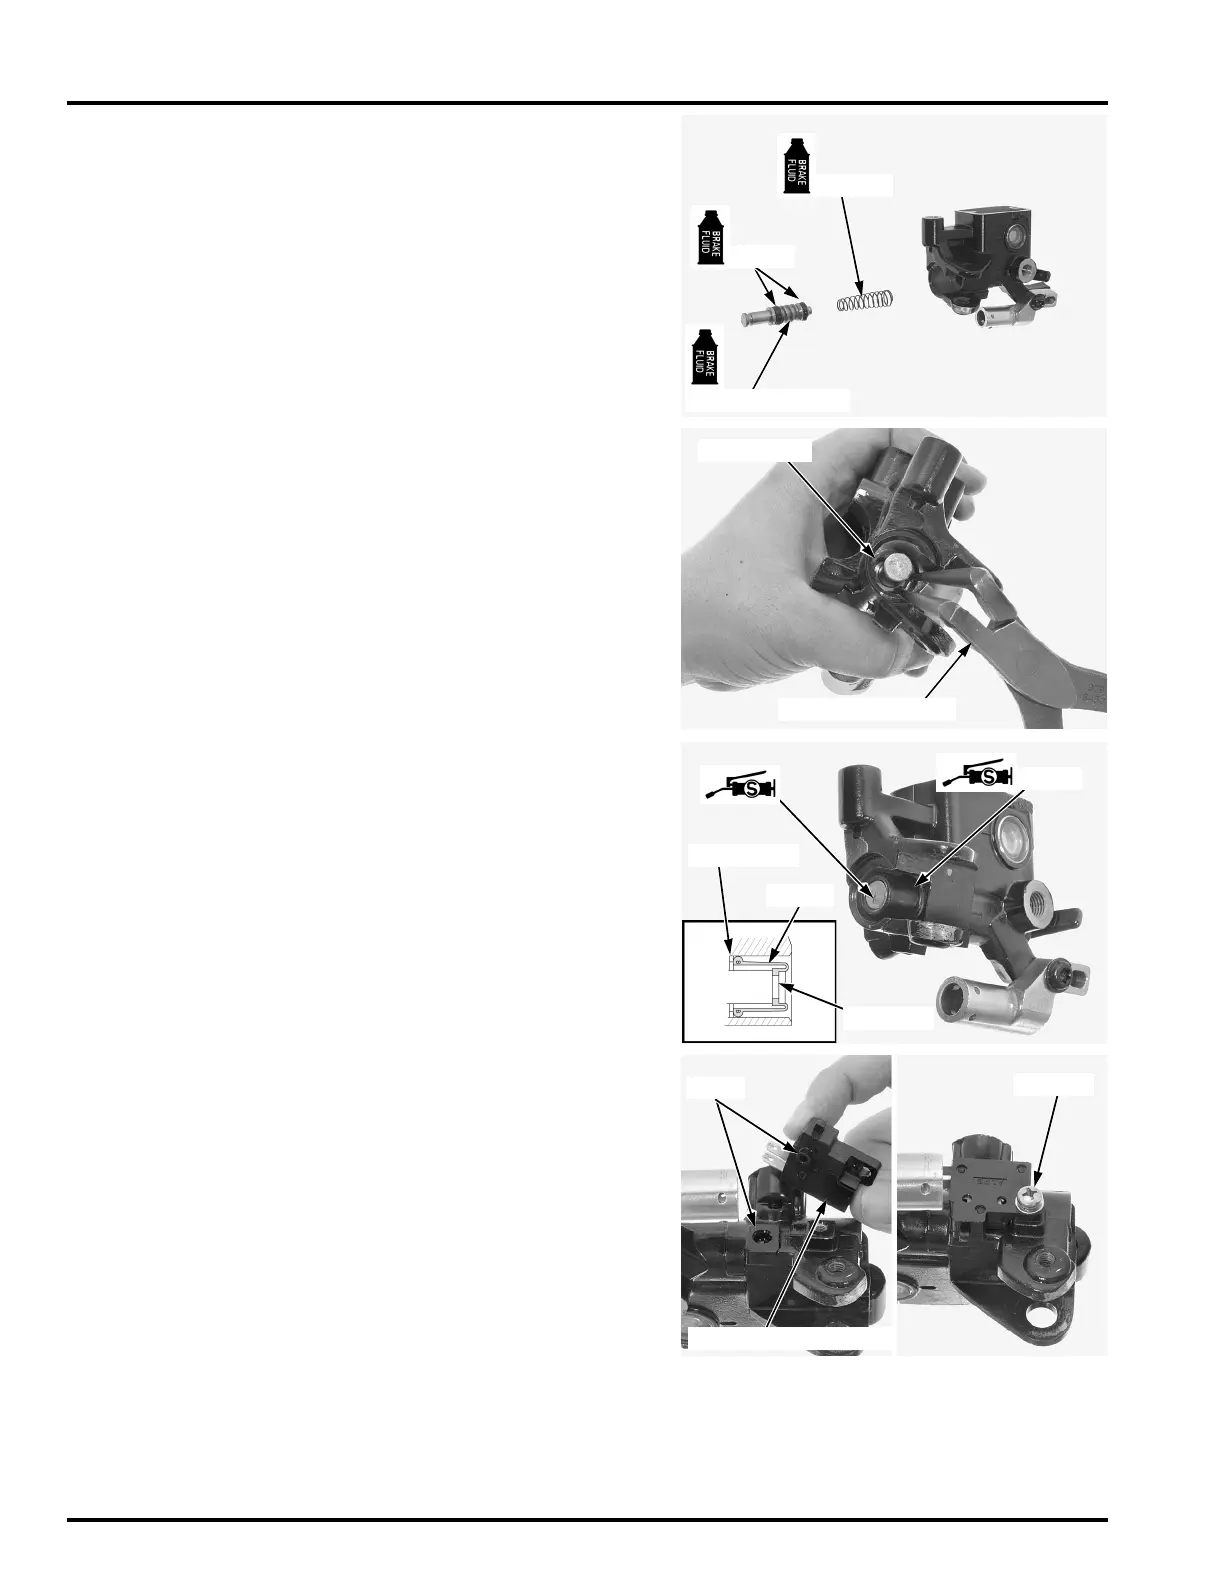
Replace the piston,
cups, spring, snap
ring and boot as a
set; do not substi-
tute individual
parts.
Coat the master piston, spring and piston cups with
brake fluid.
Install the spring onto the master piston end.
Install the spring/master piston into the master cyl-
inder.
Install the snap ring into the groove of the master
cylinder.
Apply 0.1 g of silicon grease to the inside of the
boot.
Install the boot into the master cylinder until it is
fully seated on the snap ring and set its lip into the
groove of the master piston.
Apply silicone grease to the brake lever contacting
surface of the master piston.
Install the brake light switch by aligning the boss of
the switch body and hole of the master cylinder.
Install and tighten the screw to the specified torque.
Do not allow the
piston cup lips to
turn inside out.
TOOL:
Snap ring pliers 07914-SA50001
SNAP RING PLIERS
SNAP RING
TORQUE: 1.2 N·m (0.12 kgf·m, 0.9 lbf·ft)
Align
SCREW
BRAKE LIGHT SWITCH
 Loading...