FRAME/BODY PANELS/EXHAUST SYSTEM
3-13
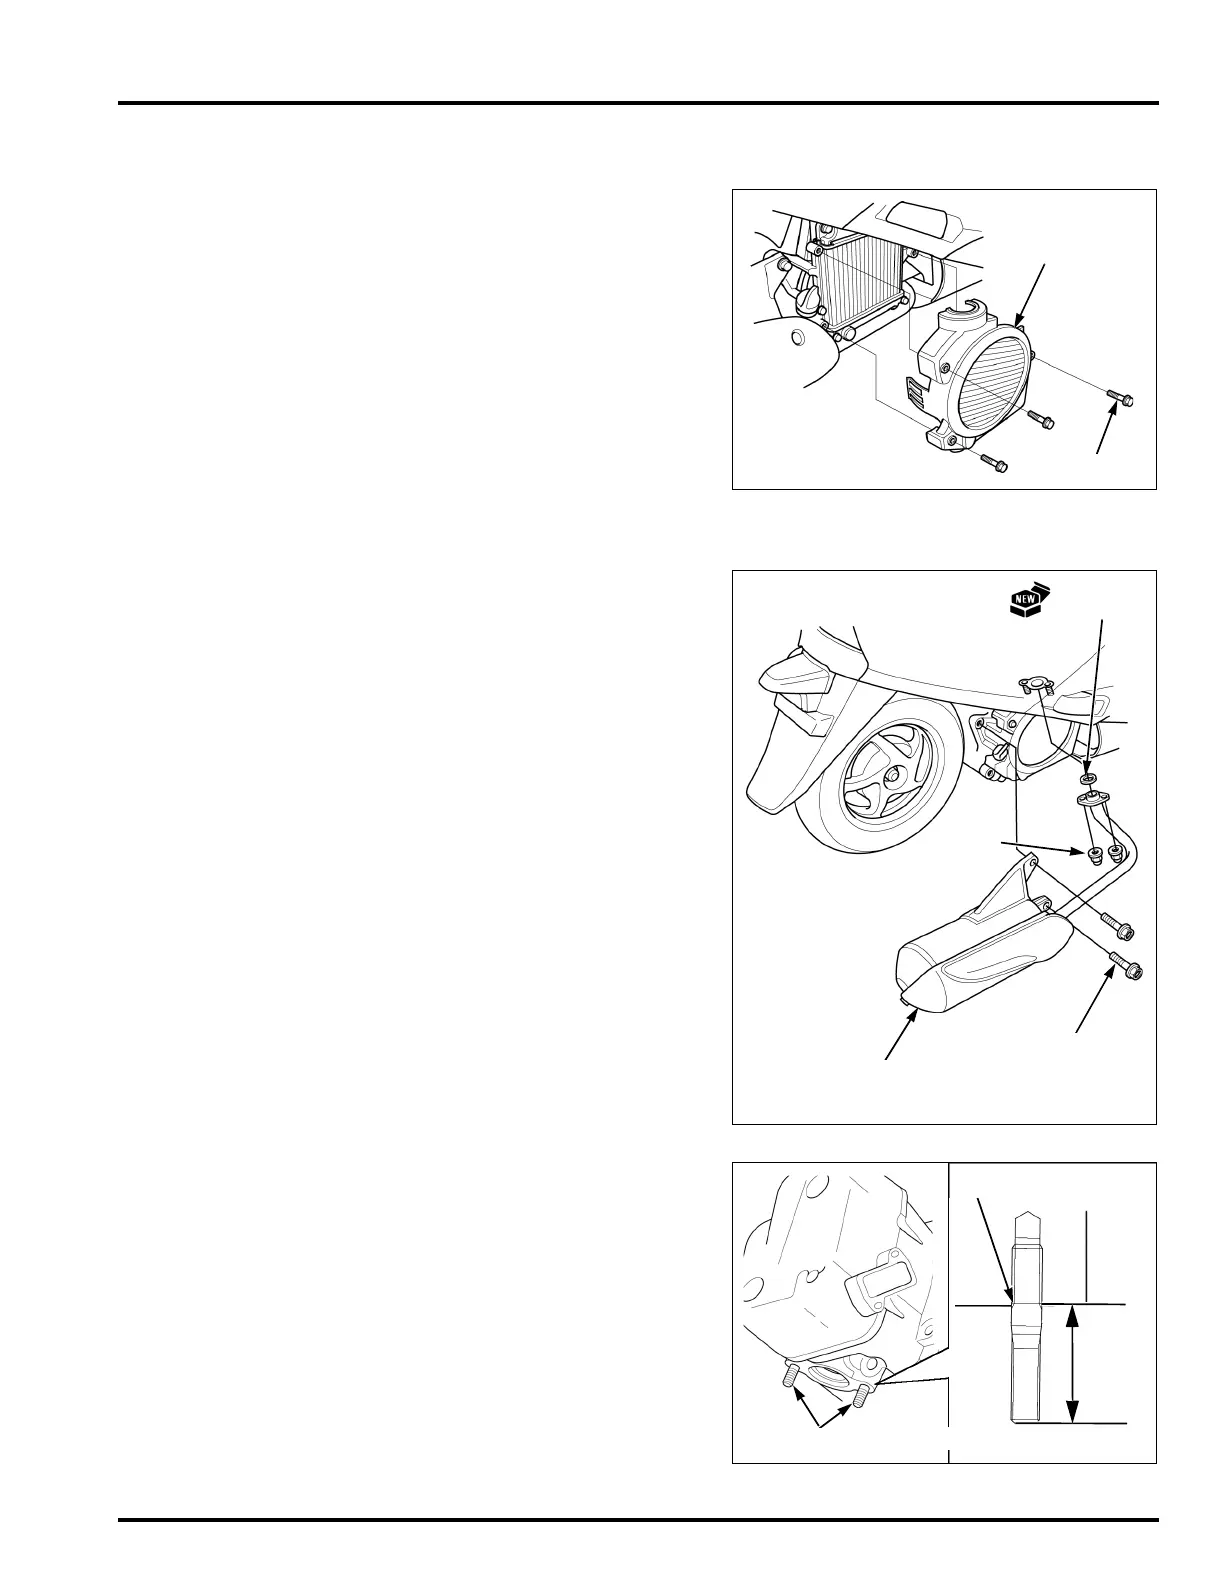
RADIATOR COVER
REMOVAL/INSTALLATION
Remove the three bolts and radiator cover, being
careful not to damage the fins.
Installation is in the reverse order of removal.
EXHAUST PIPE/MUFFLER
REMOVAL/INSTALLATION
Remove the exhaust pipe joint nuts.
Remove the muffler mounting bolts and exhaust
pipe/muffler.
Replace the exhaust pipe gasket with a new one.
Align the exhaust pipe flange with the stud bolts
and install the joint nuts, but do not tighten yet.
Install the mounting bolts, but do not tighten yet.
Tighten the joint nuts to the specified torque.
Tighten the mounting bolts to the specified torque.
After installation, make sure the exhaust system
does not leak.
STUD BOLT REPLACEMENT
Remove the exhaust pipe/muffler (page 3-13).
Thread two nuts onto the stud and tighten them
together, and use wrench on them to turn the stud
bolt out.
Install new stud bolts into the cylinder head and
tighten them until incomplete thread embed.
After installation, check that the length from the bolt
head to the cylinder head surface is within specifica-
tion.
Install the exhaust pipe/muffler (page 3-13).
TORQUE: 14 N·m (1.4 kgf·m, 10 lbf·ft)
TORQUE: 59 N·m (6.0 kgf·m, 44 lbf·ft)
GASKET
JOINT
NUTS
MOUNTING
BOLTS
EXHAUST PIPE/
MUFFLER
SPECIFIED LENGTH: 11 – 13 mm (0.4 – 0.5 in)
STUD BOLT
INCOMPLETE THREAD
11 – 13 mm (0.4 – 0.5 in)
 Loading...