KE-2050/KE-2060, KE-2050R/2055R/KE-2060R Maintenance Manual
2-20
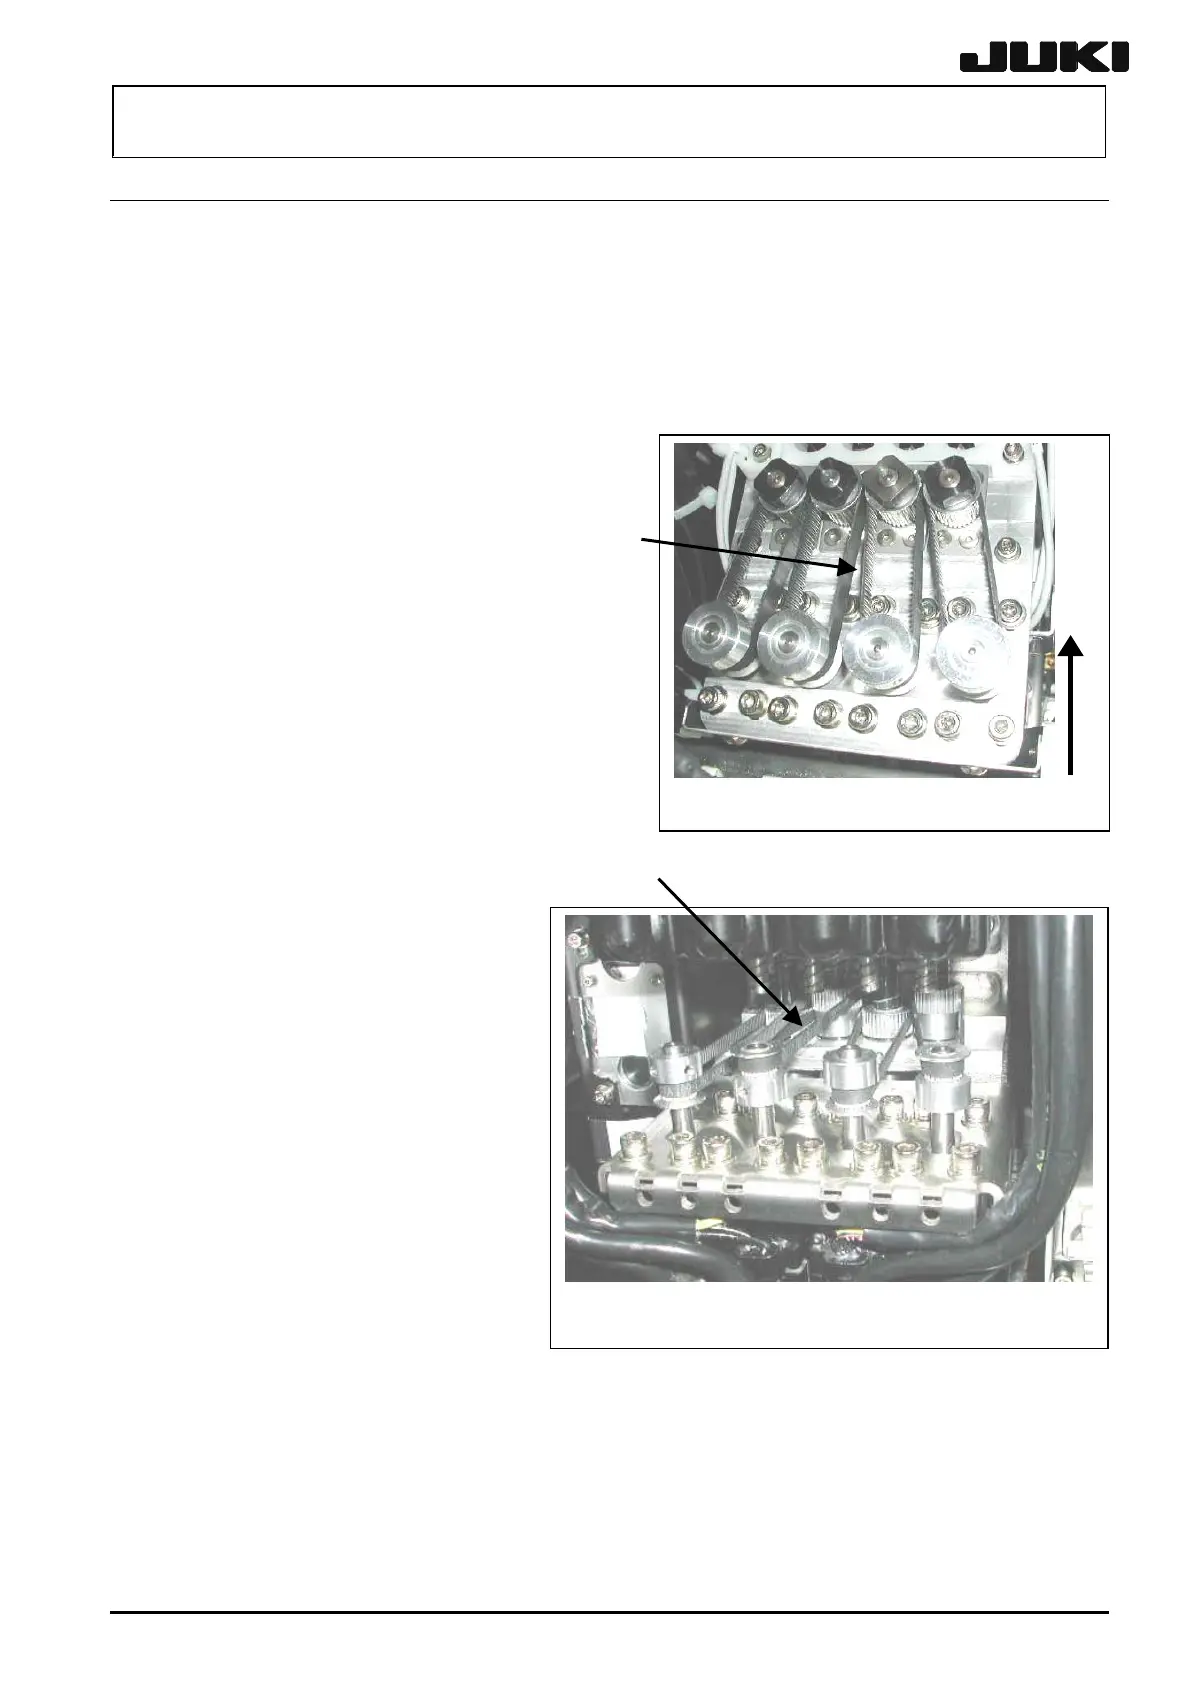
2-6. Replacing the Belts
2-6-1. MNLA Head
Replacing the timing belt Z
After the timing belt Z has been replaced, it is absolutely necessary to re-input the MS parameters
related to the Z-axis home position adjustment, Z-axis height, and laser. (For details of input items,
see section 2-9.)
Rev. 2.00
(1) Loosen the timing belt Z to the direction
indicated by the arrow following the steps (1)
through (3) in section 2-2-1.
( Replace the timing belt Z k. 2)
Apply Loctite 242 to the Z-motor mounting
screws (4 pcs.) and tighten them with a
tightening torque of 2.3 Nm.
Adjust the belt tension following section
2-2-1 "Z-motor" (on page 2-7).
Replacing the timing belt θ
After the timing belt θ has been replaced, it is
absolutely necessary to re-input the MS
parameters related to the Z-axis home. (For details
of input items, see section 2-9.)
Figure 2-6-1
(1) Loosen the timing belt θ to the
direction indicated by the arrow
following the steps (1) through (3)
in section 2-2-2.
(2) Loosen the set collar mounting
screws (2 pcs.) to detach the set
collar from the spline shaft.
(3) Remove the spline shaft from the
bearing of the Z-slide bracket.
( Replace the timing belt θ l. 4)
When fixing the set collar,
exercise care to avoid any
clearance from being formed between the collar and the spline shaft.
Adjust the belt tension following section 2-2-2 "θ-motor" (on page 2-9).
⑨
⑩
Figure 2-6-2
 Loading...


