KE-2050/KE-2060, KE-2050R/2055R/KE-2060R Maintenance Manual
5-7
Rev. 2.00
5-6. Replacing the WAIT Sensor
5-6-1. Replacing the Fiber
(1) Detach the fiber from the WAIT sensor amplifier.
Loosen the fixing screw to detach the light receiving fiber.
(2) Detach the light receiving fiber from the WAIT sensor
block.
(3) Detach the light emission fiber from the WAIT sensor
bracket.
(4) When installing new fibers, reassemble the components in
the order of step (3) to (1).
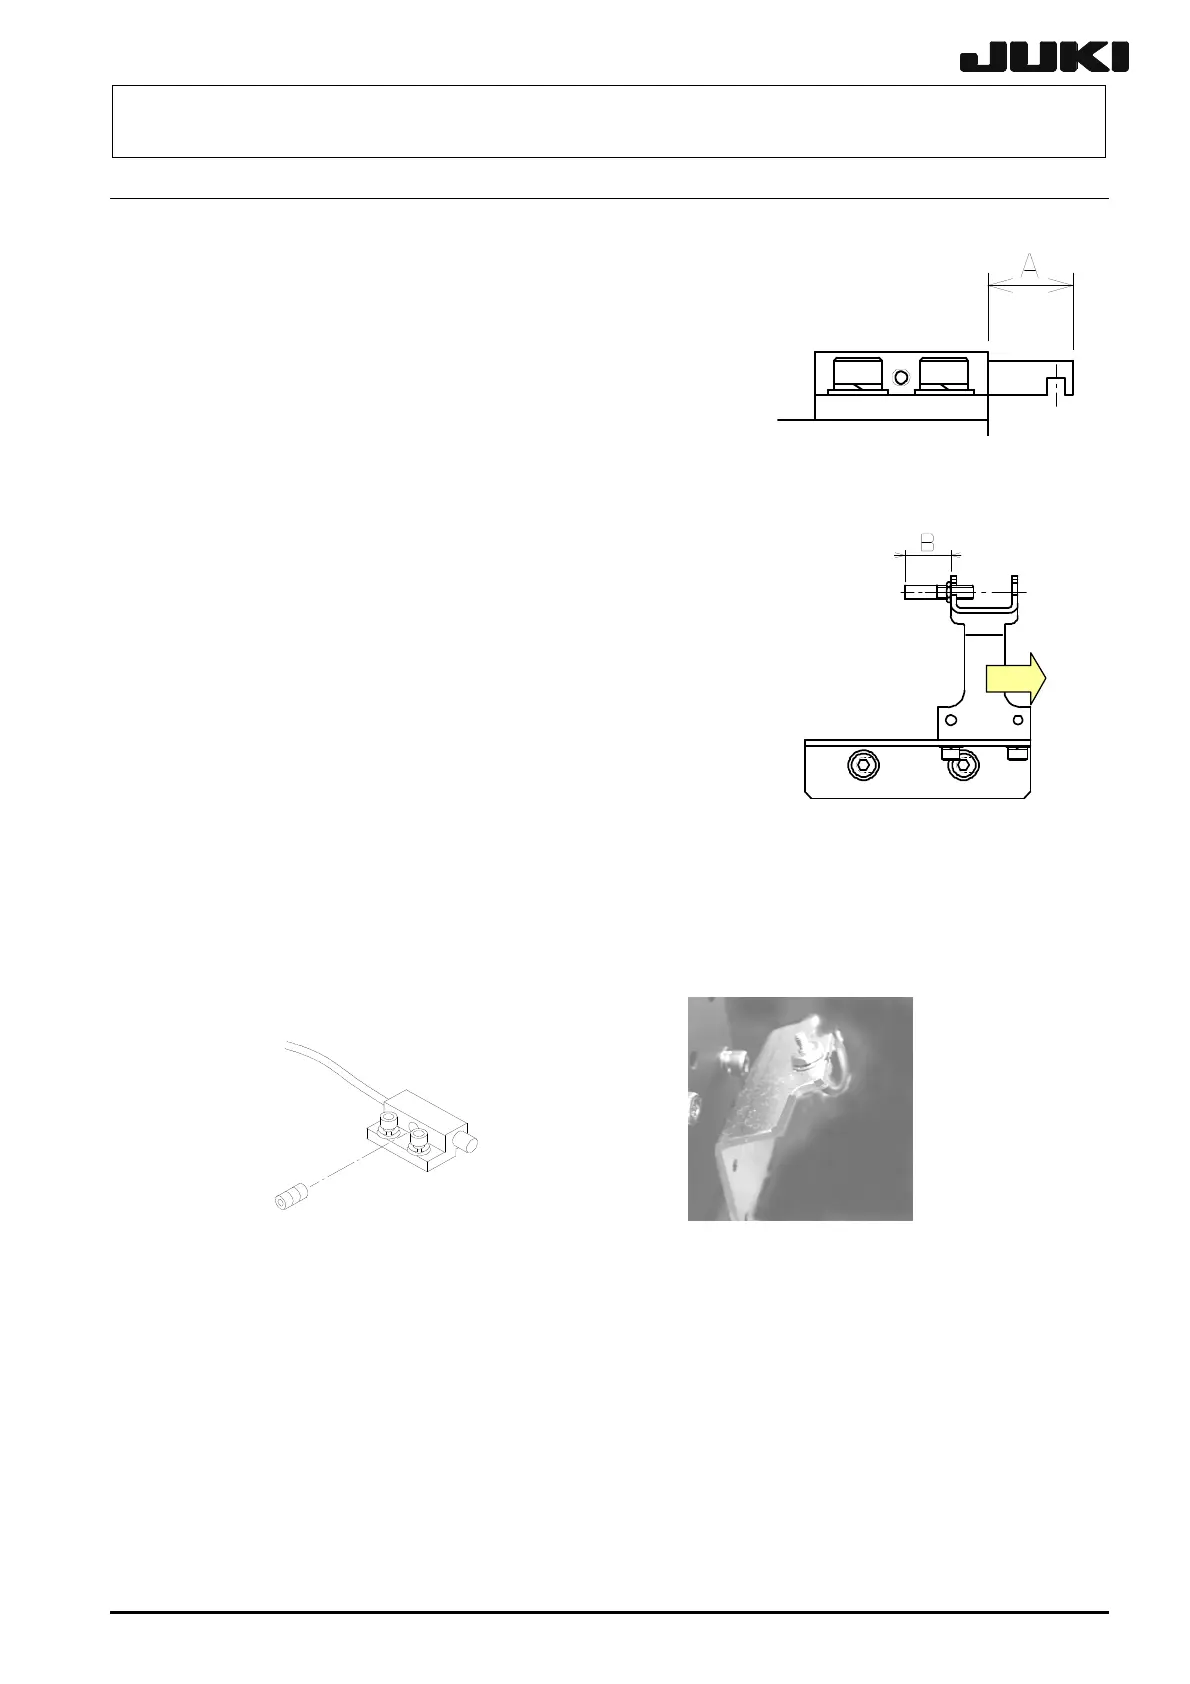
(5) Adjust so that the fiber extrudes beyond the WAIT sensor
block as follows (Dimension A).
M size: A = 10 mm
L size:
A = 9 mm
In addition, in the case of L size specification, adjustment
must be carried out so that the fiber extrudes 14 mm
beyond the WAIT sensor block (up to the tip of side view)
(Dimension B).
(6) After the fibers have been replaced, follow the steps stated
in section 5-6-2-2, How to mount the amplifier unit, to adjust the amplifier gain. (See page 5-8.)
Figure 5-6-1-3 WAIT Sensor Block Figure 5-6-1-4 WAIT Sensor Bracket (M size)
Figure 5-6-1-1
WAIT Sensor Block
Figure 5-6-1-2
WAIT Sensor Bracket (L size)
 Loading...


