KE-2050/KE-2060, KE-2050R/2055R/KE-2060R Maintenance Manual
4-8
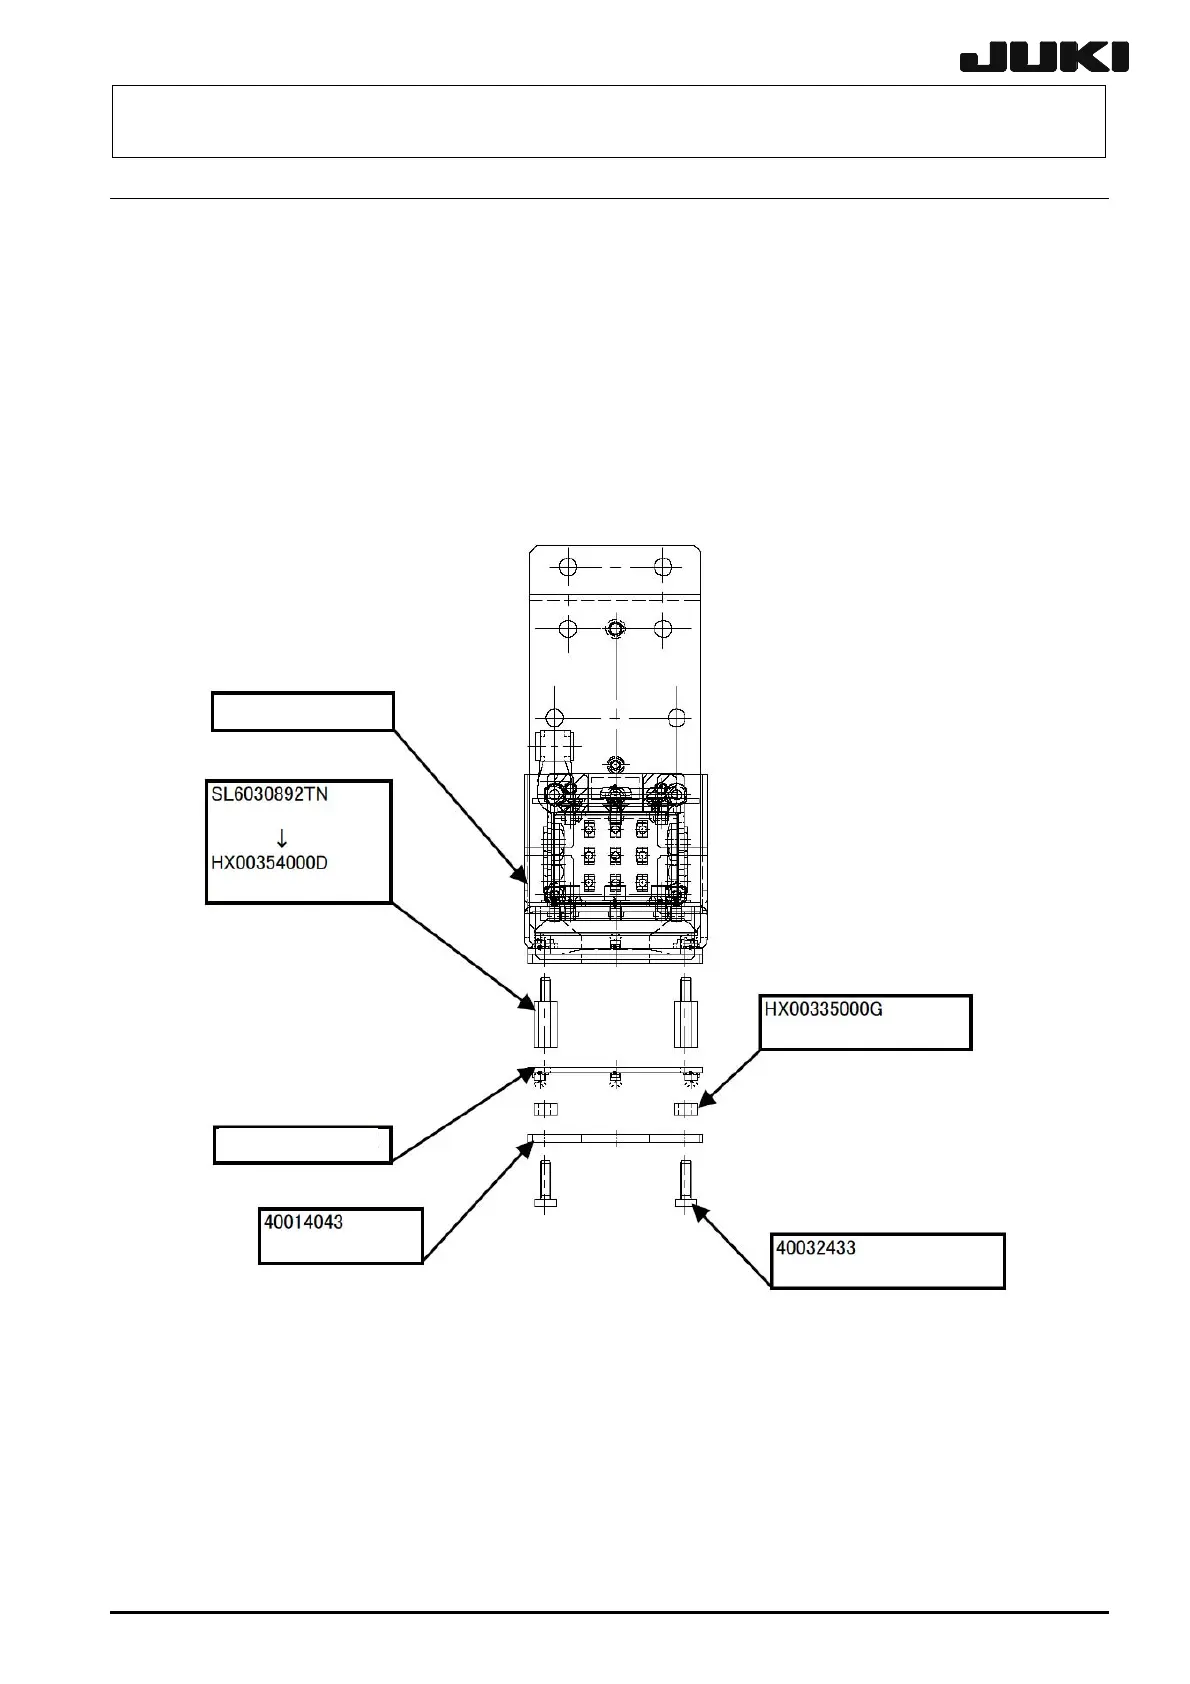
4-7. Offset Placement After Solder Screen-Printing Light
4-7-1. Replacing the Offset Placement After Solder Screen-Printing light
(1) Unscrew the low head cap screws and remove the board spacer, prism base and the OCC
angle light board.
(2) Reassemble the components in reverse order.
(3) After replacing the Offset Placement After Solder Screen-Printing light with a new one, it is
necessary to adjust both the Offset Placement After Solder Screen-Printing light and the OCC
light. (See 4-8. "List of Readjustment Items After Replacement".)
Prism base
Board spacer (x 4)
Low head cap screw M3 x 10 (x 4)
Board stud (x 4)
OCC angle light board
CA light assembly
SEMS cap M3 x 8
Figure 4-7-1 Replacing the Offset Placement After Solder Screen-Printing Light
4-7-2. Adjusting the light quantity of the Offset Placement After Solder Screen-Printing
light
<Procedure>
(1) Manually check to make sure that both the s Offset Placement After Solder Screen-Printing
light and the OCC light go on.
(2) Implement the "OCC light quantity adjustment" of the MS parameter.
Rev. 2.10
 Loading...


