21
Repair
7-19
P/N 7105144G
2008 Nordson Corporation
VersaBlue_NW
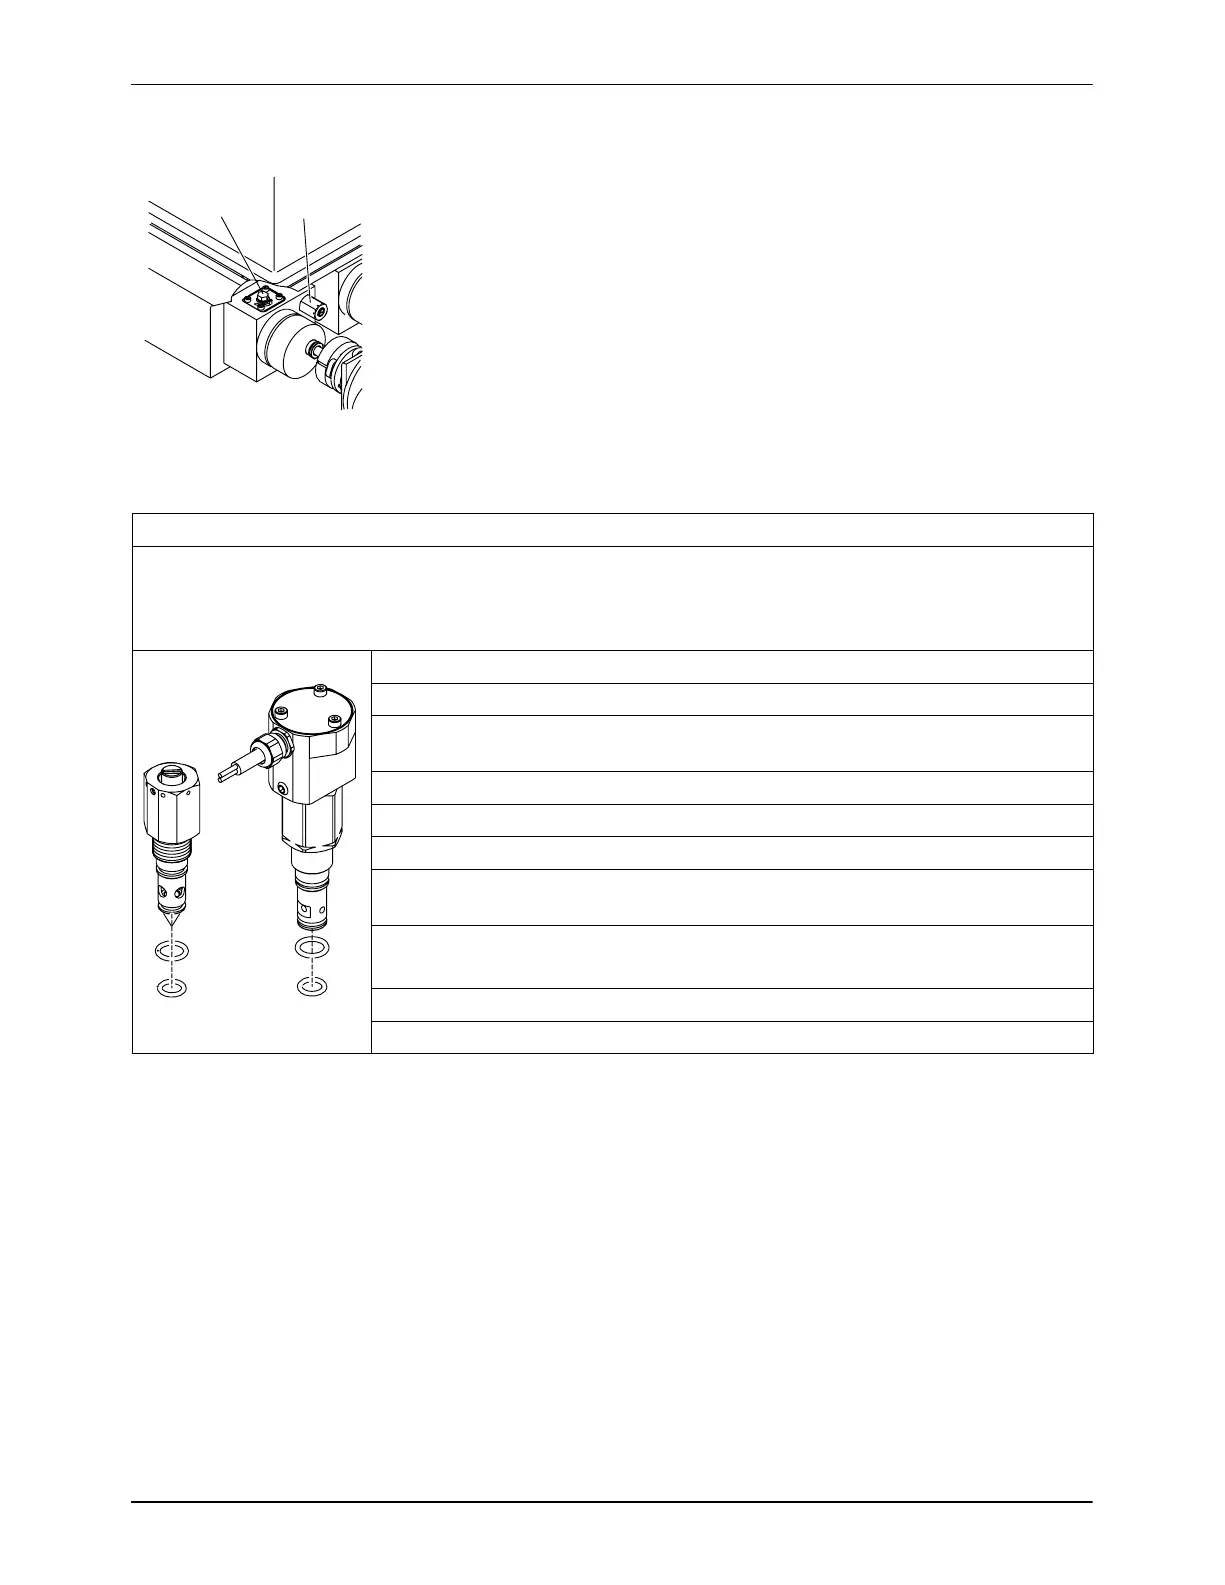
Installing Service Kit
Each kit contains two O-rings and high-temperature grease.
NOTE: Screw in/out only when the safety valve (2, Fig. 7-29) and pump are
warm and the material is soft (approx. 70 °C / 158 °F, depending on
material).
Fig. 7-29
Service kit P/N: 394592 (for safety valve and safety valve with Reed switch)
Required tools:
Open-jawed wrench: size 19 for standard safety valve; size 24 safety valve with Reed switch
Pliers
Torque wrench
1. Close the tank isolation valve (1, Fig. 7-29).
2. When present: Unscrew the connecting cable from the Reed switch.
3. Use an open-jawed wrench to screw out the safety valve, then extract with
a pliers.
4. Remove outer O-rings and clean outside of safety valve.
5. Install new O-rings.
6. Apply grease to all threads and O-rings.
7. To prevent damage to the O-rings, carefully guide the valve into the hole
when the melter is warm.
8. Tighten valve with a torque wrench.
Torque: 15 Nm (133 lbin)
9. When present: Screw the connecting cable back onto the Reed switch.
10. Open tank isolation valve.
 Loading...