and "User Setting" appears, you must set the same the group number for "Phase 1 Diffie-Hellman
Group" and "Phase 2 PFS" on the machine to establish IPsec transmission.
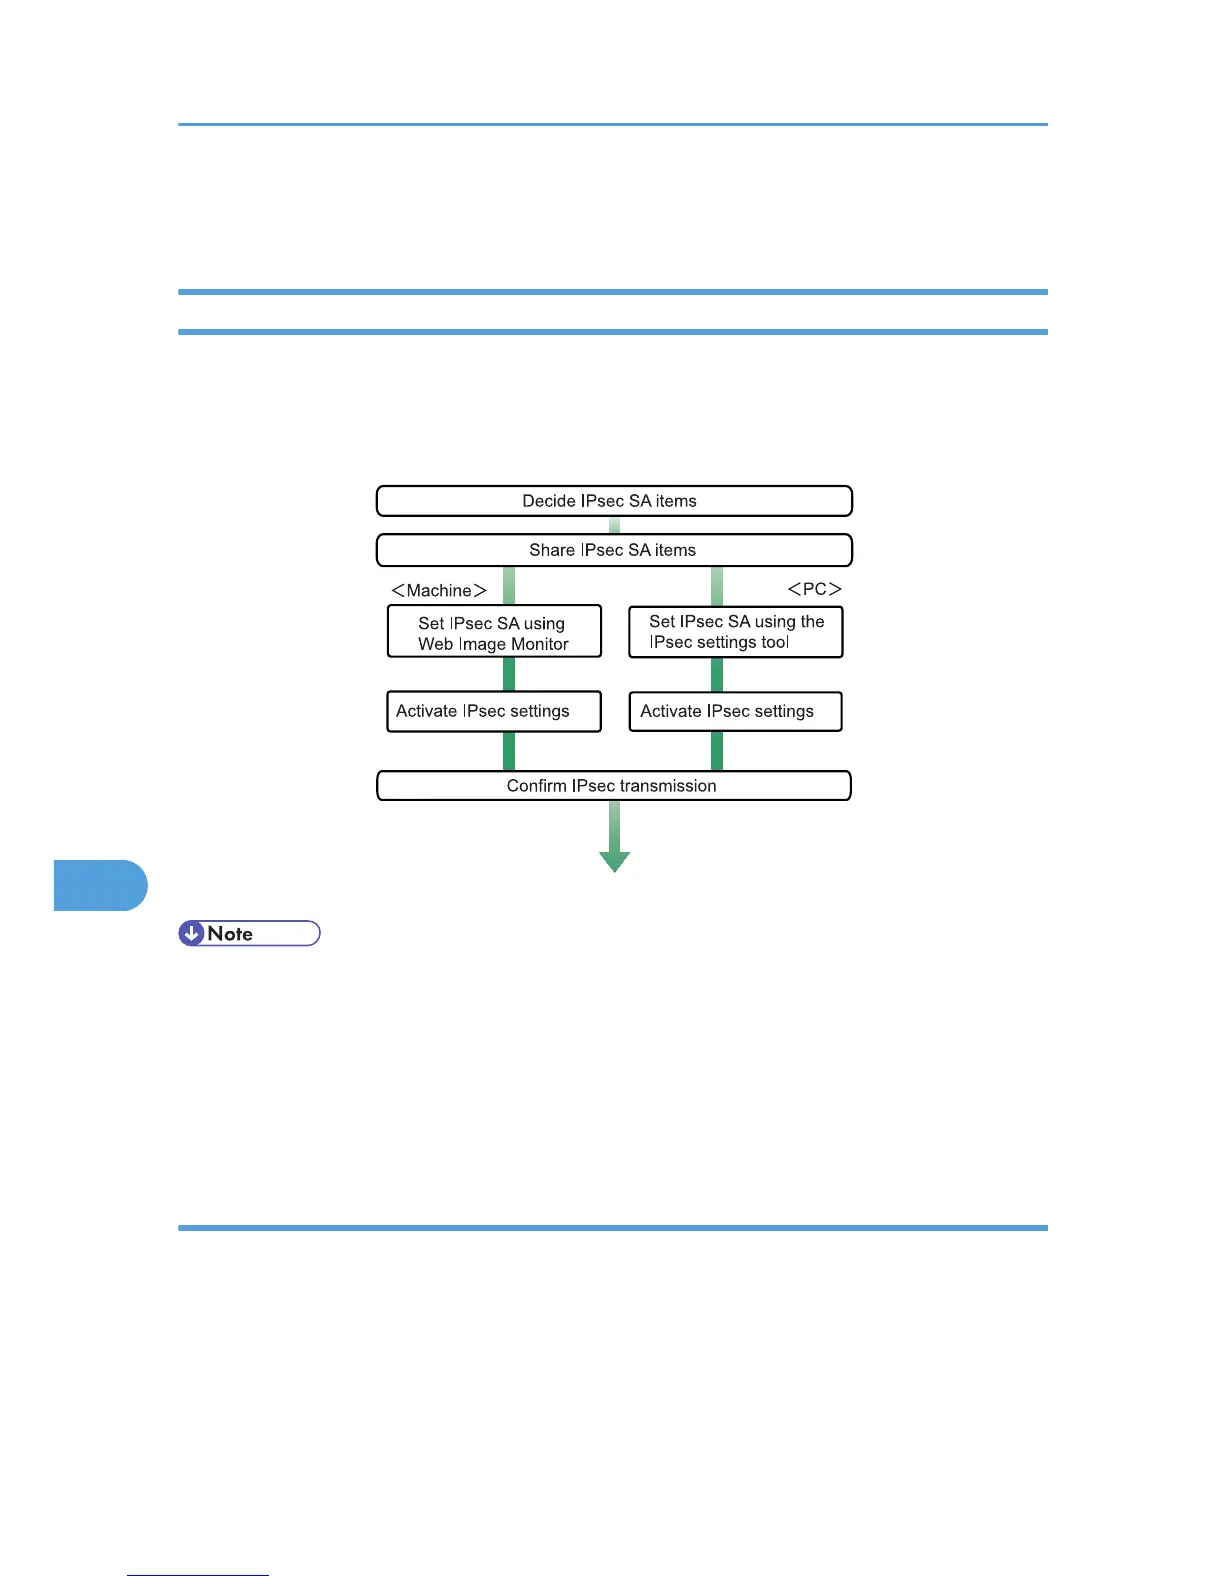
Encryption Key Manual Settings Configuration Flow
This section explains the procedure for specifying encryption key manual settings. This can be specified by
the administrator.
• Before transmission, SA information is shared and specified by the sender and receiver. To prevent
SA information leakage, we recommend that this exchange is not performed over the network.
• After configuring IPsec, you can use "Ping" command to check if the connection is established correctly.
However, you cannot use "Ping" command when ICMP is excluded from IPsec transmission. Also,
because the response is slow during initial key exchange, it may take some time to confirm that
transmission has been established.
Specifying encryption key manual settings
This can be specified using Web Image Monitor.
1. Open a Web browser.
2. Enter "http://(the machine's IP address or host name)/" in the address bar.
When entering an IPv4 address, do not begin segments with zeros. For example: If the address is
"192.168.001.010", you must enter it as "192.168.1.10" to connect to the machine.
8. Security Measures Provided by this Printer
364
 Loading...


