Learn how to view analog characteristics of a digital waveform.
Learn how to trigger on a bus.
Learn to view the bus packets.
Set up an 8B10B serial bus
NOTE. 8B10B serial bus setup is available only on instruments with the SR-810B or ST6G options.
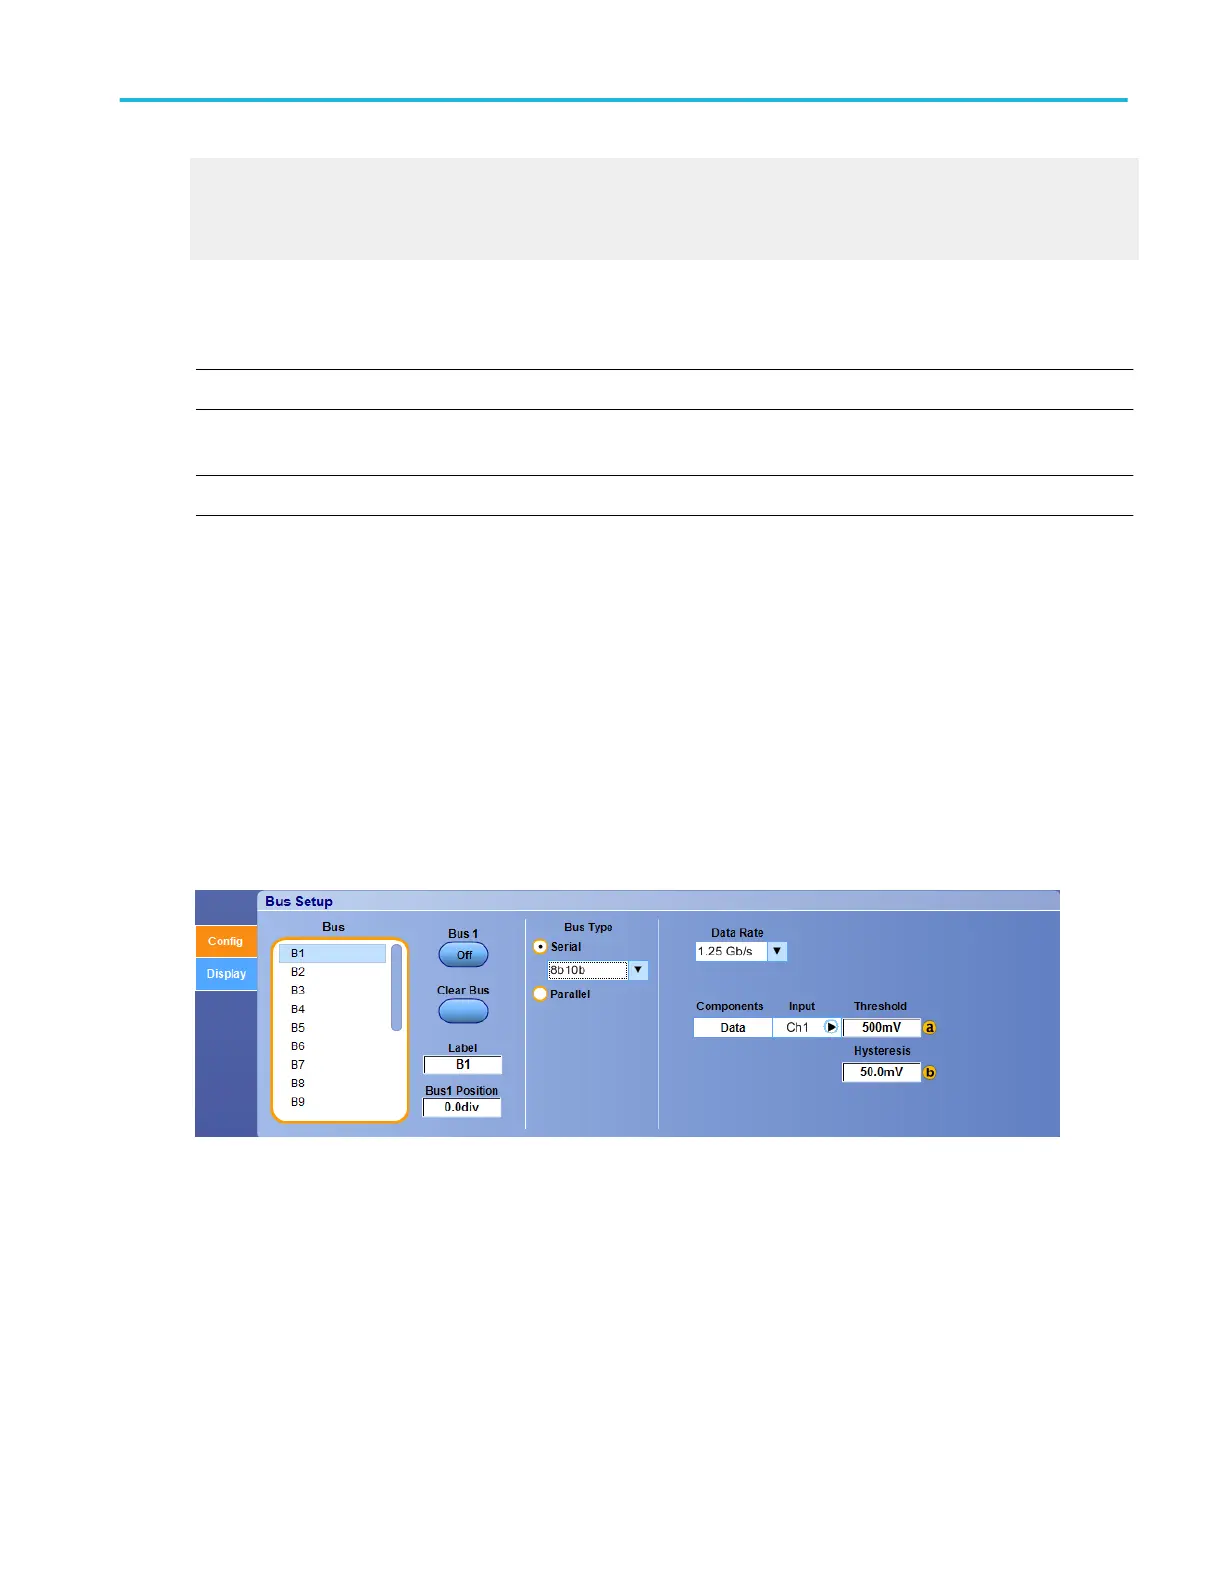
From the Bus Setup window in the Config tab, select a bus from the Bus list and then select the 8B10B Serial bus type.
NOTE. The Components for the 8B10B bus standard are set by the instrument.
For information on the controls, click the buttons.
■
Bus List
■
Display & Clear
■
Label
■
Position
■
Serial Input
■
Data Rate
■
Input
■
Serial Threshold
To use
■
To change the input for a component, click the Input and select a channel from the cascading lists.
■
To change the voltage threshold level, click the Threshold entry box and use the keypad to enter a value or use the
multipurpose knobs to select a voltage level.
■
To change the voltage hysteresis level, click the Hysteresis entry box and use the keypad to enter a value or use the
multipurpose knobs to select a voltage level.
■
To set the data rate, click the Data Rate entry box and select from the drop-down list.
■
To set the serial bus type, click the Serial Bus Type entry box and select from the drop-down list.
Bus setups
DPO70000SX, MSO/DPO70000DX, MSO/DPO70000C, DPO7000C, and MSO/DPO5000B Series 123
 Loading...