3.1 Overview of Menu Operation
3-1
3.1 Overview of Menu Operations
3.1.1 Access the menus
- MAIN menu
Press the [MENU] key or place the cursor on the [MENU] box and click the left
button.
- Box marked with [ ]
Place the cursor on the box and click the right button.
HDG, SPD, OS POSN, ARPA, AIS, TRAIL, TARGET LIST, BRILL,
MARK, PICTURE, ANT, CURSOR
*)
* To access the CURSOR menu, place the cursor on the display area of the
radar and click the right button.
Optional Menu for service engineer.
- INITIALIZE menu
Press the [MENU] key five times while pressing the [1:HL OFF] key.
- FACTROY menu
Press the [2], [3] or [4] key while pressing the [1:HL OFF] key.
Note:
1. When the “+” cursor is changed, it shows any selection is made.
The menu selection screen has a timeout of 30 seconds and the Menu box disappears.
2. After you change the some setting, wait for six seconds before turning off the power.
Otherwise, it is not saved.
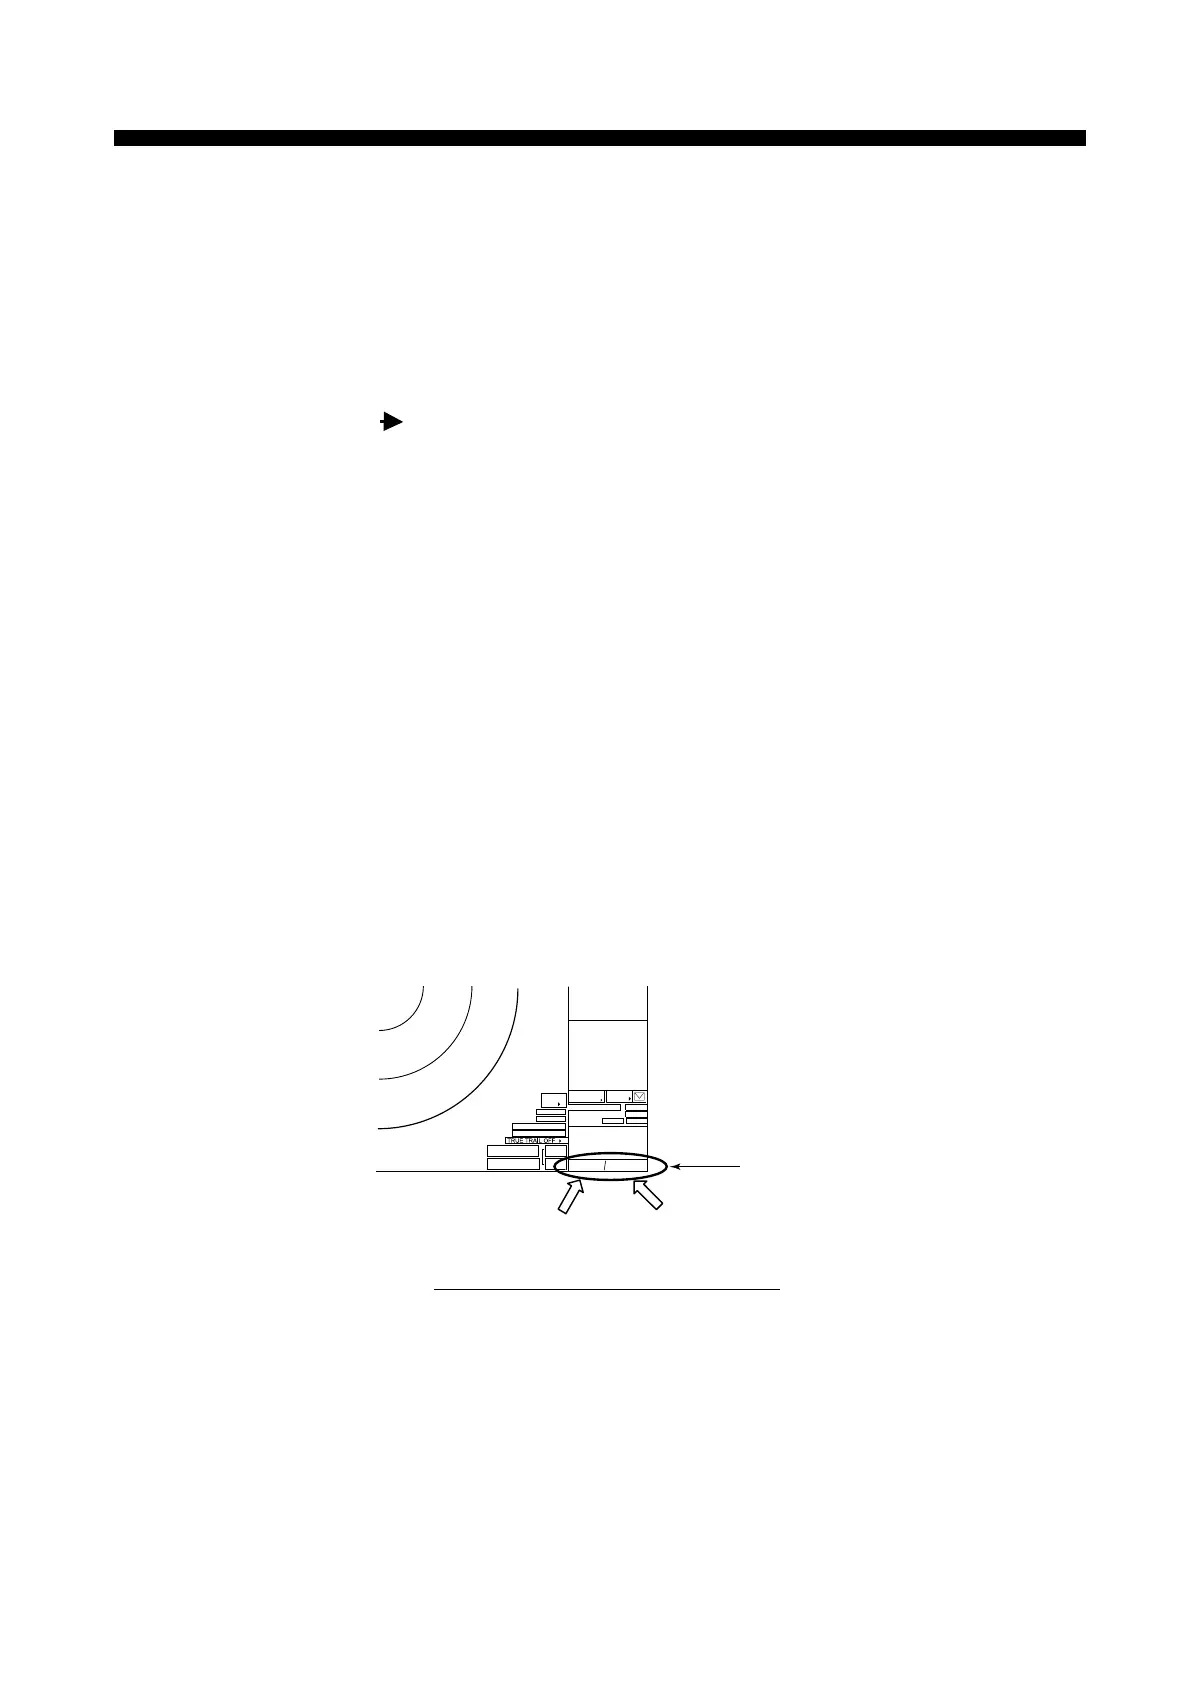
3. There is a Menu guidance box (xxx/xxx) in the lower right of the screen.
Fig. 3.1.1 Position of Guidance Box
Chapter 3. Menu Tree
ARPA
AIS
OFF
VECTOR TRUE
30M
PAST POSN REL 3M
CPA LIMIT 0. 5NM 22MIN
TARGET
LIST
CU/TM
RESET
ALARM
ACK
TARGET
DATA & ACQ
CURSOR
MENU
GZ1
GZ2
ALARM1
ALARM2
VRM1
>3.682NM<
VRM2
5.221NM
090
100
110
120
130
140
150
160
170
180
OFF
MANU
DISP
Guidance
Box
ALERT BOX
ARP,
AIS DATA BOX
Left-click Right-click
 Loading...