4-25
Improvement of print quality
(5) After cleaning the maintenance parts, is such failure cleared?
Clean the exhaust cap and suction cap and the surrounding area of the nozzle surface.
Clean the nozzle guard, wiper, exhaust cap, and suction cap.
(1) Make the clean stick R, cleaning cup, tweezers, gloves and cleaning solution, which come standard with the printer,
available for use.
(2)
From the menu, select [Maintenance] > [Maintenance Part Clean/Replace], and press
.
<IMPORTANT>
If any other error or message is displayed on the operation panel or warning message window, follow the message to solve
the problem, then perform the cleaning.
<TIPS>
Pressing
causes the platen to start moving. Do not put anything around the platen.
(3) Follow the on-screen message and turn off the power.
<IMPORTANT>
Please complete the task within 30 minutes, in order to prevent the print heads from drying up.
When the task will take more than 30 minutes to complete, close the front cover and turn on the power, then select
[Maintenance Part Clean/Replace] again to restart the task. Then, the head cleaning will be performed to prevent any ink
from drying up.
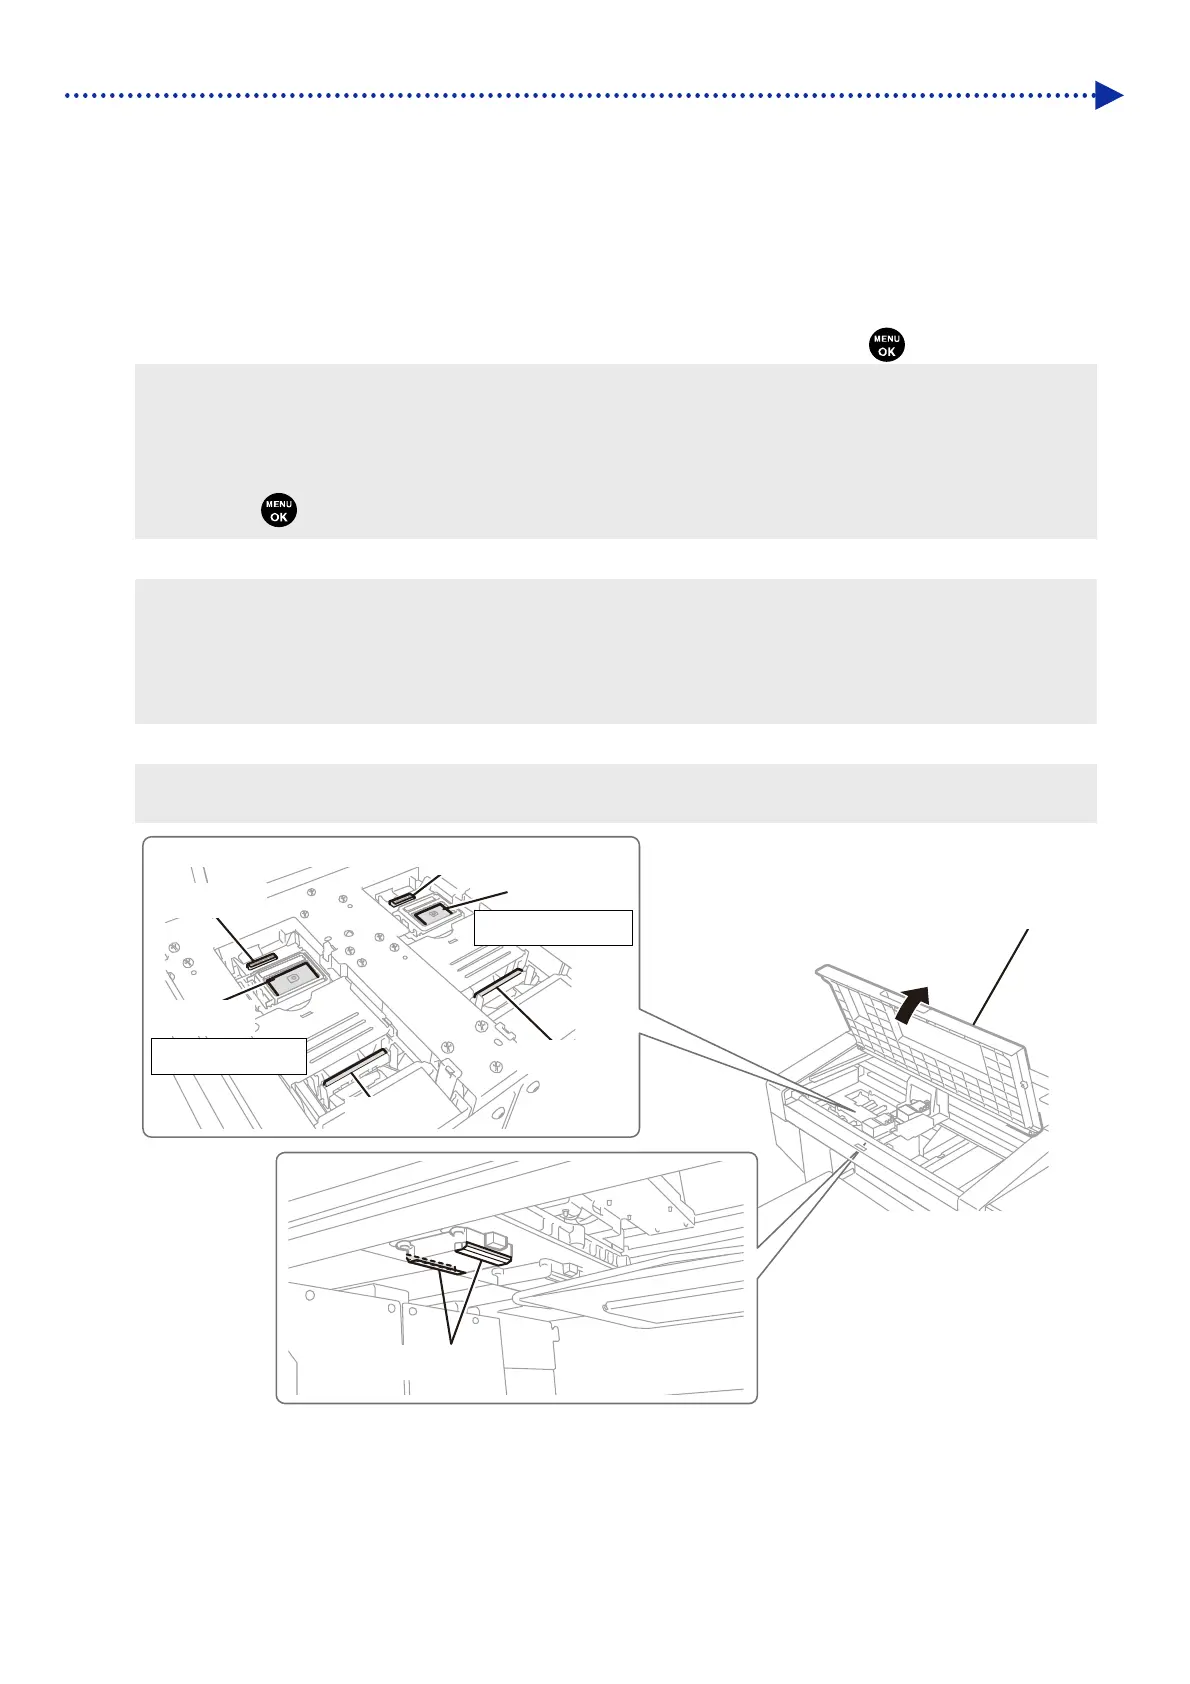
(4) Open the front cover, and clean each of the nozzle guards, wipers, exhaust caps, and suction caps.
<TIPS>
For the cleaning method, refer to the description mentioned below.
X019
Front cover
Exhaust cap
Wiper
Exhaust cap
Wiper
On the white side
On the color side
Nozzle guard
suction cap
suction cap

 Loading...