6-28
Disassembly / Replacement / Adjustment
6-1-11. Level setting for top surface of platen
(1) Press on the control panel to advance platen.
(2) Select the [Output Check] from the Advanced menu and select the [Carriage Test] > [To Center]. Press and hold
down the power button to power off.
<IMPORTANT>
Please complete the task within 1 hour, in order to prevent the print heads from drying up.
Long-hour continuation of a head without capping may lead to non-ejection of ink-jet droplets.
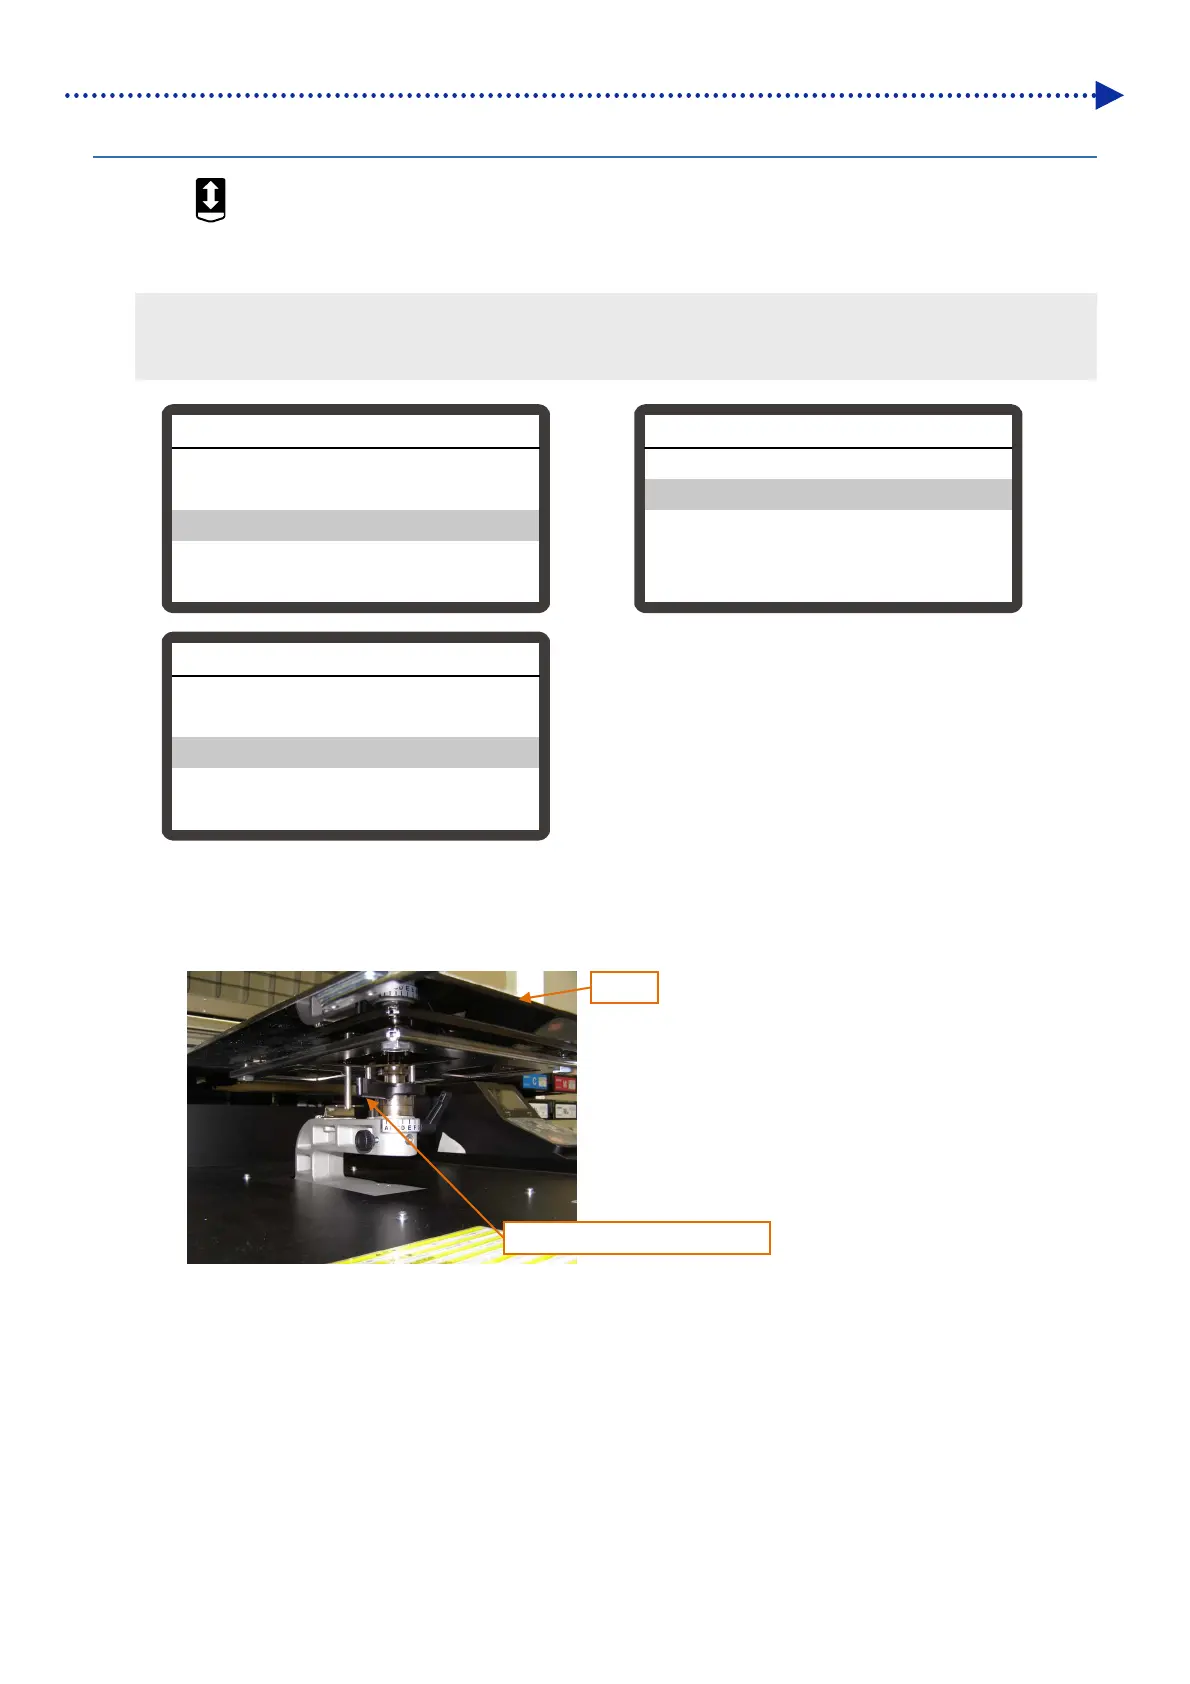
(3) Reset settings for platen bearing, collars and spacers to their initial condition.
(4) Set platen height adjustment lever to position A.
(5) Move platen to position the center of the component below the print head (color-side).
Platen height adjustment lever
Platen
Print Position Adjust
Input Check
Output Check
Setting special work mode
Exchange Filter
Advabced Menu
Solenoid Test
Carriage Test
Wiper Test
Output Check
To Center
To Flushing Position
To Cap Position OK
Carriage Test

 Loading...