ELECTRIC STARTER
STARTER MOTOR
REMOVAL/INSTALLATION
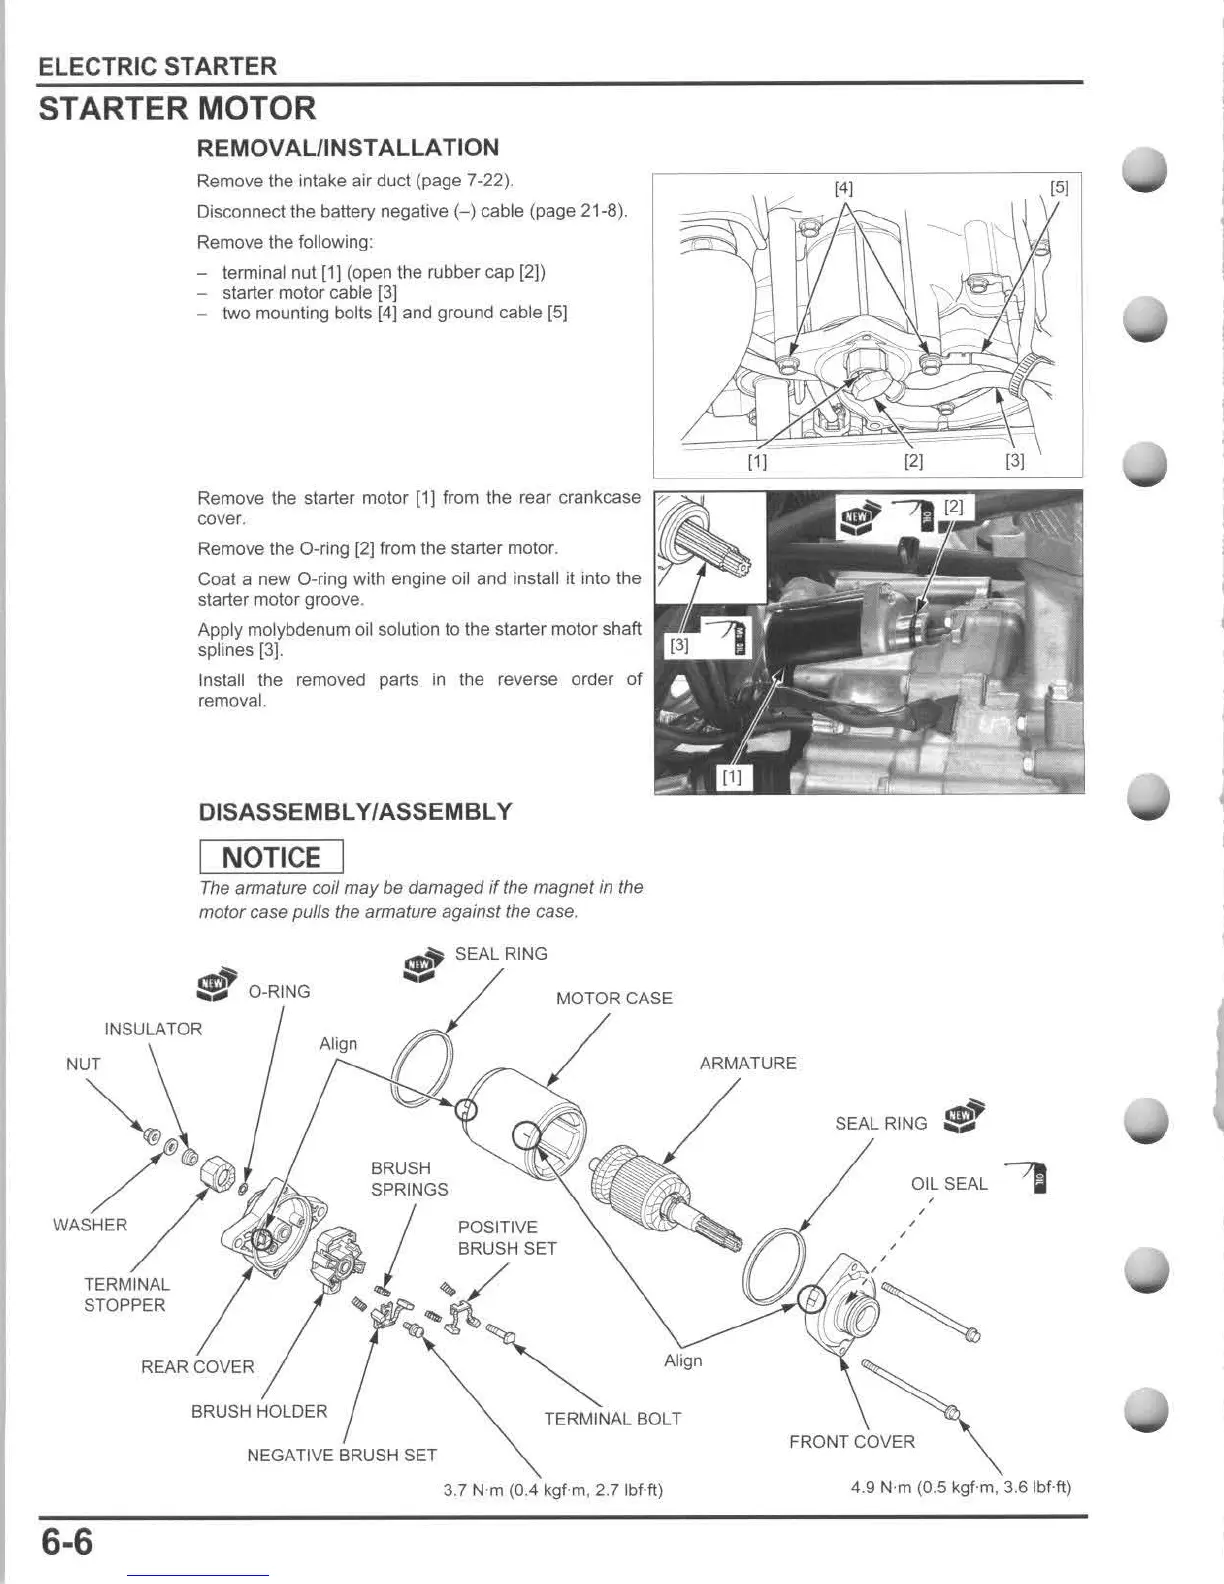
Remove the intake air duct (page 7-22).
Disconnect the battery negative H cable (page 21-8).
Remove the following:
- terminal nut [1) (open the rubber cap [2))
- starter motor cable
[3]
two mounting bolts
[4]
and ground cable
[5)
14)
151
(1)
(2)
{31
Remove the starter motor
[1J
from the rear crankcase
~;;::;==='
iiiiiiii
r:;:::;:~:=::::::iiii~iiiiiiiii
TERMINAL
STOPPER
cover.
Remove the D-ring [2] from the starter motor.
Coat a new D-ring with engine oil and install it into the
starter motor groove.
Apply molybdenum oil solution to the starter motor shaft
splines [3].
Install the removed parts
in
the reverse order
of
removal.
DISASSEMBL Y/ASSEMBL Y
I
NOTICE
I
The
armature coil may be damaged if the magnet
in
the
motor
case pulls the armature against the case.
f!I O-RING
~
SEAL RING
5
MOTOR
CASE
BRUSH
SPRINGS
J
POSITIVE
BRUSH SET
ARMATURE
SEAL RING
e~
OIL SEAL
~
~
~K
~
Allgo REAR COVER
BRUSH
HOLDER
TERMINAL
BOLT
FRONT
COVER
NEGATIVE BRUSH SET
3.7 N
·m
(0.4 kgf-m. 2.7 Ibf-ft)
4.9 N·m (0.5 kgf-m.
3.6IbHt)
6·6

 Loading...