FUEL SYSTEM
Wipe
off
spilled ouf
gasoJine
.
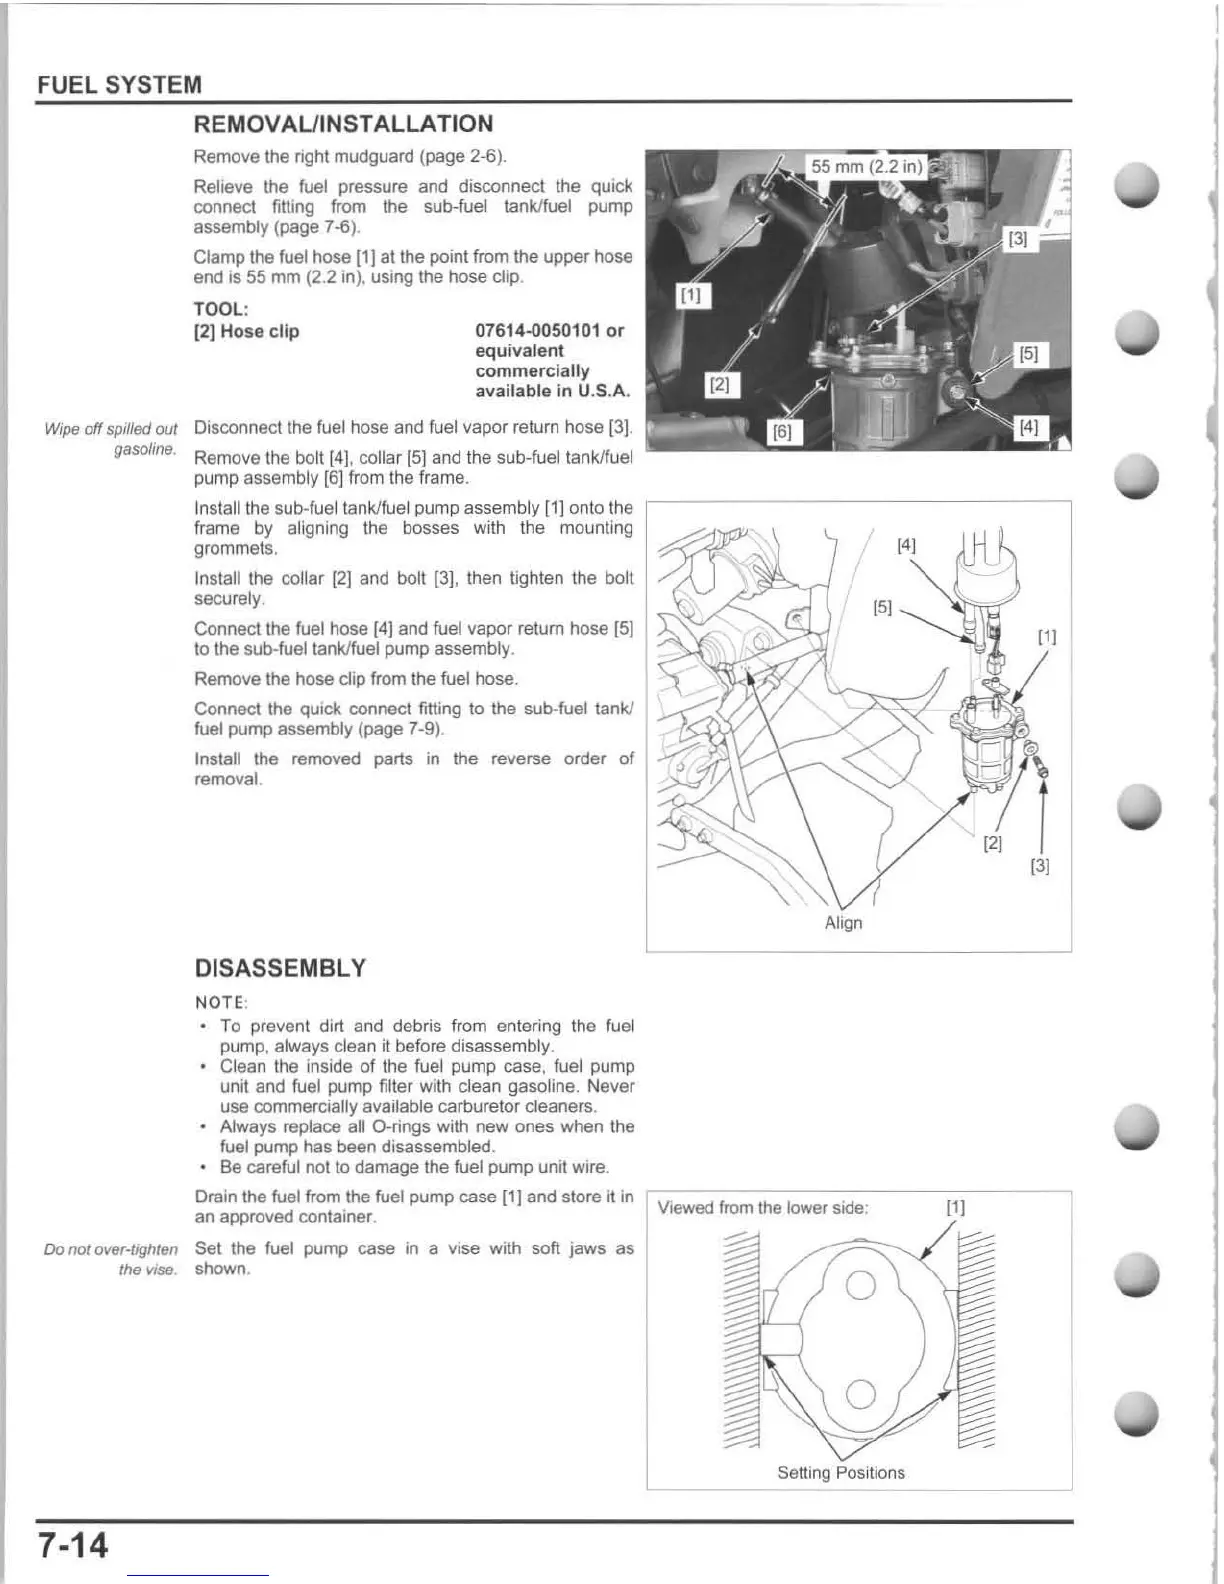
REMOVAL/INSTALLATION
Remove the
nghl
mudguard (page 2-6).
Relieve
the
fuel
pressure
and
disconnect the quick
connect filling from t
he
sub-fuel lank/fuel pump
assembly (page 7-6).
Clamp the fuel hose
(1
J
althe
point from the
upper
hose
end
is
55 mm (2.2 in), using the hose
dip
.
TOOL :
(2] Hose
clip
07614-0050101
or
equival
ent
commercially
available
in U.S.A.
Disconnect the
fuel
hose
and
fuel vapor return hose (3].
Remove t
he
bolt
(4].
collar [5]
and
t
he
sub-fuel tank/fuel
pump assembly [6] from t
he
frame.
Install t
he
sub-f
uel
tank/fuel pump assembly
[1]
on
to the
,-----------
---
-----,
frame
by
aligning the bosses with
the
mount
ing
grommets.
Install the collar
[2J
and bolt
[3],
then tighten t
he
bolt
securely.
Con
nect the fuel hose
[4J
and fuel vapor return hose [5]
to the sub-fuel
tanklfuel pump assembly.
Remove the hose clip from the
fuel hose.
Connect the quick connect fitting
to
the sub-fuel lank/
fuel
pump assembty (page 7-9).
Install the removed paris
in
the reverse order of
removal.
DISASSEMBLY
NO
TE
:
To prevent dirt
and
debris from entering t
he
fuel
pump.
always
clean
it
be
f
ore
disassembly.
Clean
the
inside
of
the
fuel
pump case,
fuel
pump
unit and
fuel
pump filter
wi
th clean gasol
ine.
Never
use
commercially available carburetor cl
eaners.
Always replace all O-rings with
new
ones
when the
fuel pump
has
been disassembled.
Be careful not to
damage
the fuel pump unit wire.
Align
Drain the fuel from the fuel pump case [1]
and
store it
in
~
Vo
~
'ewe<l
--:-:
f,
-
o
-
m
-
t
~
h
-
e
~
fo
-w-
e
-
,
-
,
~~~
e
-,
---
~I1~I-
-
an approved container.
Do
not over-tighten Set
the
fuet
pump case
in
a vise with soft jaws as
the
VIse
shown.
7-14
L
Setting Positions
1
31
J

 Loading...