10
GPS/GPS-A OPERATION
10-2
■ GPS operation
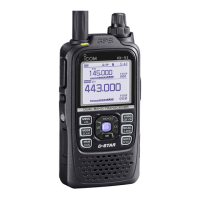
The ID-51A/E has a built-in internal GPS receiver. The
GPS receiver’s position information can be received
in any mode. Also, a NMEA format compatible exter-
nal GPS receiver can be connected to the ID-51A/E
through the [DATA] port.
To receive signals from an external GPS source, connect
an external NMEA format compatible receiver to the ID-
51A/E according to the instructions, shown below. The
cable is not an Icom product and must be made sepa-
rately. Refer to the wiring diagram for pin connections.
• Position data can be transmitted in only the DV mode.
To prolong the battery life in the GPS mode
To prolong the battery life while operating in the GPS
mode, manually update your position with the re-
ceived GPS data.
Set the “GPS Select” option to “Internal GPS,” and re- q
ceive your position from the internal GPS receiver.
( MENU > GPS > GPS Set> GPS Select)
Open the MANUAL POSITION screen, and then w
push [QUICK] .
( MENU > GPS > GPS Set> Manual Position)
D-pad( e ) to select “Capture From GPS,” and then
push D-pad(Ent).
• Your current position is now memorized and displayed
on the MANUAL POSITION screen.
After that, set the “GPS Select” option to “Manual.” r
GPS SELECT
screen
Receiving GPS data D
Push [MENU] q .
Push D-pad( w ) to select the root item (“GPS”), and
then push D-pad(Ent) to go to the next screen.
(MENU > GPS > GPS Set> GPS Select)
Refer to the menu sequence shown directly above and e
push D-pad() to select, and then D-pad(Ent) to enter,
one or more times until the last screen is displayed.
Push D-pad( r ) to select “Internal GPS.”
• If an external GPS receiver is connected, select “External
GPS.”
Push [MENU] t to exit the Menu screen.
• The GPS icon blinks when receiving data, as illustrated
below, and stops blinking when valid data is received.
- If “Manual” was selected, the icon does not appear.
• It may take only a few seconds to receive, but depending on
the environment, it may take a few minutes. If you have difficul-
ties receiving, we recommend that you try a different location.
NOTE: While continuously using the Internal GPS mode,
the transceiver’s battery will quickly be exhausted.
Longer battery time can be achieved by turning ON the
Power Save mode. See page 16-32 for details.
(MENU > GPS > GPS Set > Power Save (Internal GPS))
GPS
Receiver
To the
RS-232C Port
To the [DATA]
jack
Cable
Less than ø 6.0 mm
• Connection
RS-232C (DB-9 female)
To the [DATA] jack
RxD
TxD
GND
ø 2.5 mm
t
o y
e
w
q
Connect w with RxD, e with TxD and t with GND.
Blinks

 Loading...