Fusing Unit
SM 4-69 D062/D063/D065/D066
Replacement
and
Adjustment
3. Pressure roller cleaning unit [B] ( x 2)
4. Release the pressure arms [C]
5. Use screw driver to lower the pressure arms on both ends of the pressure roller.
6. Pressure roller springs [D]
7. Pressure roller [E]
The fusing lamps are fragile. Work carefully to avoid breaking them.
During assembly, handle the roller carefully to avoid scratching it on the
bracket.
Make sure the tabs and grooves of the lower cover are engaged correctly
before tightening the screw.
Spring Adjustment
Two holes [F] are provided on each pressure arm for the springs.
Normally the springs should be attached to the lower holes.
Attaching the springs to the upper holes exerts less pressure on the hot roller. Attach
the springs to the upper holes only for especially thin paper.
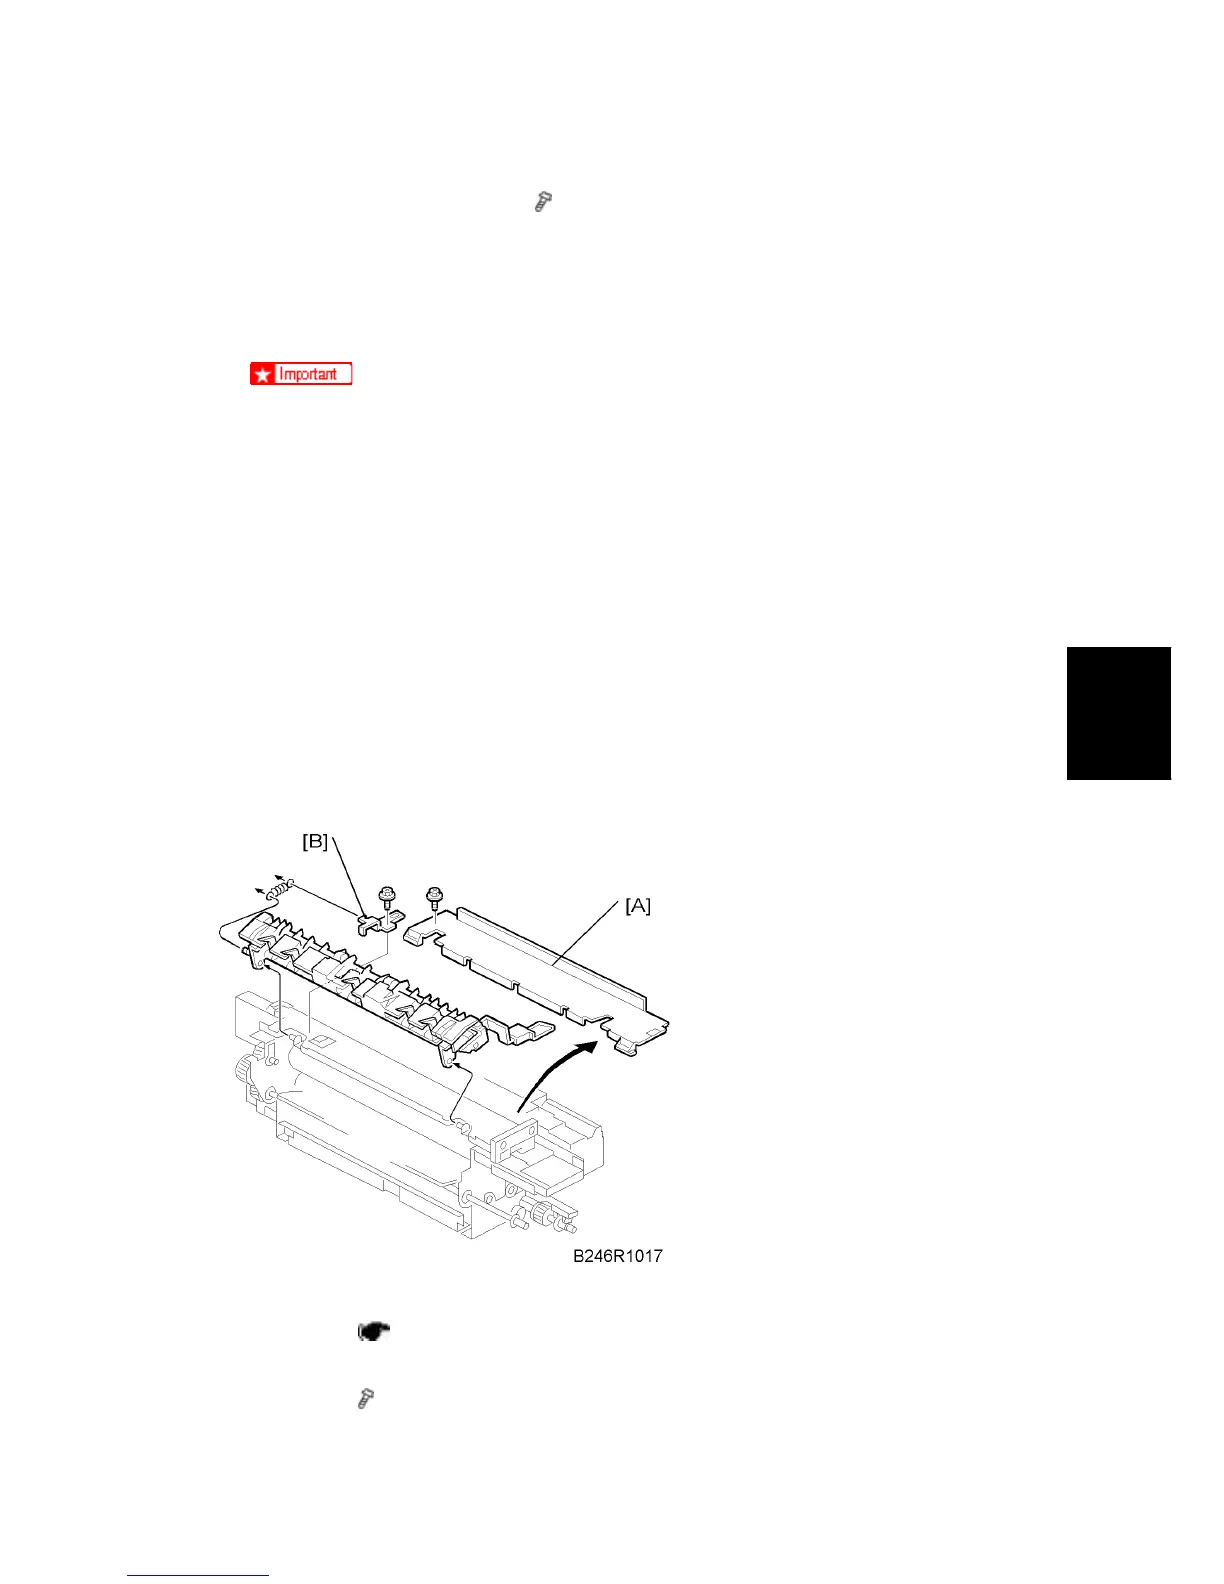
4.9.8 STRIPPER PAWLS
Remove:
Fusing unit (
p.4-57)
1. Top cover [A]
2. Bracket [B] (
x 1, spring x 1)
 Loading...