Setting the AS-i address of slave 2
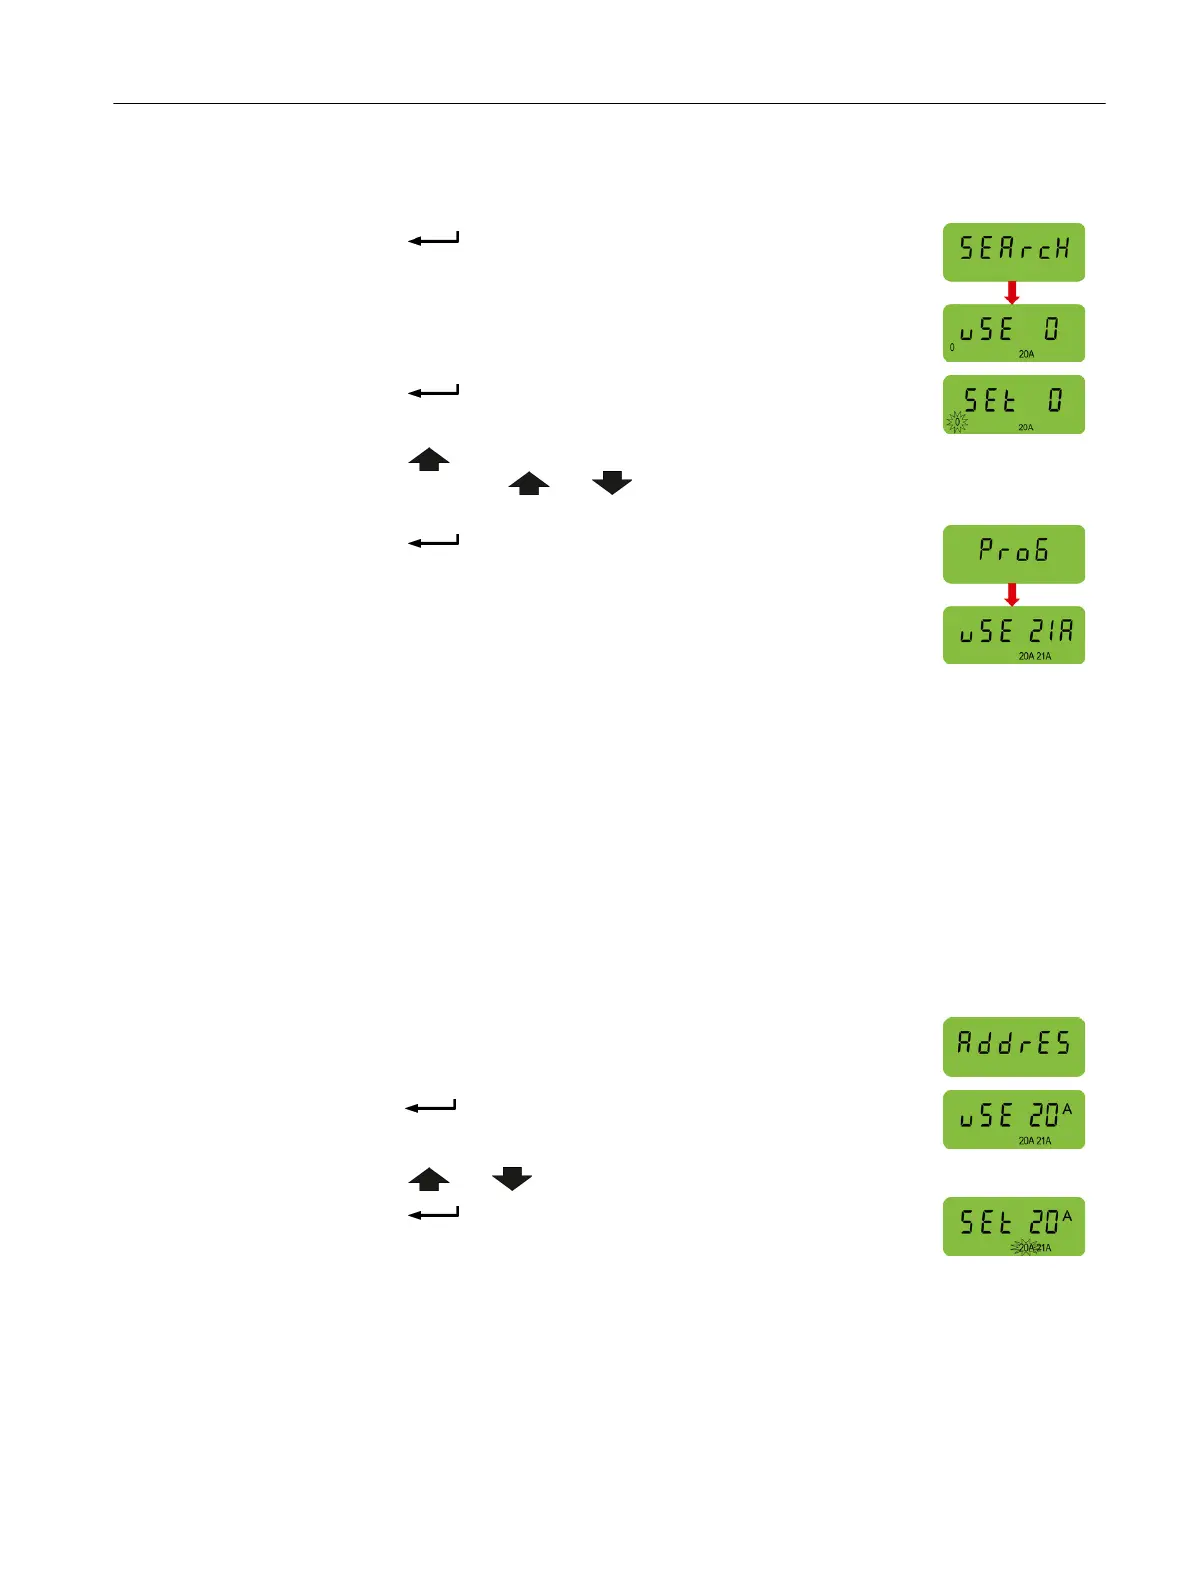
1. Press the button; the display shows the text SEArcH followed
by uSE 0.
A small 0 is displayed to the left of the display and the number of the
rst slave that has already been allocated to slave 1 is shown at the
bottom of the display.
2. Press the button to select this number.
SEt 0 appears and the small 0 in the left of the display starts ashing.
3. Press the button until you reach the required number.
By pressing both the and simultaneously, you can toggle between A and B
identiers of the address.
4. Press the button to accept this number.
ProG is displayed briey.
Both of the numbers allocated to the slaves are now displayed in the
lower part of the screen.
Changing existing addresses of the AS-i slaves
If the allocated addresses used two dierent numbers, for example, 10A and 11A, then if one of
the slave addresses is reset to 0 the other slave is not aected.
If the allocated addresses use the same number, for example, 20A and 20B, then if one slave
address is reset to 0, then both slave numbers will be reset to 0.
Modifying an existing address of a single slave within the converter will not aect the address
of the other slave.
To change an existing address of a slave, the following procedure should be performed:
1. Plug the AS-i Programmer into the addressing socket (interface X03) of the converter.
2. Turn the dial on the Programmer to the ADDR position. The display
will indicate that this mode has been selected.
3. Press the button; the screen will display uSE and the number of
the lower addressed slave.
The existing slave addresses are shown at the bottom of the display.
4. Press the and buttons to select the slave address number to be changed.
5. Press the button; the display now shows SEt.
The selected number will begin to ash.
Wiring
5.14Connecting to AS-i
SINAMICS G115D Wall Mounted distributed drive
Operating Instructions, 07/2023, FW V4.7 SP14, A5E52808211A AA 99

 Loading...