REPAIR
27080 Issue 1 Sept 98 8--3
PRINT HEAD REPAIR
Nozzle Plate Removal and Cleaning
WARNINGS (1) Never start the printer with the nozzle plate
removed.
(2) Under certain fault conditions, the ink in the feed
tubes and gunbody could remain under pressure
whentheprinterisswitchedoff. To protectagainst
escaping ink, place tissue around the nozzle plate
before releasing the securing screws, or around an
ink feed tube junction before disconnection.
CAUTION In the following procedure, except where specified,
do not touch the head valve plunger or the nozzle
jewel (in the middle of the nozzle plate) with the
fingers.
The print head must be removed from its holster. Remove the nozzle
plate as follows.
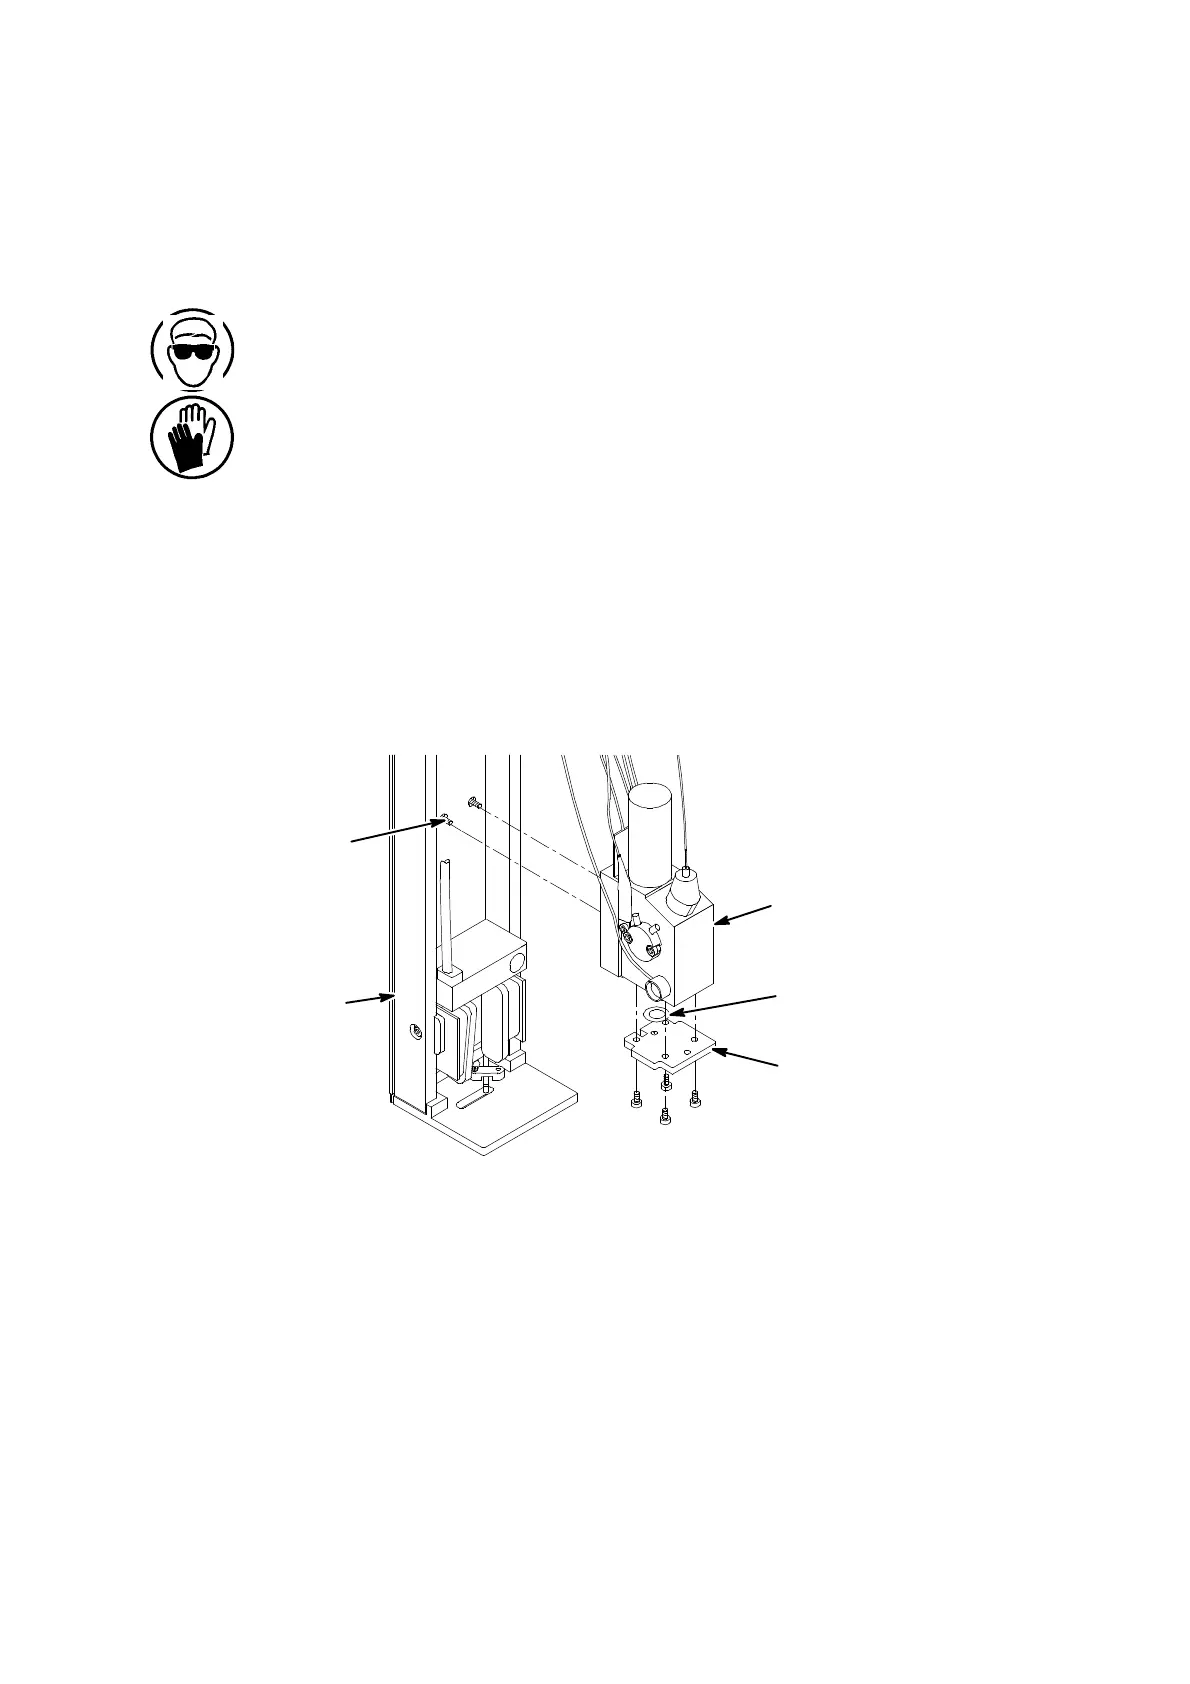
Nozzle
Plate
‘O’ Ring
Drop Generator
Removing the Nozzle Plate
MG057--2
Captive
Screws
Chassis
(1) At the rear of the print head, unscrew the two captive screws
securing the drop generator.
(2) Pull the drop generator gently away from the chassis sufficiently
to allow access to the nozzle plate screws. Avoid pulling on the
wiring.
(3) Remove the four screwssecuringthe nozzle plate. Pull thenozzle
plate off its locating pins and remove.
 Loading...


