REPAIR
27080 Issue 1 Sept 98 8--29
Solenoid Valve Replacement
WARNING: Protective clothing, especially safety glasses must
be worn.
Theinksystemcanbewithdrawnfromthecabinetifrequired,however
access to the solenoid should be sufficient by removing one of the
cartridges.
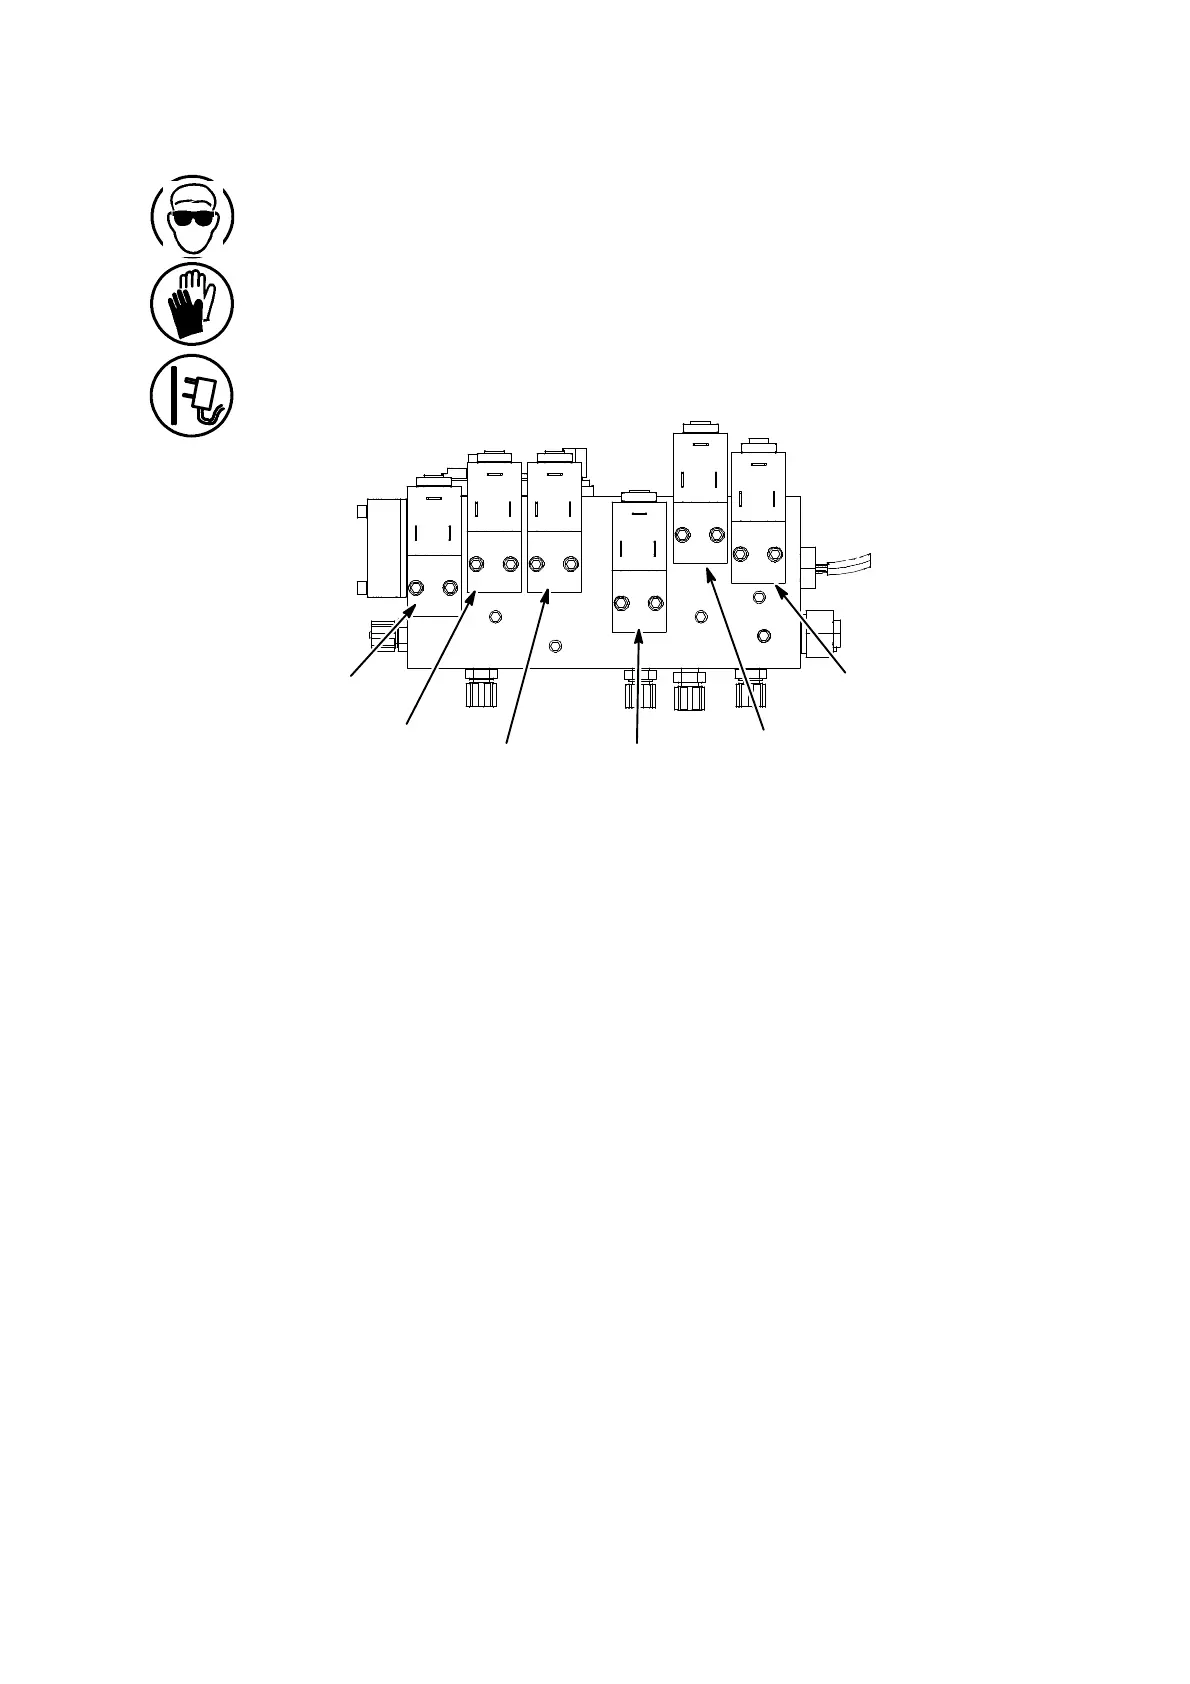
Flush
Solenoid
Make--Up
Add
Solenoid
Bleed
Solenoid
Wash
Solenoid
Feed
Solenoid
Viscometer
Solenoid
Solenoid Valves
MG020_1
Each solenoid valve consists of a valve actuated by an electrical
solenoid. The solenoid can be removed separately by unscrewing the
ringnutandslidingthesolenoidoffthevalvestem. Twosmall’O’rings
seal the junction between the valve and block.
Note: Tools required: Lint--free tissue to catch any escaping ink.
2.5mm ball driver (see step (3)).
Protective clothing (especially safety glasses).
(1) Remove power from the printer.
(2) Pull off the electrical connections to the solenoid.
(3) Remove the two screws securing the solenoid valve to the block
and remove the valve, taking care not to lose the ’O’ rings.
(4) Clean thefaceoftheblockandensurethe faceofthevalve isclean.
(5) Fit the new solenoid valve, ensuring that the ’O’ rings are fitted
correctly. Do not over--tighten the fixing screws.
(6) Fit the electrical connections.
Replace the cartridge if removed. Check the block for leaks when the
printer is started up.
 Loading...


