REPAIR
8--34 27080 Issue 1 Sept 98
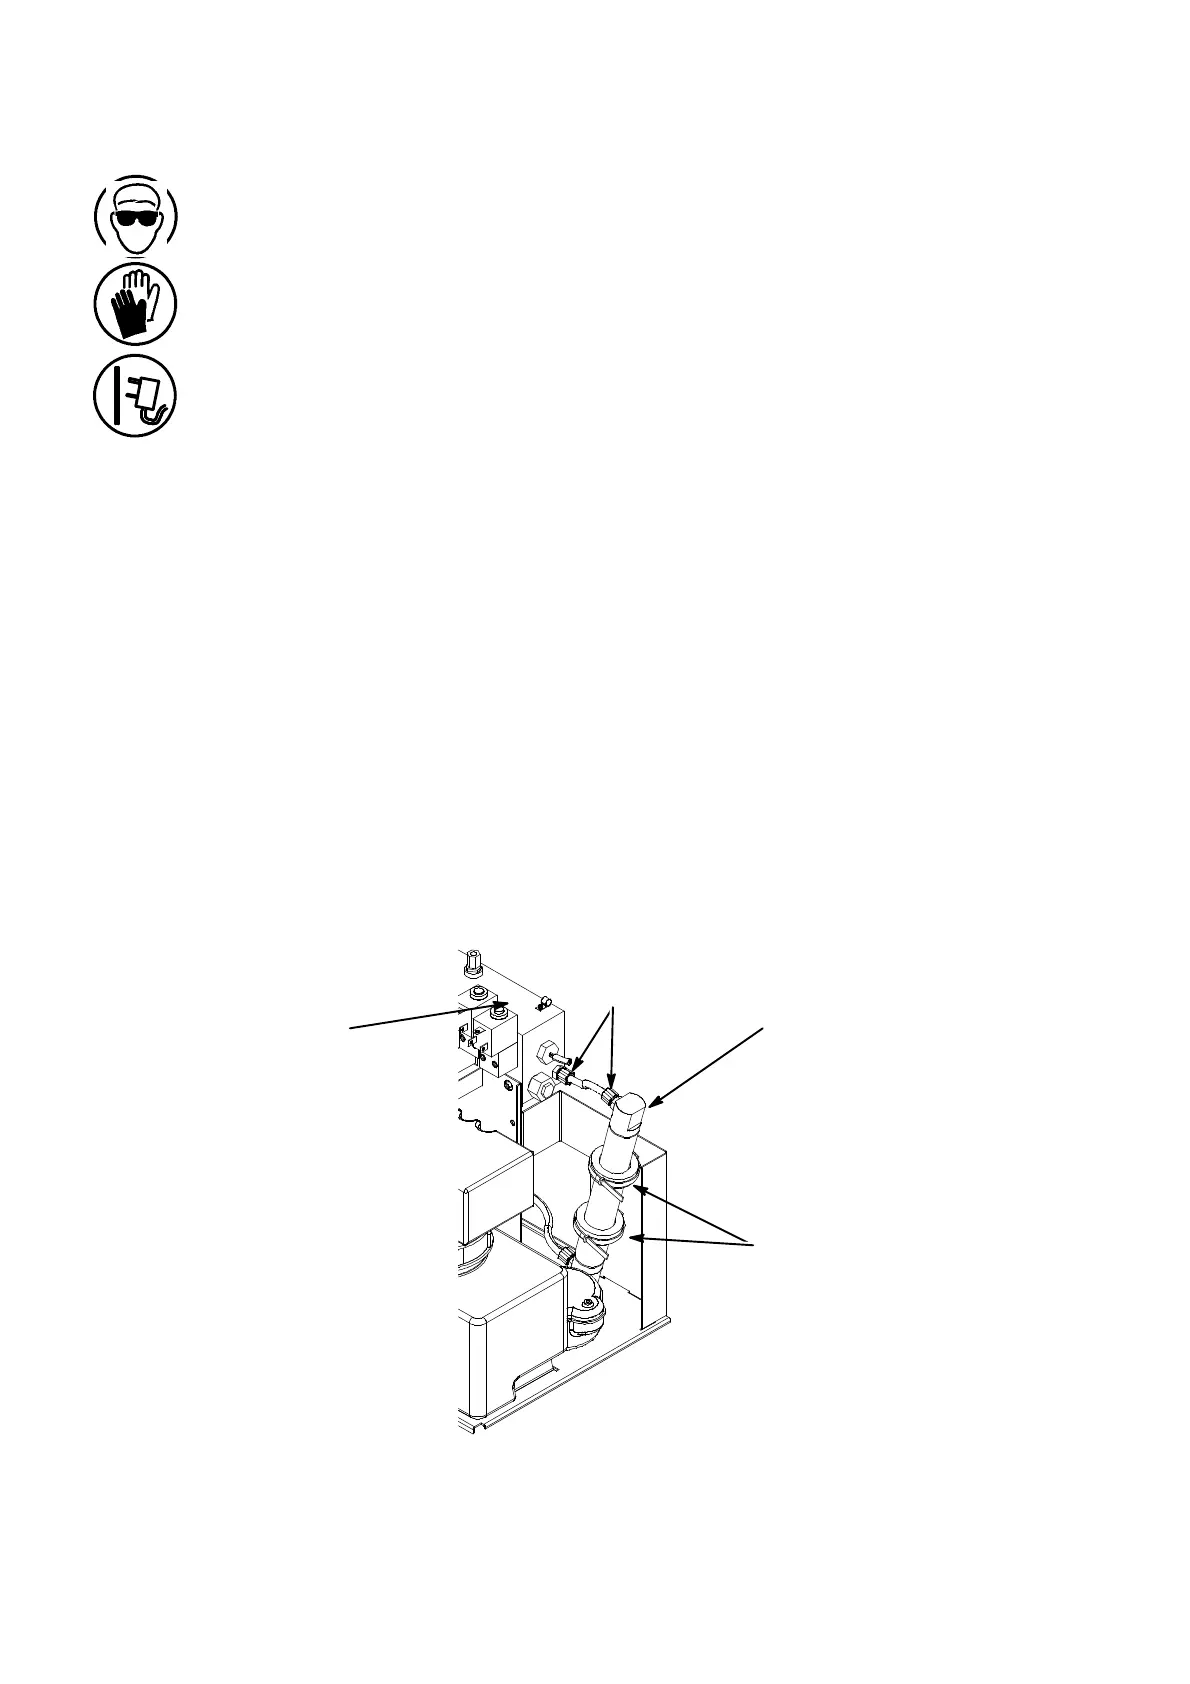
Viscometer Replacement
Note: Tools required: Lint--free tissue to catch any escaping ink.
Adjustable spanner (see step (4)).
Protective clothing (especially safety glasses).
The printer must be shut down and the cartridges removed.
(1) Remove the securing screw and pull out the ink system.
(2) Disconnect the viscometer wiring from the ink interface PCB.
(3) Pull the viscometer out of its clips by squeezing each tab and
releasing the clip.
(4) Disconnecttheinktubesfromtheviscometerandtrimtheusedend
part (approx. 5--6mm) of the tubes, then transfer to the new
viscometer. The tubes must be connected so that when the new
viscometerisfittedintotheclips,thetubeconnectorsfacetheblock
(see diagram), the wires must come out of the bottom of the
viscometer.
(5) Fit the new viscometer into the clips and connect the wiring to the
ink interface PCB.
(6) Refit the ink system and the cartridges.
The replacementisnowcomplete. Check for leaks when the printer is
next started up. If a viscometer fault is shown, ensure that the
viscometer is fitted correctly.
Viscometer
Clips
Viscometer Replacement
MG025_2
Tube
Connectors
Ink Management
Block
 Loading...


