REPAIR
27080 Issue 1 Sept 98 8--15
(1) Loosen the charge electrode fixing screw and lift the electrode off
its mounting pillars, clear of the jet position.
(2) Start the ink jet by pressing the Sequence to Jet Run button.
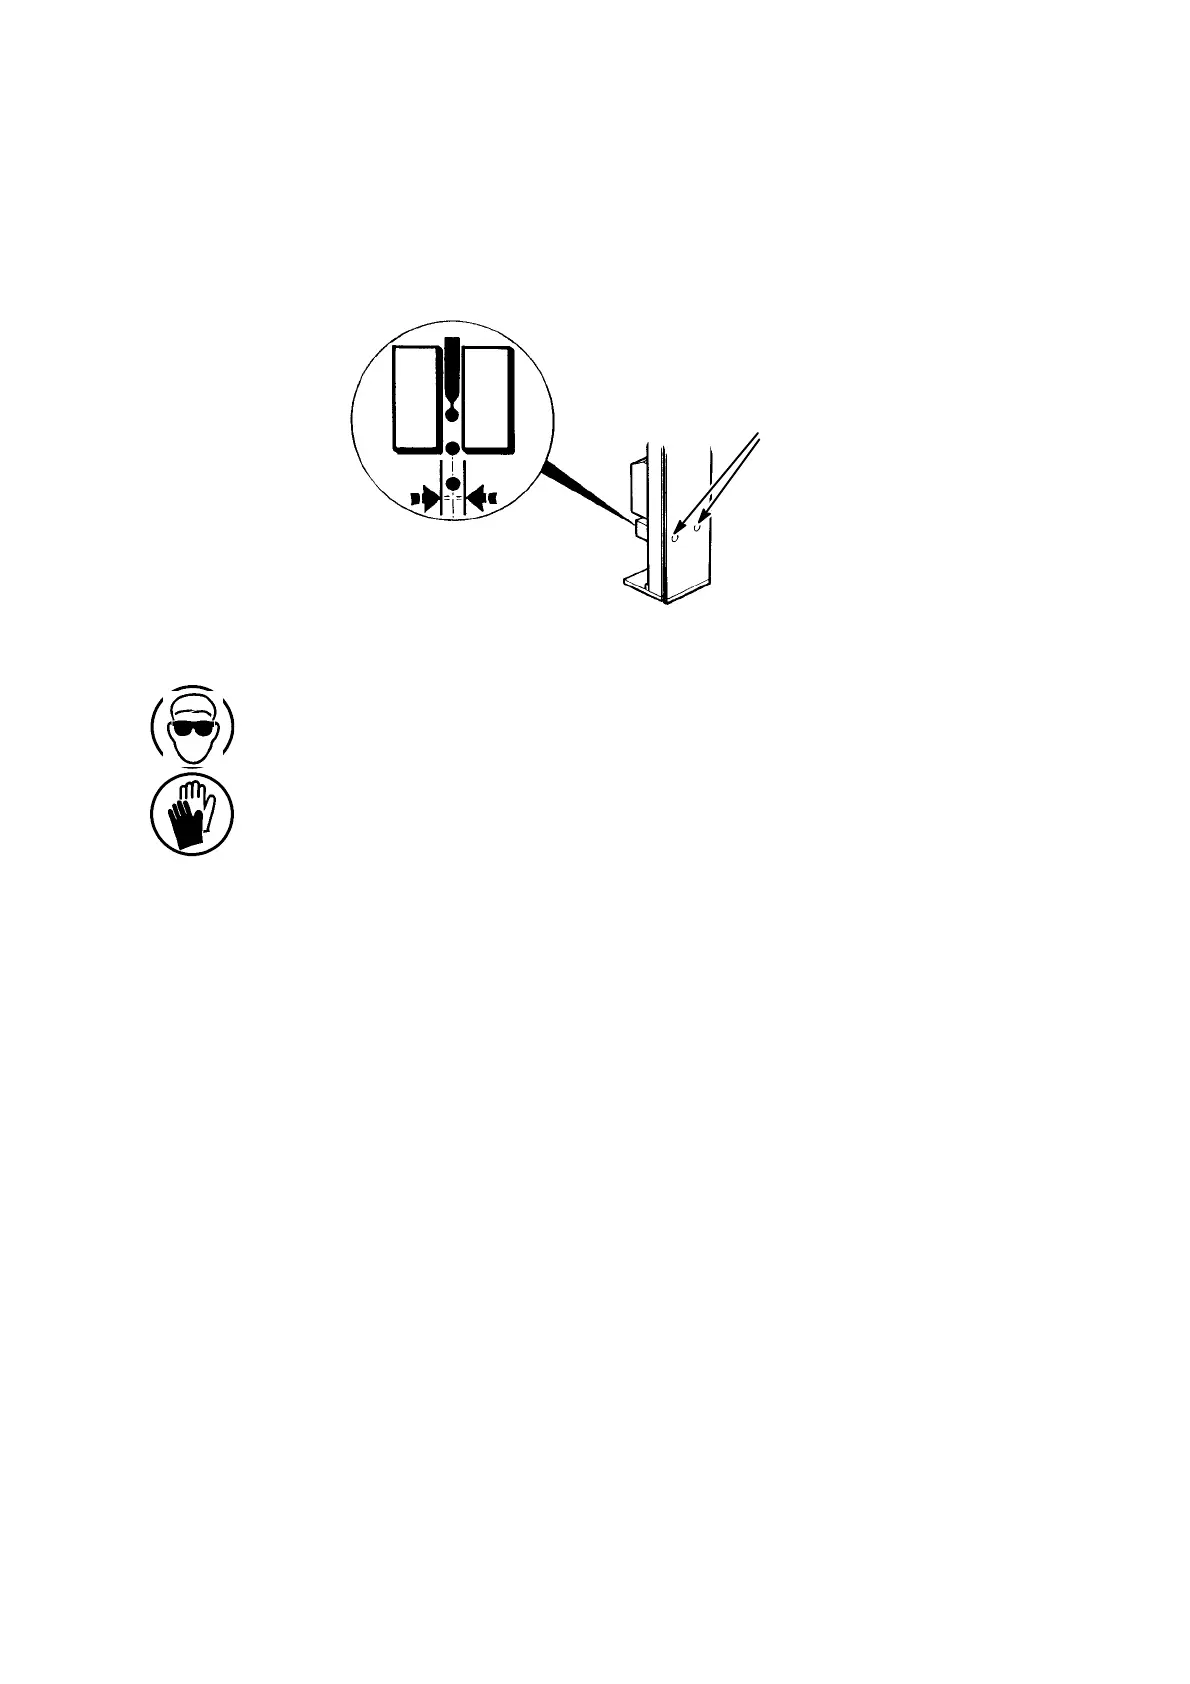
Charge Electrode
Mounting Plate Securing
Screws
Charge Electrode Adjustment
TP3284--2
(3) Carefully slide the charge electrode onto its mounting pillars,
watching the inkjetandits position in thecharge electrodeslot. If
the ink jet collides with the charge electrode, pull off the electrode
and adjust the position of the mount as in the next step.
Note: If, atanytime,inklossis sufficienttocauseagutterfault,stopthe
jet, clean the print head and restart the jet.
(4) Attherearoftheprinthead,slackenthescrewssecuringthecharge
electrodemount. Move the chargeelectrode to aposition where it
is possible to slide the charge electrode onto its mounting pillars
without contact with the ink jet. Tighten the mount securing
screws sufficiently to secure the charge electrode.
(5) Inspect thepositionof theink jetin the chargeelectrodeslot. With
the mounting plate fixing screws sufficiently loose to allow
movementofthechargeelectrode,adjusttheelectrodeuntiltheink
jet is in the correct position in the slot.
(6) At the rear of the print head, tighten the mounting plate fixing
screws. Re--checkthepositionofthejetinthechargeelectrodeslot.
The adjustment is now complete. If necessary clean the print head.
 Loading...


