CRANKSHAFT, PISTON AND CYLINDER BODY
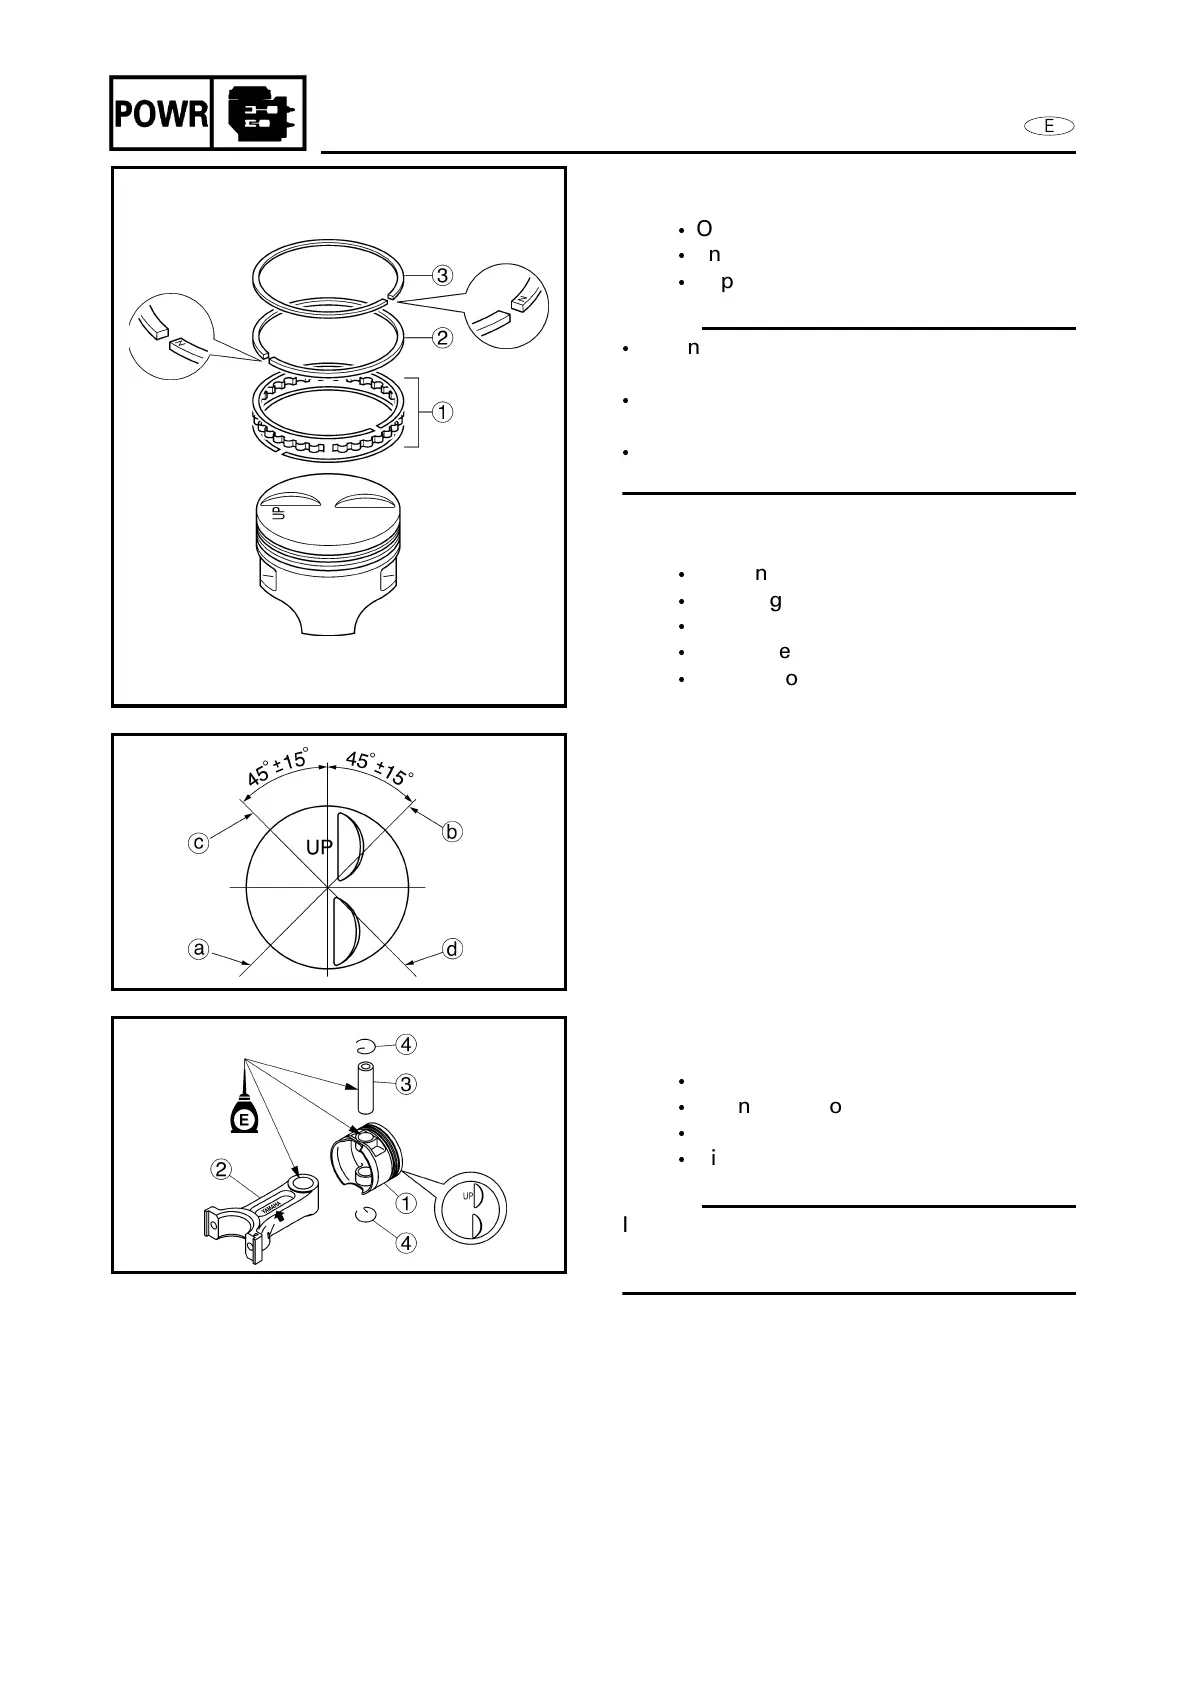
INSTALLING THE PISTON RING
1. Install:
Oil ring
1
2nd ring
2
Top ring
3
NOTE:
When installing oil ring, first install the
expander ring and then the side rails.
When installing the 2nd ring and top ring,
make sure the “N” mark faces upward.
After installing the piston rings, check
that they move smoothly.
2. Set:
Set the piston ring end gaps as shown.
Top ring end gap
a
2nd ring end gap
b
Oil ring Upper side rail end gap
c
Oil ring expander ring end gap
a
Oil ring lower side rail end gap
d
INSTALLING THE CONNECTING ROD
Install:
Piston 1
Connecting rod 2
Piston pin 3
Circlip 4
NOTE:
Install the connecting rod with “YAMAHA”
mark facing towards the “UP” mark on the
piston crown.
5-61
 Loading...