10 Scene memory
88 PM5D/PM5D-RH Owner’s Manual Operating section
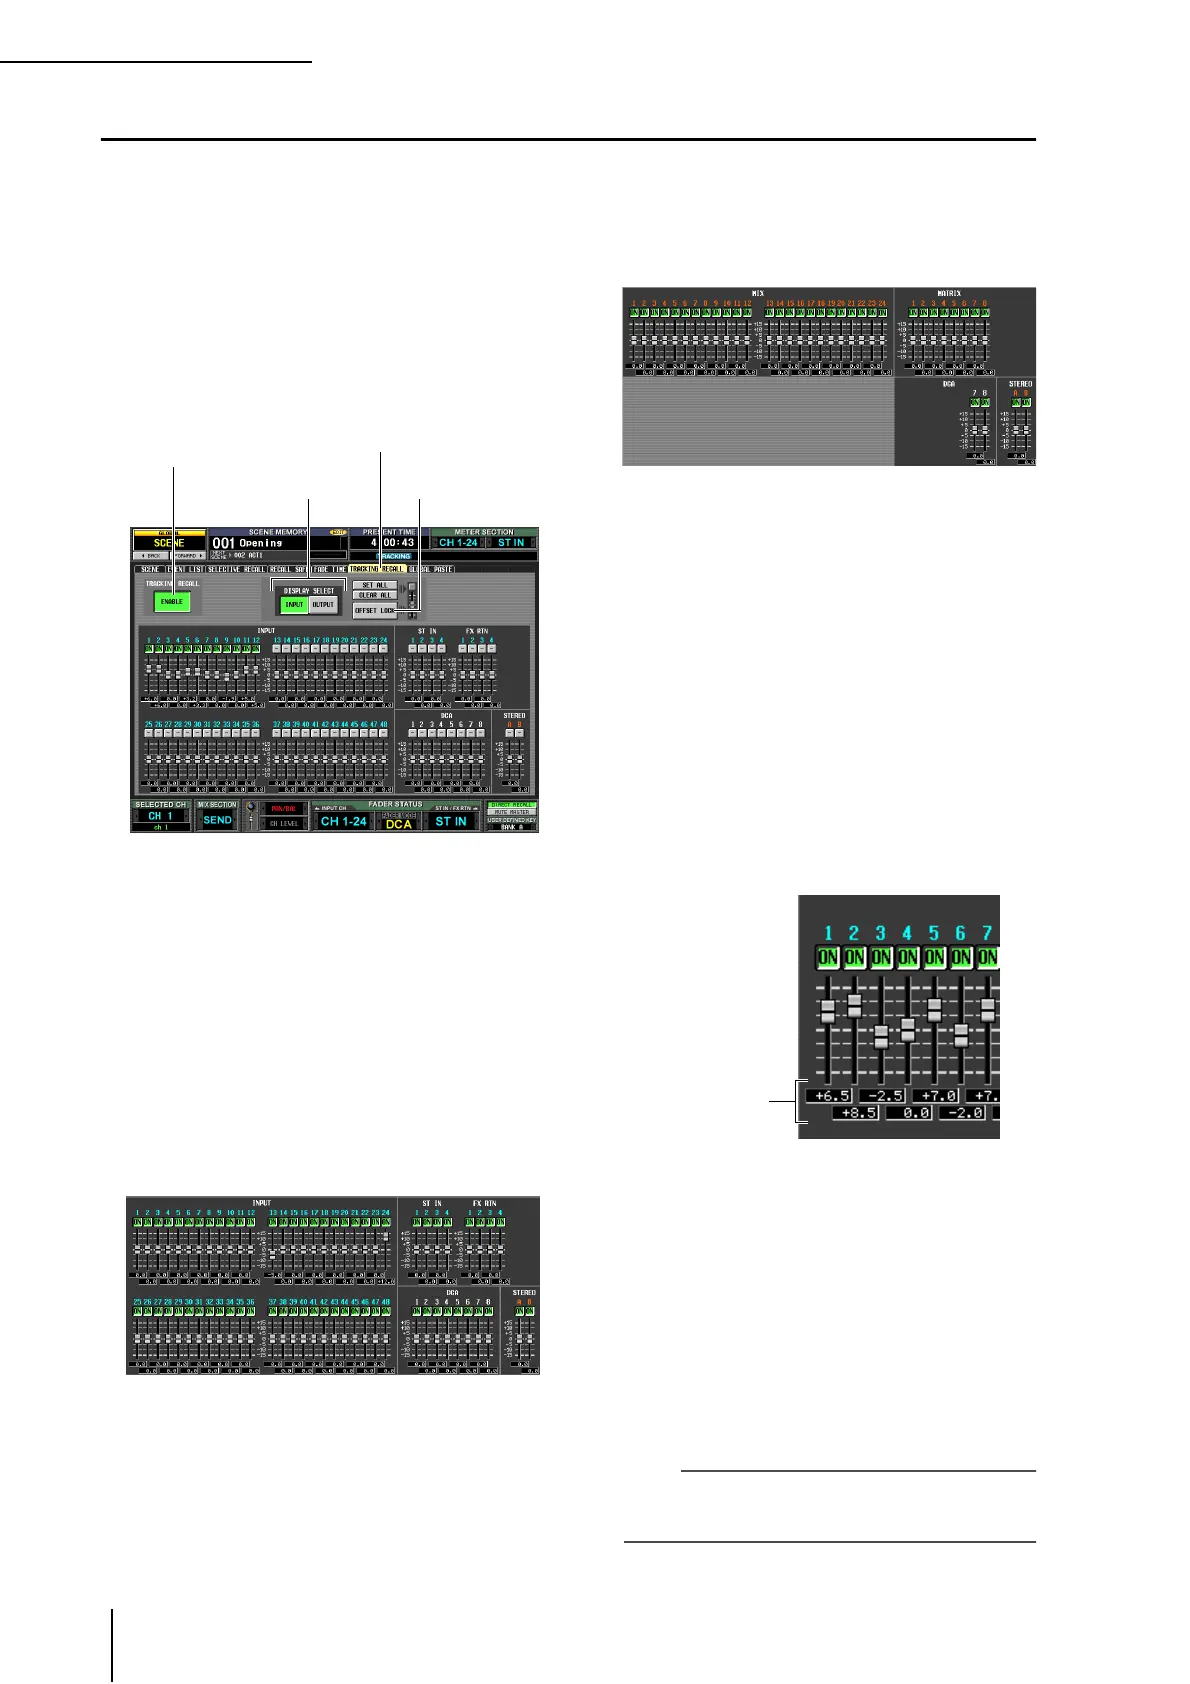
Using the Tracking Recall function
“Tracking Recall” is a function that adds a specified offset value to each fader or level value when a scene is recalled. Tracking
Recall settings are common to all scenes. For example if the original level of a certain sound source has changed, or if an actor
was replaced by an understudy, this function provides a convenient way to adjust the level of that specific channel for all
scenes.
1
In the DISPLAY ACCESS section, press the
[SCENE] key several times to access the
TRACKING RECALL screen shown below.
In this screen you can select the channels that will use
the Tracking Recall function, and specify the offset
value for each channel.
2
In the upper left of the screen, click the
TRACKING RECALL ENABLE/DISABLE button to
make it indicate ENABLE.
When the TRACKING RECALL ENABLE/DISABLE
button is set to ENABLE, the Tracking Recall function
will be enabled for all scenes.
3
Using the buttons of the DISPLAY SELECT area
in the upper middle of the screen, select the
type of channels for which you want to make
settings.
• If the INPUT button is on
The screen will show the faders of input channels 1–48,
ST IN channels 1–4, FX RTN channels 1–4, DCA
groups 1–8, and STEREO A/B channels.
• If the OUTPUT button is on
The screen will show the faders of MIX channels 1–24,
MATRIX channels 1–8, DCA groups 7/8, and STE-
REO A/B channels.
4
In the row of buttons above the faders in the
screen, click to turn on the buttons of the
channels for which you want to enable the
Tracking Recall function.
Clicking the SET ALL button located in the upper right
of the screen will turn on the buttons of all channels
and DCA groups.
Clicking the CLEAR ALL button located in the upper
right of the screen will turn off the buttons of all chan-
nels and DCA groups.
5
To set the offset value for each channel, drag
the fader upward or downward for a channel
whose button you have turned on.
When you turn on the setting for a channel in step 4,
the offset value is set to 0. The offset value can be
adjusted in a range of –15 dB to +15 dB. The current
value is shown in the box immediately below the fader.
6
In the same way, specify the offset value for
other channels as well.
7
When you have finished making settings, turn
on the OFFSET LOCK button located in the
upper right of the screen.
When this button is on, the offset values currently
specified for the channels will be fixed; this prevents the
offset values from being unintentionally changed.
When you recall a new scene in this state, the offset val-
ues will be added to the level of each channel when the
scene is loaded. (However, the upper and lower level
limits will not be exceeded.)
Note
Channels that are excluded from Recall operations by the
Recall Safe or Selective Recall functions will not change even
if Tracking Recall is turned on.
TRACKING RECALLTRACKING RECALL
ENABLE/DISABLE button
DISPLAY SELECT area OFFSET LOCK button
Offset value
 Loading...