Ventilation
138 Instructions for Use Apollo SW 4.5n
Part Number: 9053586, 3rd edition
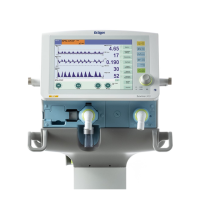
Pressure-Controlled Ventilation
Figure 72. Respiratory Cycle - Pressure ModeThe Apollo has a pressure-controlled ventilation
mode with fixed pressure limitation P
INSP and
frequency Freq. as well as with optional
synchronization and variable Pressure Support for
spontaneous breathing efforts (optional).
A continuous pressure is applied to the patient during
the inspiratory time T
INSP (refer to Figure 72). The
rate at which the pressure curve rises is preset via
the rise time T
SLOPE. Synchronization and Pressure
Support are controlled by the sensitivity of the flow
trigger and the level of ΔP
PS. The maximum time
interval for controlled ventilation is set via the
frequency. To maintain a constant frequency, a time
interval triggered prematurely is compensated in the
next cycle.
Changes in lung compliance and ventilation
parameters influence the tidal volume.
Some settable values are limited or mutually
exclusive so that specific combinations of therapy
settings are not possible, e.g., >T
INSP< 6.9 s at
>Freq.<100bpm.
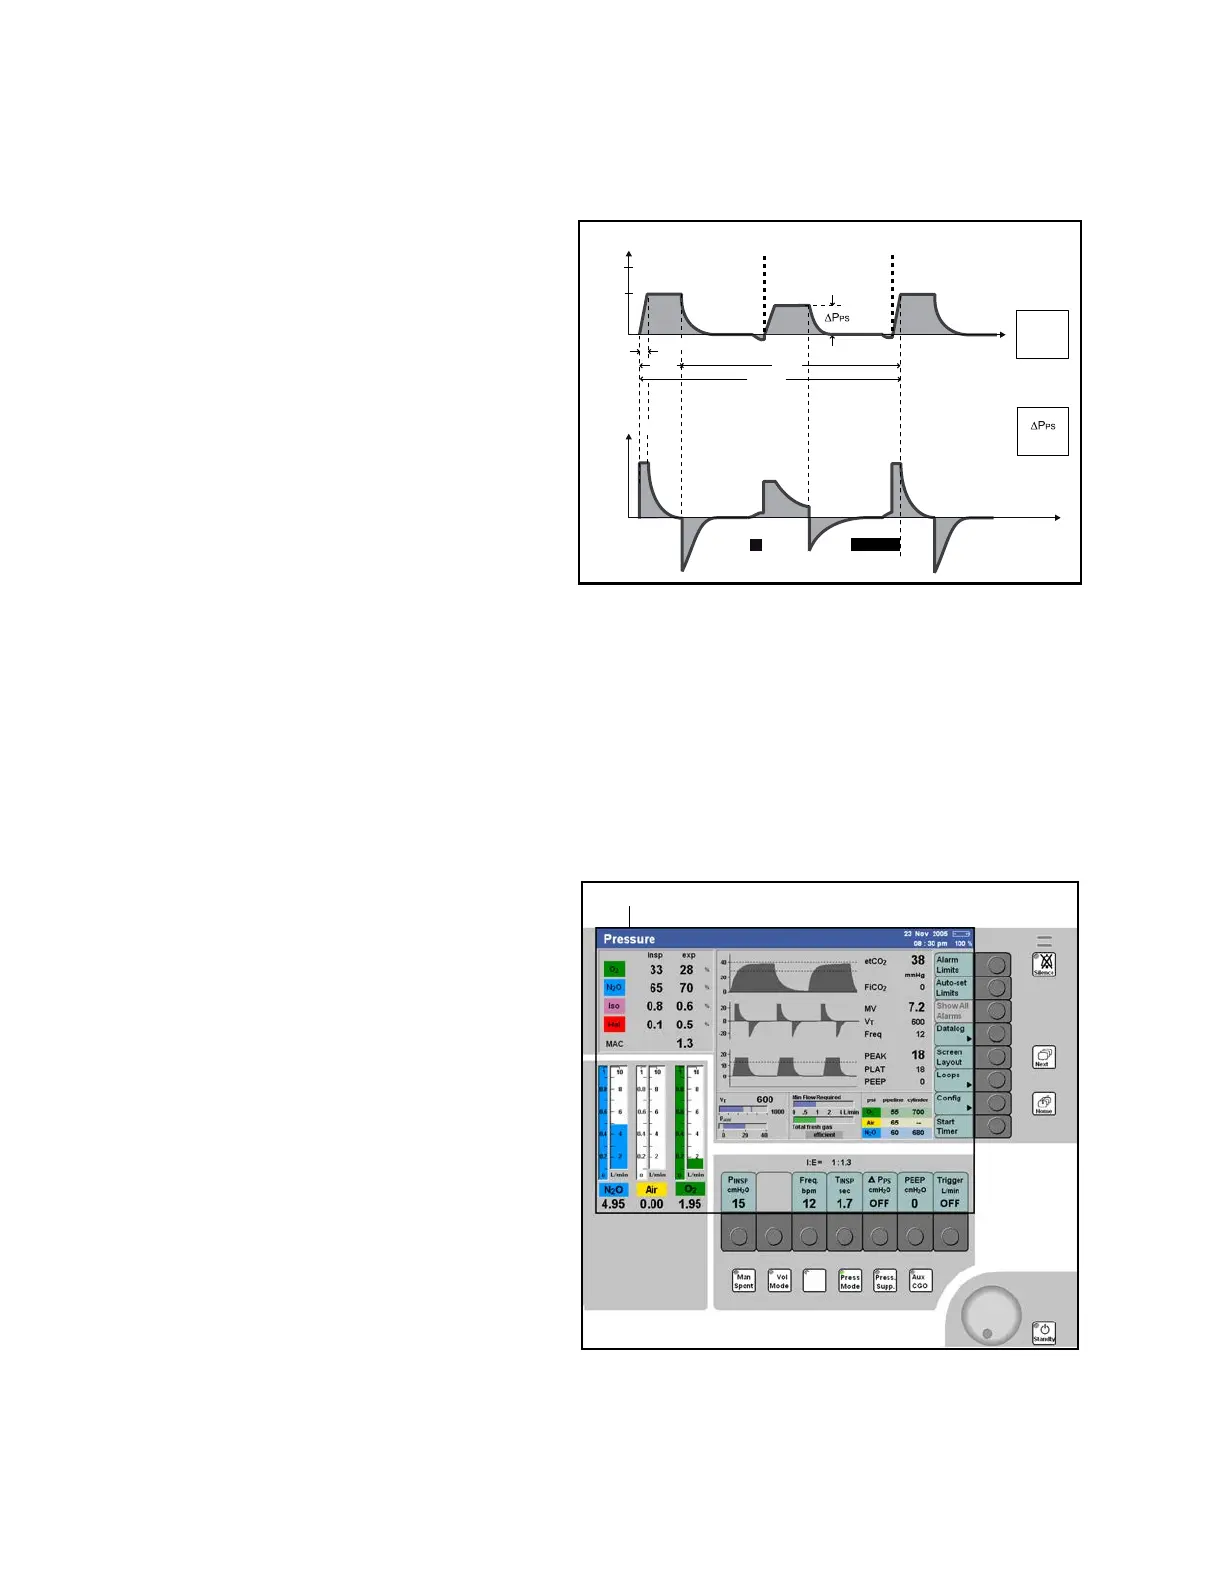
Starting Pressure-Controlled Ventilation
Presetting the pressure-controlled ventilation
mode
Figure 73. Pressure Mode ScreenPrior to activating Pressure Mode, the user can
preset the Pressure Mode parameters.
1. Press the >Press Mode< key located at the
bottom of the display panel (1 in Figure 73). The
LED on the key and the status field at the top of
the screen (2 in Figure 73) flash on and off.
The row of buttons for the ventilation parameters
valid for Pressure Mode are displayed on a light
green background (3 in Figure 73). This means
that they are not yet active.
2. Press the button for the parameter to be
changed; its color changes to yellow to indicate
that it is selected.
3. Turn the rotary knob to adjust the parameter to
the desired value, and press the rotary knob to
confirm (4 in Figure 73).
Continue to set the values for the other
parameters.
The parameters that can be set for Pressure
Mode are shown in Tab le 6 , along with their
adjustment ranges and factory settings.
Pressure
Time [s]
Flow
TINSP
TEXP
Time [s]
1/Freq.
PINSP
Trigger
on
Trigger indicator
on
Flow-trigger window
Flow trigger
Trigger indicator
25%
TSLOPE

 Loading...