GE PROPRIETARY TO GE
D
IRECTION 5308917-100, REVISION 8 LOGIQ P3 SERVICE MANUAL
8-44 Section 8-4 - Mechanicals
8-4-8 Right EMI Cover (P/N: 5308965 - Not a FRU; Part of EMI Cover Assy FRU P/N:
5315111)
This is a description on how to remove and replace the Right EMI Cover.
8-4-8-1 Tools
• Common phillips screwdrivers
8-4-8-2 Needed Manpower
• 1 person, 15 minutes
8-4-8-3 Preparations
• Shutdown the system and switch off the main Circuit Breaker at the bottom rear side of the system.
8-4-8-4 Removal Procedure
1) Remove Right cover. Refer section 8-4-3 on page 35 for details on how to remove Right cover.
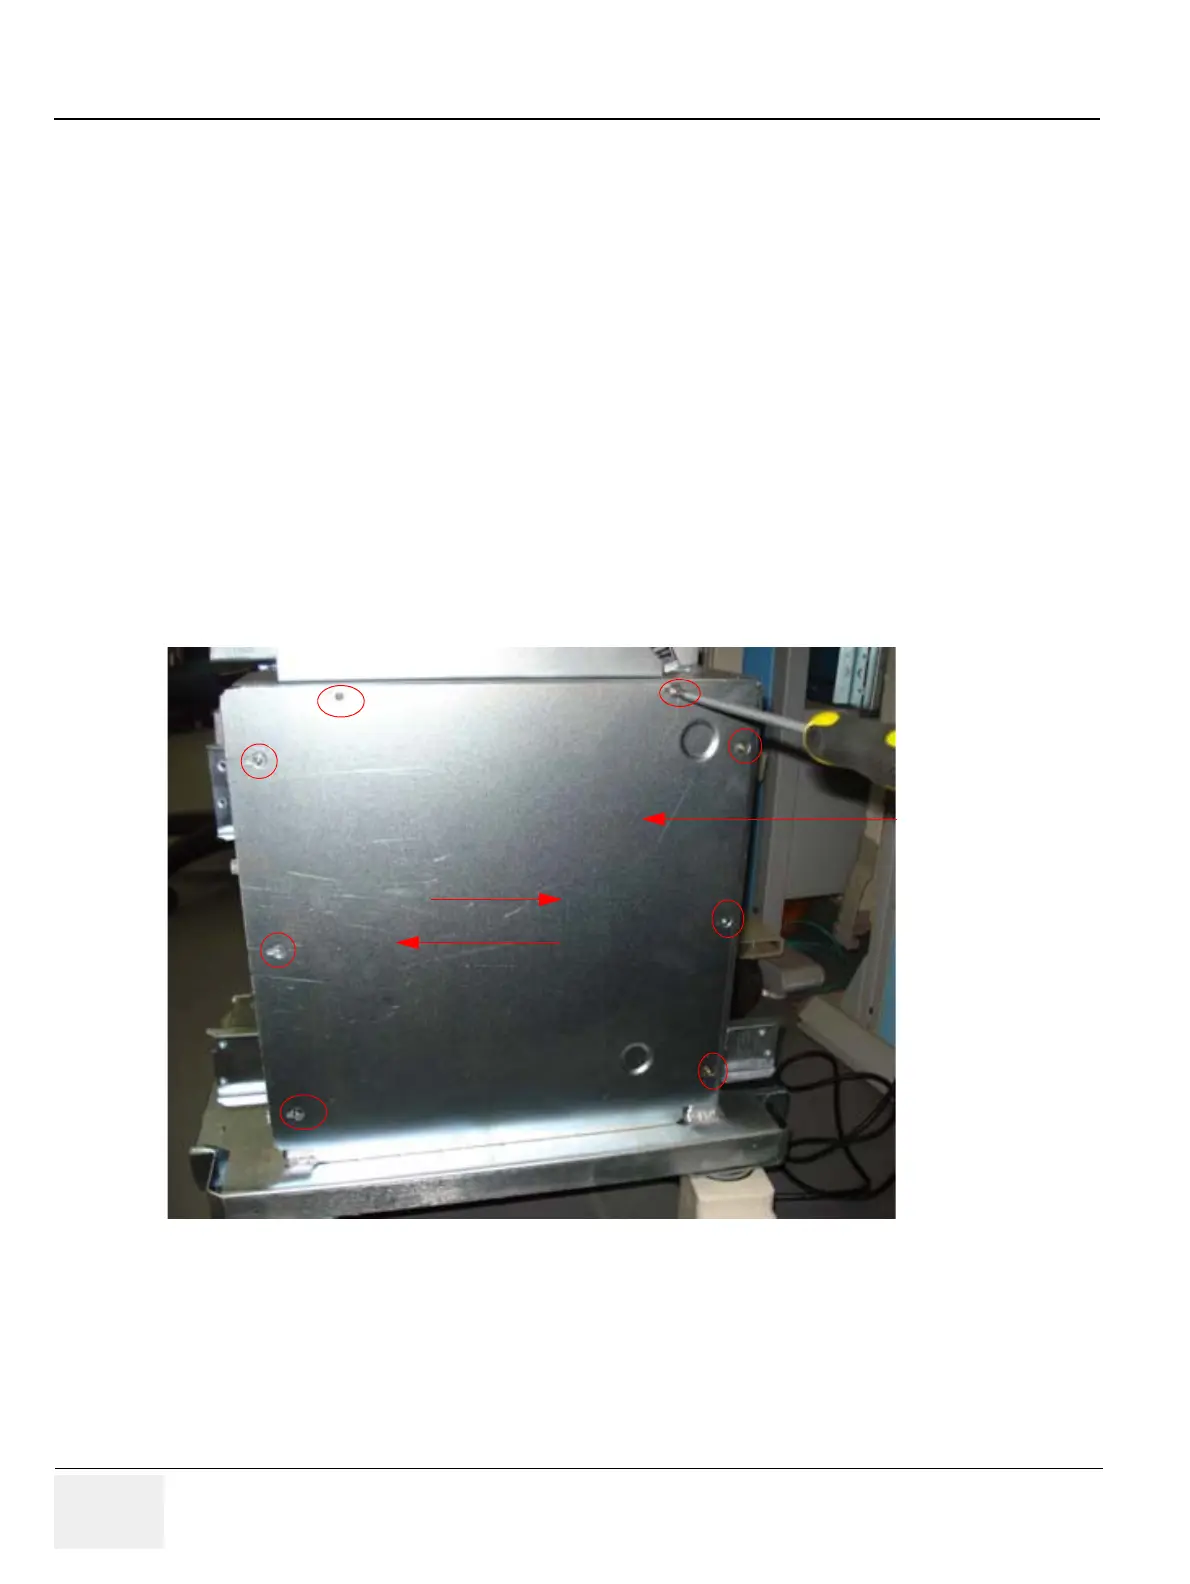
2) Use the scewdriver and Loose the eight screws (1,2,3,4,5,6,7,8)
3) Slide and remove RH-side EMI cover. Refer Figure 8-50 on page 8-44 for details on how to remove
Right cover.
Figure 8-50 RH-side EMI cover
8-4-8-5 Mounting procedure
Install the new parts in the reverse order of removal
1
2
3
4
5
6
7
8
RH-side
EMI cover
Slide to right to re-install cover
Slide to left to remove the cover

 Loading...


