Servicing Your Honda 59
Coolant
1. Check the cooling system for leaks (see the
Honda Shop Manual for troubleshooting of
leaks).
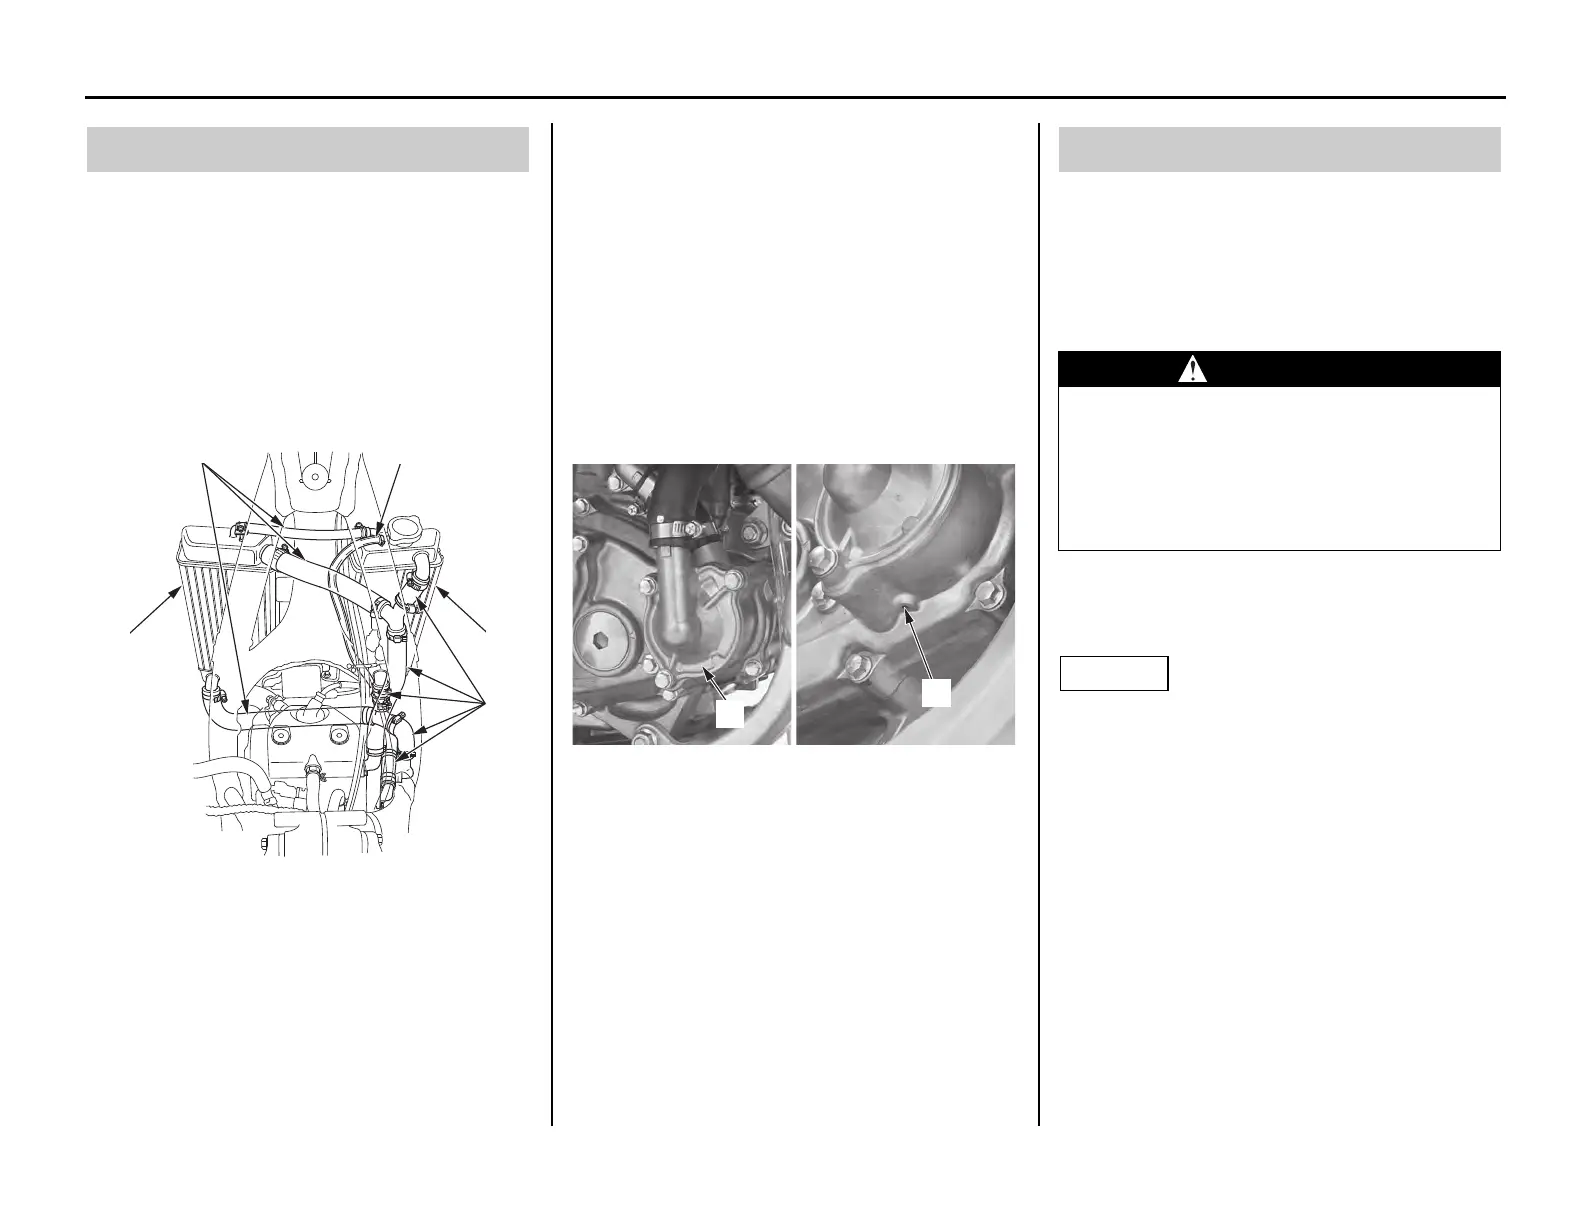
2. Check the water hoses (1) for cracks,
deterioration, and radiator hose clamps for
looseness.
3. Check the radiator mount for looseness.
4. Make sure the overflow hose (2) is connected
and not clogged.
5. Check the radiator fins (3) for clogging.
6. Check the bleed hole (4) below the water pump
cover (5) for leakage. Clean away any clogged
dirt or sand, if necessary. Check for signs of
seal leakage. If water leaks through the bleed
hole, replace the mechanical seal. If oil leaks
through the bleed hole, replace the oil seal.
Make sure that there is no continuous coolant
leakage from the bleed hole while operating
the engine.
A small amount of coolant weeping from the
bleed hole is normal. See an official Honda
Shop Manual or consult your Honda dealer for
replacing the mechanical seal or oil seal.
Both seals should be replaced at the same time.
Refer to Safety Precautions on page 27.
Coolant should be replaced by your Honda dealer,
unless you have the proper tools and service data
and are mechanically qualified.
Refer to the Honda Shop Manual.
To properly dispose of drained coolant, refer to
You & the Environment, page 148.
Improper disposal of drained fluids is harmful to
the environment.
Cooling System Inspection
(1) water hoses (3) radiator fins
(2) overflow hose
(4) bleed hole
(5) water pump cover
Coolant Replacement
Removing the radiator cap while the
engine is hot can cause the coolant to
spray out, seriously scalding you.
Always let the engine and radiator cool
down before removing the radiator cap.
CRF450R.book Page 59 Thursday, July 8, 2010 9:34 AM
 Loading...