10. Make sure that all cables, adapters, and other components are installed and seated correctly and that
you have not left loose tools or parts inside the node. Make sure that all internal cables are correctly
routed. If you disconnected the Fibre Channel and Ethernet cables, make sure that each cable is
reconnected to the same port from which it was removed.
11. If you removed the power cords, replace the power cords and the cable-retention brackets, as
described in “Replacing the cable-retention bracket” on page 39.
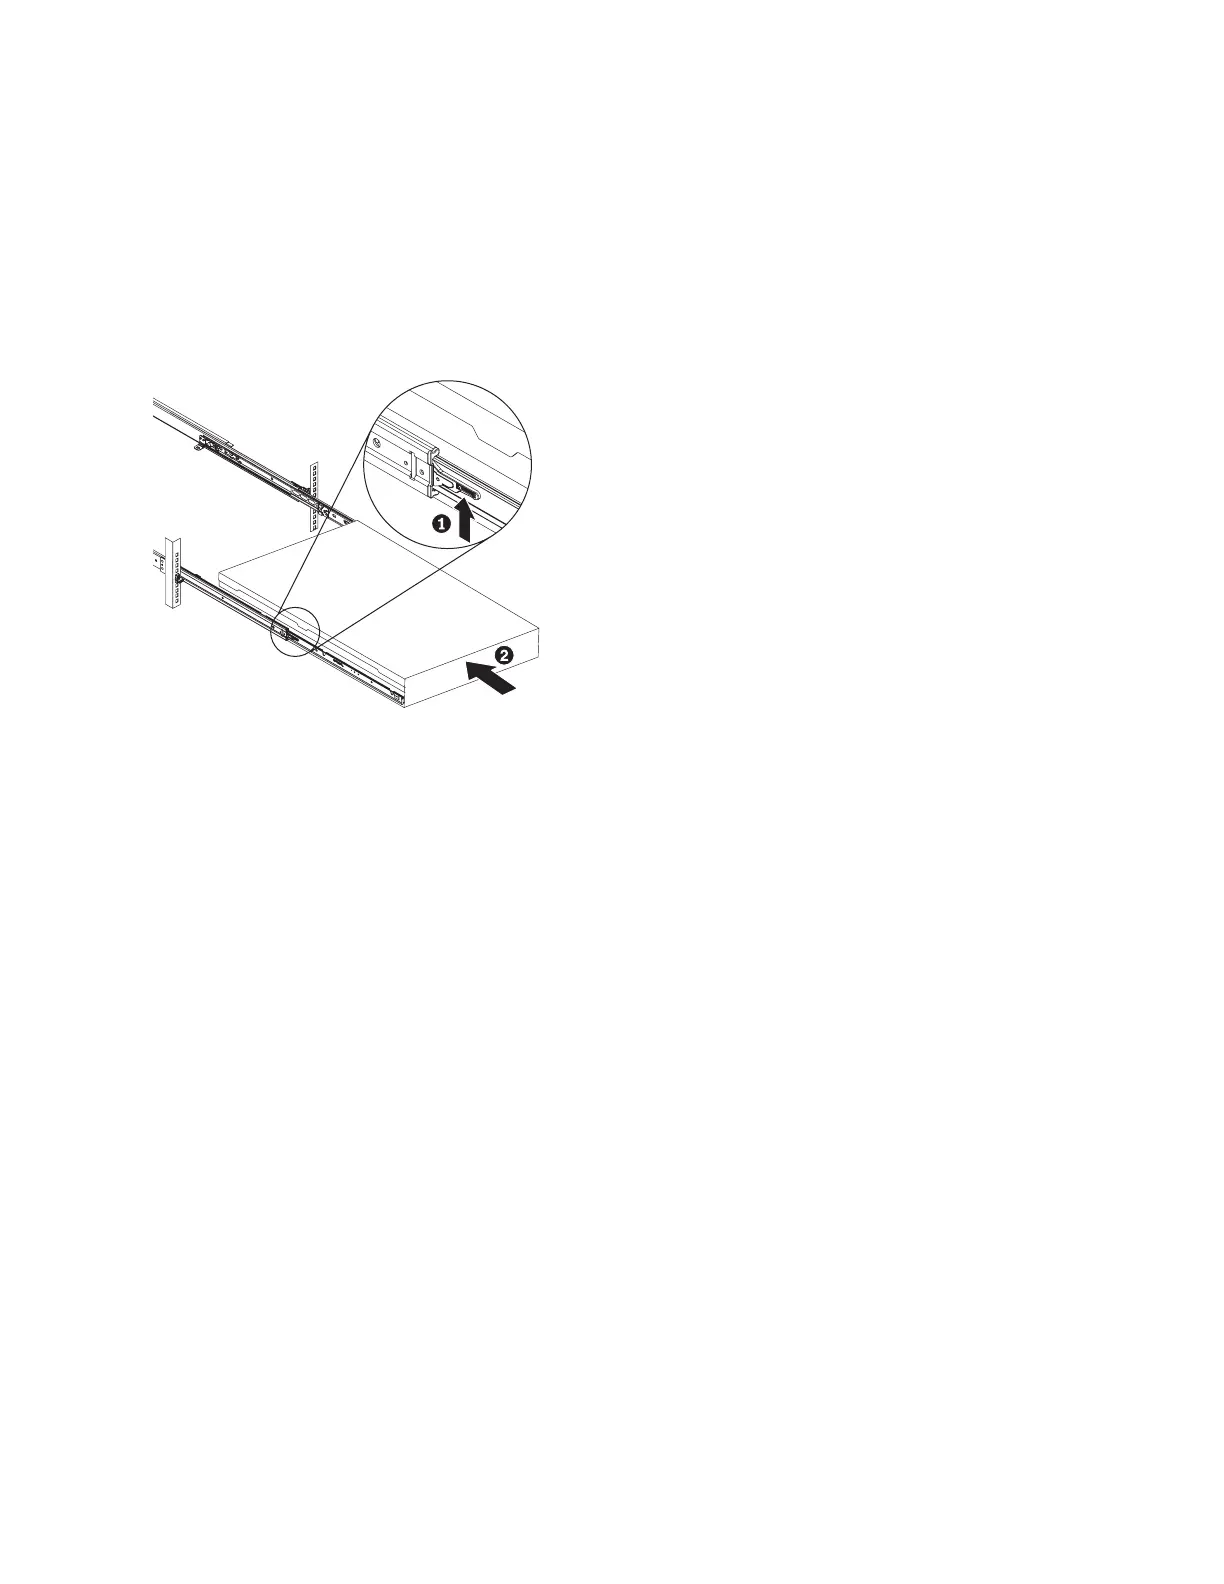
12. Lift the locking levers (1 in Figure 108) on the slide rails and push the server 2 all the way into
the rack until it clicks into place.
13. Turn on the node. When you turn on the node, use the node rescue procedure to install the SAN
Volume Controller software on the new disk. Then add the node back into the cluster. See
"Performing the node rescue" in the IBM System Storage SAN Volume Controller Troubleshooting Guide.
Note: If you must replace the hard disk and the service controller at the same time, you might not
be able to start the node to perform node rescue. See “Replacing a disk drive and a service controller
on the SAN Volume Controller” on page 102.
Replacing the SAN Volume Controller 2145-8A4 and the SAN Volume Controller
2145-8G4 SATA disk drive
This topic describes how to replace the SATA disk drive for the SAN Volume Controller 2145-8A4 and the
SAN Volume Controller 2145-8G4 nodes.
You can replace the SATA (serial advanced technology attachment) disk drive after you remove the
existing disk drive.
To replace the SAN Volume Controller 2145-8A4 and the SAN Volume Controller 2145-8G4 disk drive,
perform the following steps:
1. Make sure that the node cover is in place and fully closed.
Attention: To avoid damage to the hard disk drive connectors, make sure that the node cover is in
place and fully closed whenever you remove or replace a hard disk drive.
2. Find the rails assembly and screws that are shipped with the new disk drive. Attach the rails
assembly to the disk drive with four screws, as shown in Figure 109 on page 121, using two on each
side of the disk.
svc_bb1ka055
Figure 108. Raising the SAN Volume Controller 2145-CF8 or 2145-CG8 locking levers of the slide rails of the rack
120 IBM SAN Volume Controller Hardware Maintenance Guide
 Loading...