Figures
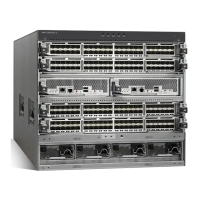
1. Parts diagram for the SAN Volume Controller
2145-CG8 model ...........2
2. Exploded view of the SAN Volume Controller
2145-CF8 node ............6
3. Exploded view of the SAN Volume Controller
2145-8A4 node ...........10
4. Exploded view of the SAN Volume Controller
2145-8G4 node ...........13
5. Exploded view of the SAN Volume Controller
2145-8F4 node............16
6. Exploded view of the SAN Volume Controller
2145-8F2 node............18
7. View of the redundant ac-power switch FRU 20
8. Exploded view of the 2145 UPS-1U hardware 21
9. The cable-management arm, support rails, and
associated parts of the 2145-CG8 and 2145-CF8 27
10. Release latches and mounting screws of the
SAN Volume Controller 2145-CG8 or 2145-CF8. 28
11. Removing the cables from the
cable-management arm ........28
12. Removing the cable-management arm....29
13. Removing the cable-management-support arm 30
14. Installing the cable-management-support arm 31
15. Installing the cable-management arm ....32
16. Adjusting the location of the
cable-management arm ........33
17. Connecting and routing the cables .....34
18. Cable-retention brackets ........35
19. SAN Volume Controller 2145-8A4 with the
cable-retention bracket installed ......36
20. SAN Volume Controller 2145-8G4 cable
retention bracket - type A ........37
21. SAN Volume Controller 2145-8G4 cable
retention bracket - type B ........37
22. The SAN Volume Controller 2145-8G4 with the
cable-retention bracket attached ......38
23. The SAN Volume Controller 2145-8G4 with
cable-retention bracket type B attached . . . 39
24. Cable-retention brackets ........40
25. Raising the SAN Volume Controller 2145-CF8
or 2145-CG8 locking levers of the slide rails of
the rack ..............41
26. Retaining screw on the SAN Volume
Controller 2145-8A4 node ........42
27. Installing the SAN Volume Controller
2145-8A4 cable retention bracket .....42
28. SAN Volume Controller 2145-8G4 cable
retention bracket - type A ........43
29. SAN Volume Controller 2145-8G4 cable
retention bracket - type B ........43
30. The SAN Volume Controller 2145-8G4 before
you attach the cable-retention bracket ....44
31. The SAN Volume Controller 2145-8G4 with
cable-retention bracket type B attached . . . 45
32. Attaching the cable retention bracket to the
SAN Volume Controller 2145-8F4 power cable . 45
33. Removing the 2145-CG8 or 2145-CF8 from the
rack ...............48
34. The captive thumbscrews that secure the node
and the shipping brackets ........51
35. Removing the SAN Volume Controller
2145-8G4 from the rack ........53
36. Installing the 2145-CG8 or 2145-CF8 node in
the slide rails of the rack ........57
37. Raising the 2145-CG8 or 2145-CF8 locking
levers of the slide rails of the rack .....58
38. The captive thumbscrews that secure the node
and the shipping brackets ........59
39. The captive thumbscrews that secure the node
and the shipping brackets ........60
40. Aligning the SAN Volume Controller 2145-8G4
with the rack slides ..........60
41. Sliding the SAN Volume Controller 2145-8F4
into the rack ............61
42. Removing the front end of the slide rails 62
43. Removing the rear end of the slide rails 63
44. The rail-adjustment bracket and the release tab
on the rear rail-locking carrier ......64
45. Removing the latch strike from the front of the
slide rail .............65
46. Removing the right slide rail from the front of
the rack ..............65
47. The left support rail for the SAN Volume
Controller .............66
48. Opening the rear slide-rail hooks .....67
49. Installing the rear end of the slide rails 68
50. Preparing the front end of the slide rails 68
51. Installing the front end of the slide rails 69
52. SAN Volume Controller 2145-8A4 support-rails
installation kit............69
53. A closed rail-locking carrier at the front of the
support rail for the SAN Volume Controller
2145-8A4 .............70
54. An open rail-locking carrier at the rear of the
support rail for the SAN Volume Controller
2145-8A4 .............71
55. Aligning the pins on the left front support rail
for the SAN Volume Controller 2145-8A4 with
the front mounting flange ........72
56. SAN Volume Controller 2145-8G4 support rails
installation kit............73
57. Inserting the right slide rail into the rear rack
mounting flange ...........73
58. Extending the right slide rail .......74
59. Attaching the latch strike to the front of the
slide rail .............74
60. Retracting the latch-lock carrier ......75
61. Opening the front latch-lock carrier assembly 75
62. Opening the back latch-lock carrier assembly 76
63. Installing the front end of the rail .....76
64. Closing the latch-lock carrier assembly . . . 77
© Copyright IBM Corp. 2003, 2011 v
|
||
|
 Loading...