Scanner Unit
SM 4-41 D146/D147/D148/D149/D150
and Adjustment
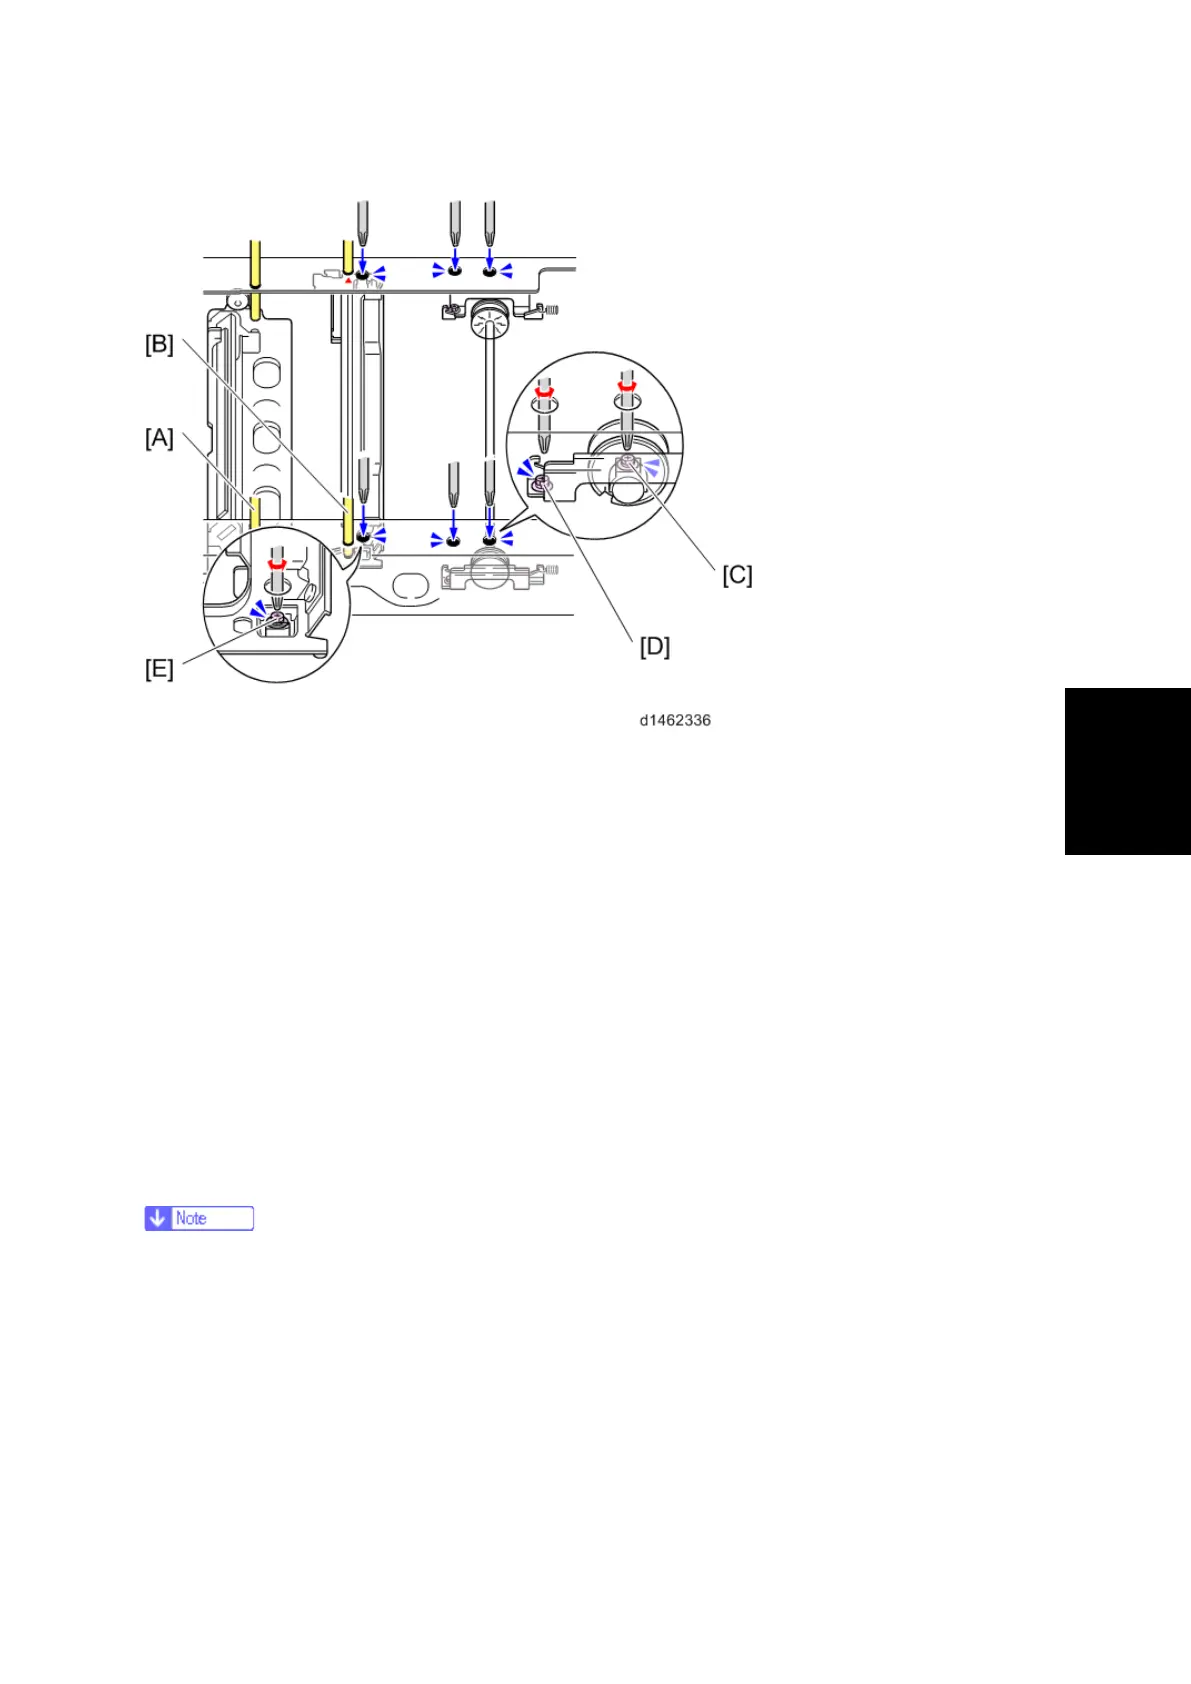
Scanner position adjustment
1. Set the scanner positioning pins (4).
§ 2nd scanner carriage and frame hole [A]
§ 1st scanner carriage and frame hole [B]
§ Same position as [A] on the rear side
§ Same position as [B] on the rear side
2. Tighten the screw [C] of the pulley which was temporarily tightened.
3. Tighten the screw [D] of the scanner retaining bracket which was temporarily tightened.
4. Attach the wire clamp [E].
5. Pull out the scanner positioning pins.
6. Holding the center part of the 1st scanner carriage, move it to the left and right to ensure it
moves smoothly.
If it does not move smoothly, loosen the scanner wire, and perform the scanner position
adjustment procedure again.
§ After replacing the wire, make a test copy, and check skew, magnification, and whether
there is a registration gap. If there is a gap, adjust the scanner wire position again, or
perform Scan Registration Adjustment (SP4010-SP4011).
 Loading...