8、FUEL TANK COMPONENT 75
CHK
AD
J
NO. PART NO. PART NAME QTY CAUTION
4044201-325035 ZT310-T fuel tank cover (titanium matte)
【
】
4044201-329064 ZT310-T fuel tank cover (bright blue)
【
】
4044201-331033 ZT310-T fuel tank cover (bright orange)
【
】
4044201-018035 ZT310-R fuel tank cover (titanium matte)
【
】
4044201-018064 ZT310-R fuel tank cover (bright blue)
【
】
4044201-139033 ZT310-R fuel tank cover (bright orange)
【
】
4044201-329002 ZT310-T fuel tank cover (Pearl white)
2 1184200-002000 ZT310 electronic fuel tank lock 1
4044201-326035 ZT310-T fuel tank cover (titanium matte)
【
】
4044201-330064 ZT310-T fuel tank cover (bright blue)
【
】
4044201-332033 ZT310-T fuel tank cover (bright orange)
【
】
4044201-019035 ZT310-R fuel tank cover (titanium matte)
【
】
4044201-019064 ZT310-R fuel tank cover (bright blue)
【
】
4044201-140033 ZT310-R fuel tank cover (bright orange)
【
】
4044201-330002 ZT310-T fuel tank cover (Pearl white)
4 1224100-014000 ZT250-S fuel tank cover rotary damping 1
5 1274100-021000 ZT250-S fuel tank cover rotating bracket 1
6 1274100-090000 ZT250-S fuel tank cover rotating shaft 1
7 1260100-215000 ZT310-T storage box cover rotating shaft limit circlip 1
【
】
Large tank version
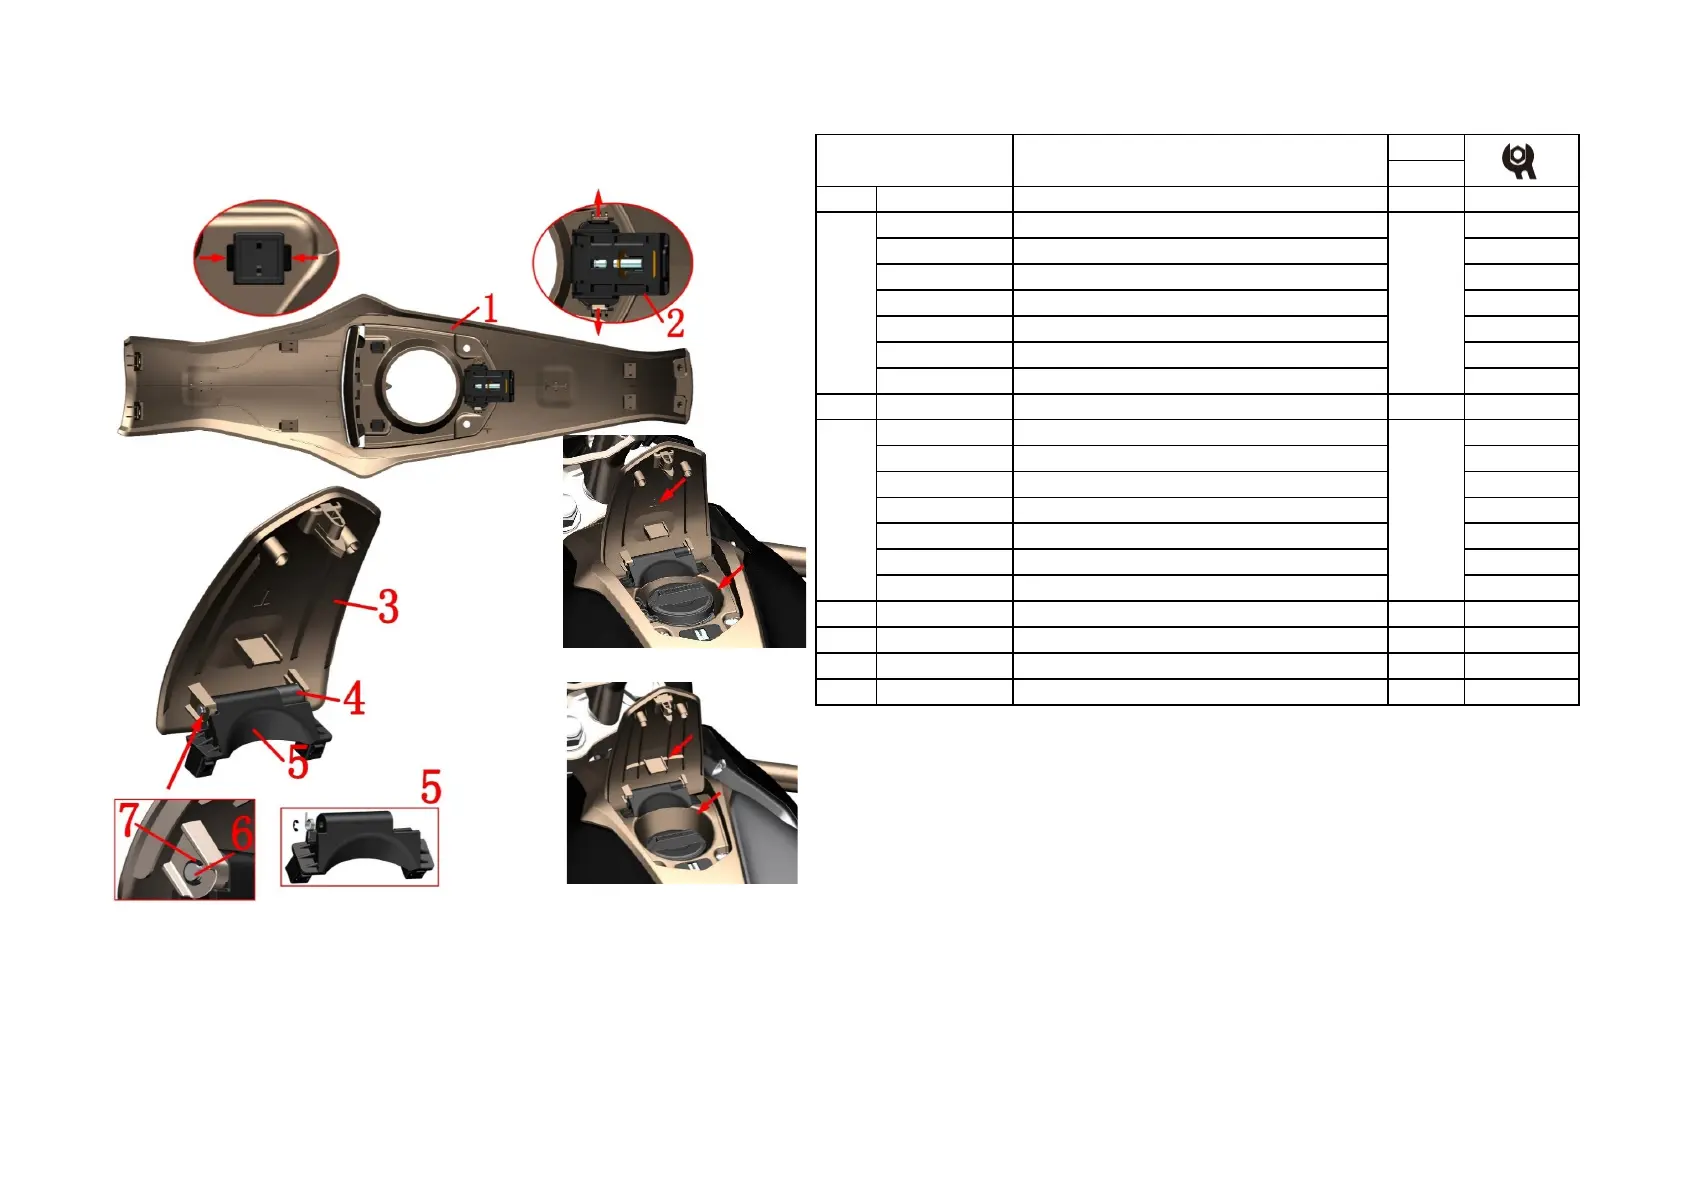
Fig. 2 FUEL TANK
COMPONENT
Fuel tank cover, fuel tank cover, fuel tank lock
●When removing the buckle, pay attention to the strength to prevent damage to the buckle.
●Be careful not to lose your own spring when removing the swivel bracket.
●When assembling, pay attention to whether the length of the process clip 1 on the outer cover is too
long. If it is too long, be sure to cut it short.
●【1】 The fuel tank cover rotation bracket (5) already contains a circlip (7).
●【2】&【3】&【4】 for large tank version. 【5】&【6】&【7】 for small tank version.
●【2】&【5】 for black vehicle. 【3】&【6】 for blue vehicle. 【4】&【7】for orange vehicle.
PROCEDURE:
●Fuel tank lock
Use a flat-blade screwdriver to carefully pry the ends of the middle cover and remove the fuel tank lock (2),
taking care to prevent damage to the buckle.
●Fuel tank cover component
Use a needle-nose pliers to clamp the tab of the swivel bracket (5) with a slight force. Remove the cover
component and pay attention to the force to prevent damage to the buckle.
Remove the circlip (7) attached to the rotating shaft (6), which is the self-contained rotating bracket (5). Remove
the rotating shaft and separate the rotating bracket (5) and damper (4).
CAUTION:
●The material should be protected during the disassembly process to prevent damage to the paint surface.
1 1
3 1
"T"

 Loading...