8、FUEL TANK COMPONENT 84
CHK
ADJ
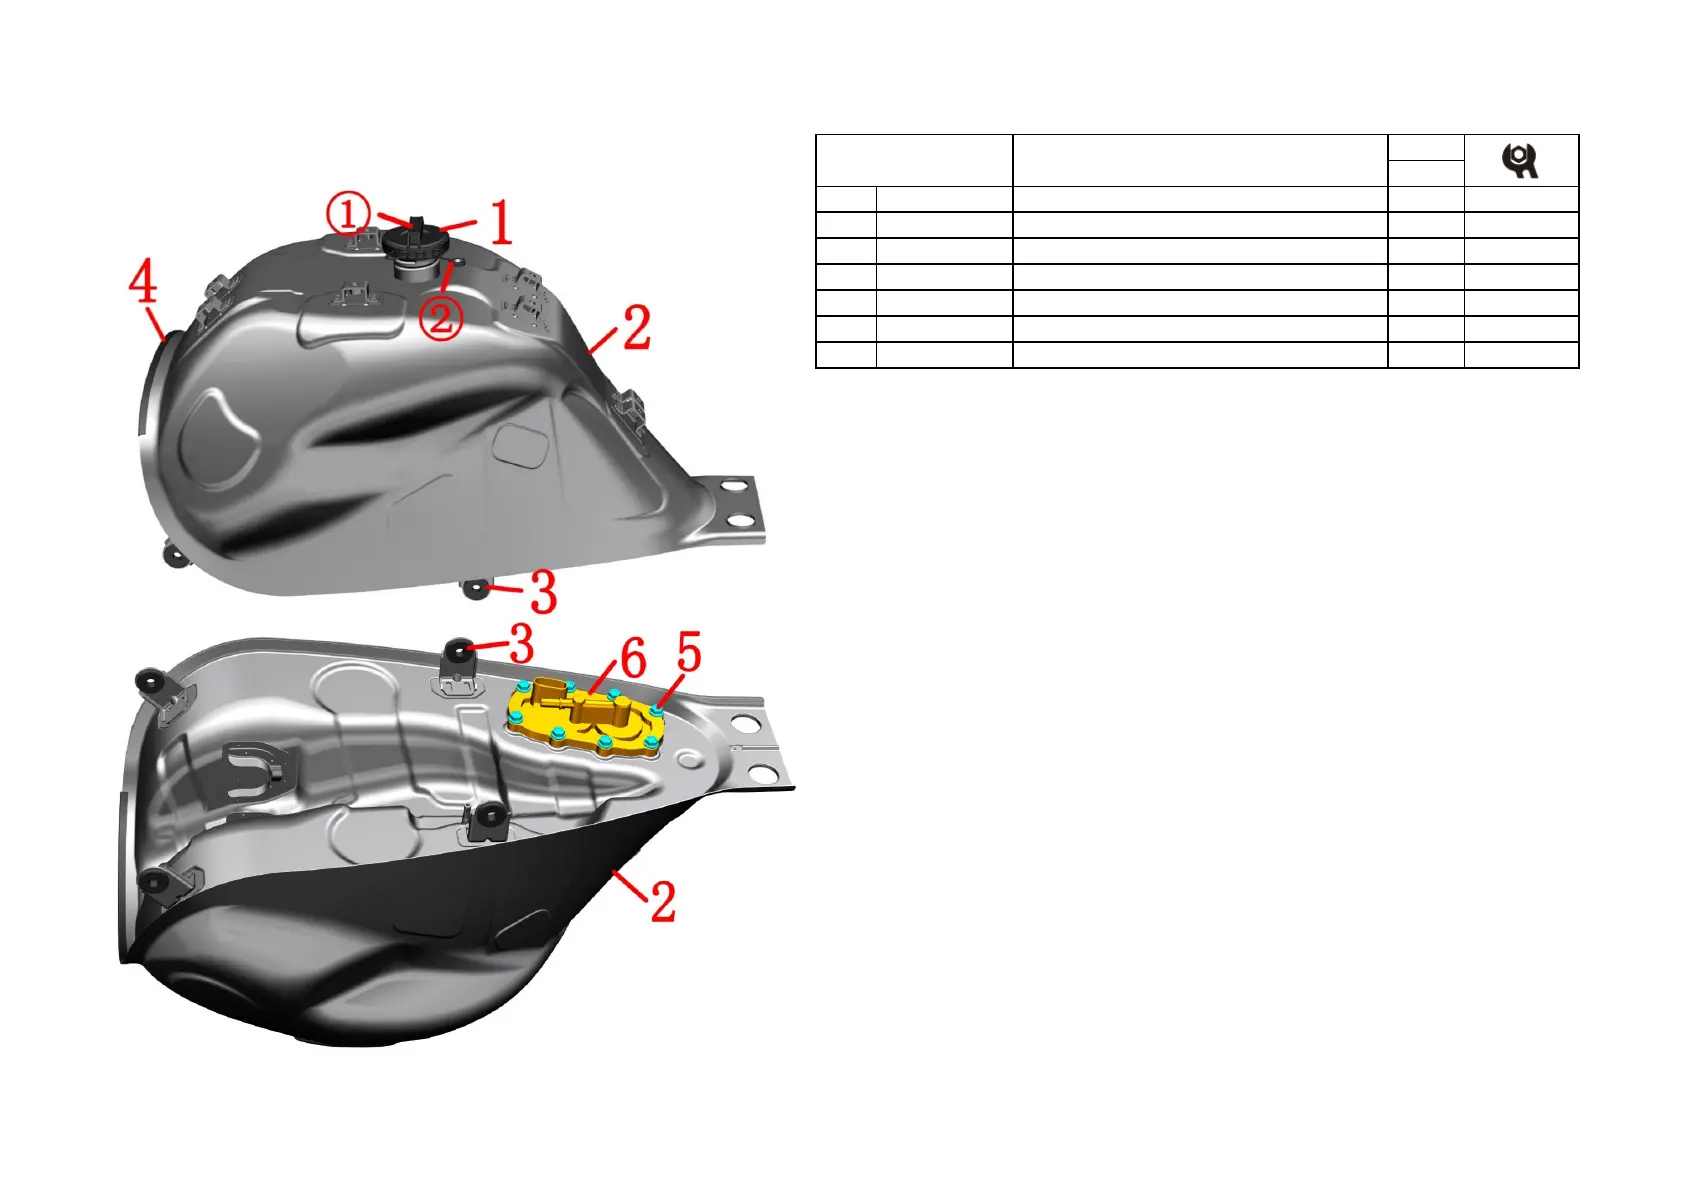
NO. PART NO. PART NAME QTY CAUTION
1 1224100-033000 ZT250-S threaded fuel tank cap 1
2 4034200-009000 ZT310-T fuel tank liner 1
3 1244100-002000 ZT250-S side cover round glue 4
4 1240300-021000 HJ125-6 shroud glass strip (1.5m) 0.17
5 1250105-137093 GB5789M6×16 (environmental color) 8
6 1050954-018000 T02 built-in fuel pump -300 1
Fig. 11 FUEL TANK
COMPONENT
Large fuel tank liner component
●Fuel tank cap
Pinch ① by hand to remove the fuel tank cap (1) counterclockwise. Be careful not to pull the nylon cord ②
hard.
●Adhesive strip
Pull the strip (4) off the end of the strip by hand.
●Side cover round glue
Remove the side cover round rubber (3) from the tank liner (2).
●Fuel pump
After the tank liner component is placed upside down, remove the bolts (5) with a sleeve.
When the fuel pump (6) is removed, the float connecting rod cannot be bent or bent to avoid inaccurate oil
display.
CAUTION:
●It is recommended to use the oil pump to pump out the fuel or consume the fuel before disassembling the tank
component.
●Fireworks, answering or dialing should be strictly prohibited near the car-breaking site to prevent accidents.
●
Reverse the fuel tank inner component When removing the fuel pump, be sure to check if the fuel tank cap has
been tightened to prevent the remaining fuel from overflowing from the fuel tank port; the vent pipe ④ may have
a small amount of fuel overflow when the fuel tank cap is turned back.
●When reassembling the fuel pump, be sure to clean the joint surface of the fuel pump sealant and the tank
liner. When locking the bolt, the position should be locked to ensure uniform deformation of the seal gasket.
●When assembling the fuel tank cap, be careful to rotate ① to the position shown in the figure. In other
positions, it may interfere with the process clip of the fuel tank cover.

 Loading...