•
On faceplates without handles, use a Phillips number 1 screwdriver to remove the
noncaptive screws.
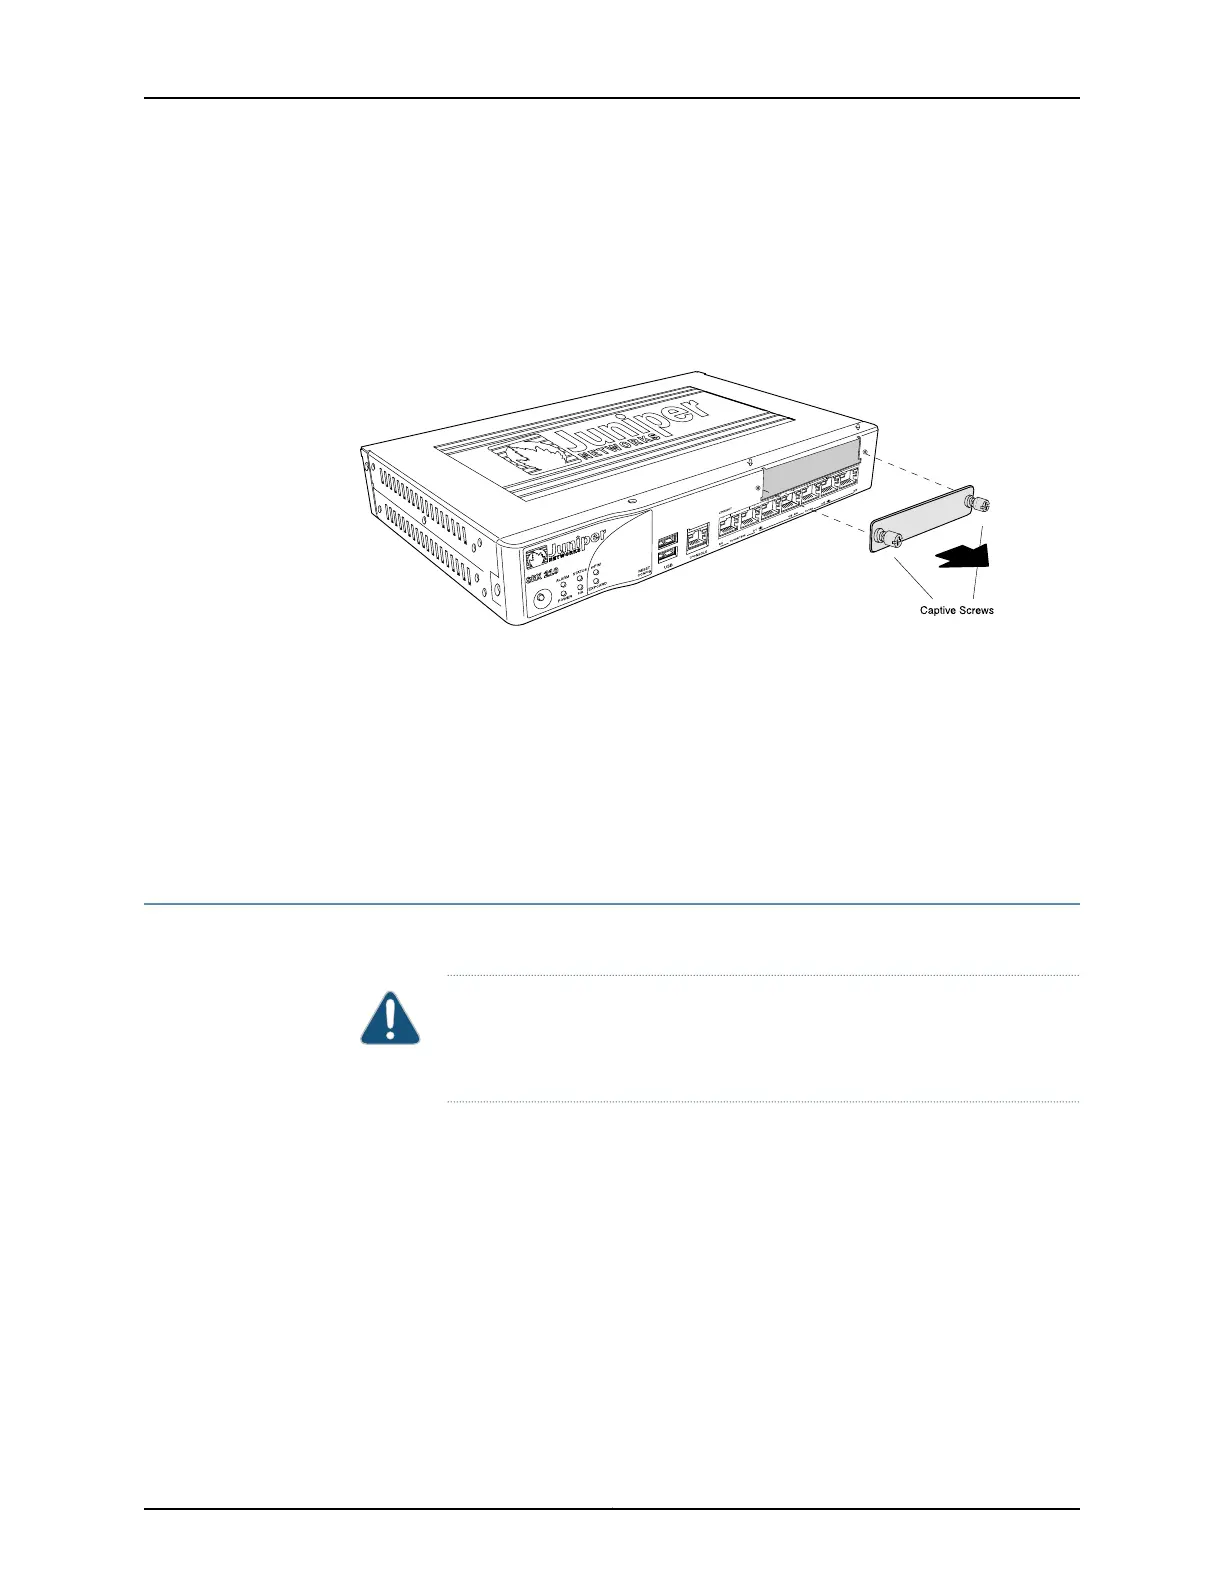
4. Remove the faceplate. See Figure 41 on page 250.
Figure 41: Removing a Blank Mini-PIM Faceplate from an SRX Series
Services Gateway
Related
Documentation
Required Tools and Parts for Replacing a Mini-Physical Interface Module on page 245•
• Installing a Mini-Physical Interface Module in the SRX Series Services Gateway on
page 250
• Removing a Mini-Physical Interface Module from the SRX Series Services Gateway on
page 252
• SRX Series Services Gateway Mini-Physical Interface Modules Overview on page 7
Installing a Mini-Physical Interface Module in the SRX Series Services Gateway
Before you begin, power off the services gateway.
CAUTION: The Mini-PIMs available on the SRX Series Services Gateway are
not hot-swappable. You must poweroff the services gateway before removing
or installing Mini-PIMs.
To install a Mini-Physical Interface Module (Mini-PIM) in the SRX Series Services Gateway:
1. Attach an electrostatic discharge (ESD) grounding strap to your bare wrist, and connect
the strap to the grounding point on the back of the services gateway.
2. Power off the services gateway by briefly pressing the Power button on the front panel.
Wait for the Power LED to turn off before proceeding.
3. Disconnect the services gateway from its power source:
•
For SRX210 or SRX220 Services Gateway, either unplug the power adapter from
the AC power outlet, or disconnect the power adapter from the power connector
on the rear panel of the device.
Copyright © 2015, Juniper Networks, Inc.250
SRX Series Services Gateways for the Branch Physical Interface Modules Reference
 Loading...


