ENGINE DISASSEMBLY
5-14
ENG
CRANKCASE (R)
1. Remove:
•
Crankcase (R)
NOTE:
•
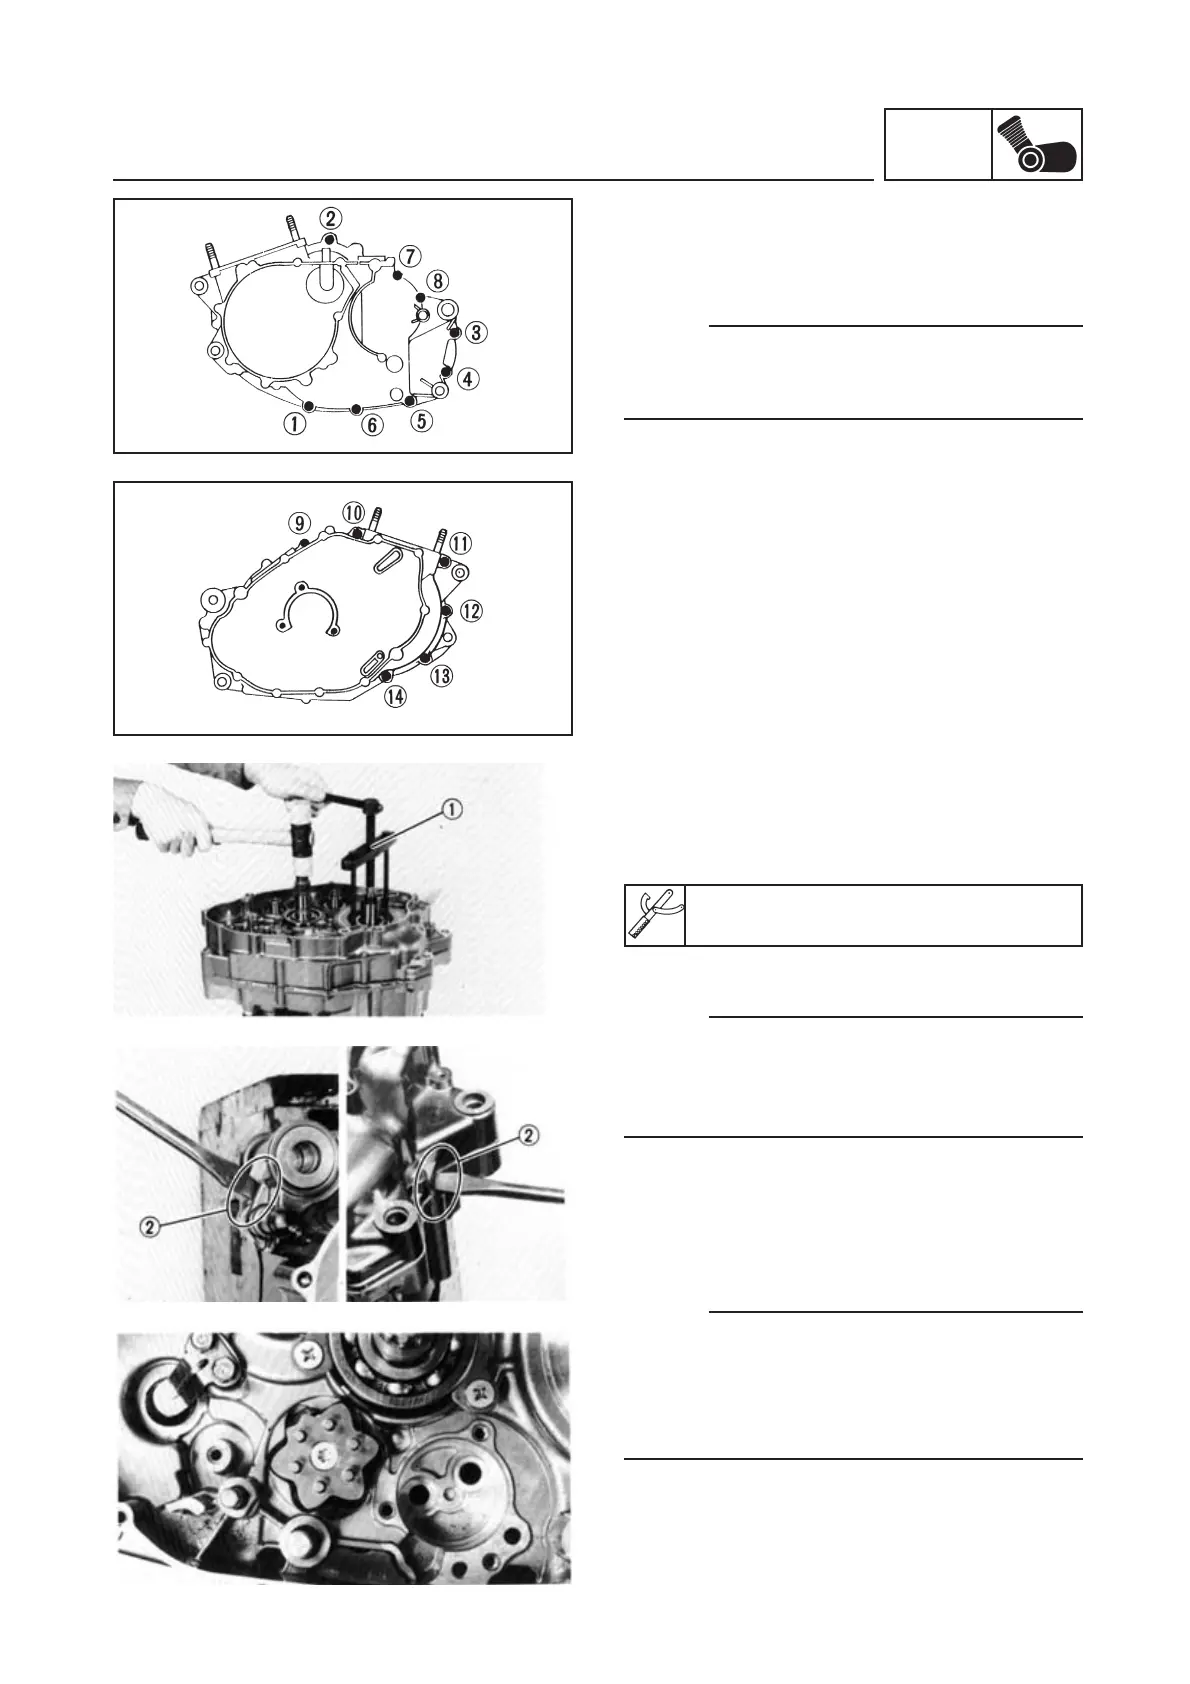
Loosen nuts starting from the one with the
highest number.
•
Loosen all by 1/4 turn and then remove.
Removal procedure:
•
Set the crankcase separating tool (1) in place.
▼▼▼▼▼▼▼▼▼▼▼▼▼▼▼▼▼▼▼▼▼▼▼▼▼▼▼▼▼
Crankcase separating tool:
P/N. 90890-01135
NOTE:
When tightening the support bolts of the separat-
ing tool, be sure to keep the tool body parallel to
the engine crankcase. If necessary, a screw may
be slightly loosened to put the tool body on level.
•
Applying pressure, strike the front engine
assembly flange, the drive shafts and the gear
cam plate with a rubber hammer. Then
remove the crankcase.
NOTE:
•
If the crankcase fails come out, lever at points
(2), being careful not to damage the
crankcase.
•
Turn the gear cam plate as shown in the fig-
ure to prevent it interfering with the crankcase.

 Loading...