GE HEALTHCARE
DIRECTION 5394152, Revision 5
LOGIQ™ P6/P6 PRO SERVICE MANUAL
Chapter 8 - Page 8-107
8-3-5-2 Image Management Guide
NOTE: Before upgrade to R3.x.x software, perform recommended image backup procedure.
Export/Import Data/Images Between Systems - Use this to copy both patient data and images for
specified patient(s) from one system to another.
To move exams from one Ultrasound system to another, you need to export/import exam information.
NOTE: Both database information and images are exported. No data is deleted from the local archive
when exporting data.
Exporting Data
To export an exam(s) to a compatible Ultrasound system:
1.) Format the removable media (DVD or CD-ROM). Label the removable media. Answer Yes/OK
to the messages.Press Patient. Deselect any selected patient(s) in the search portion of the
Patient screen. Press Data Transfer (located at the upper, right-hand corner of the Patient
menu).
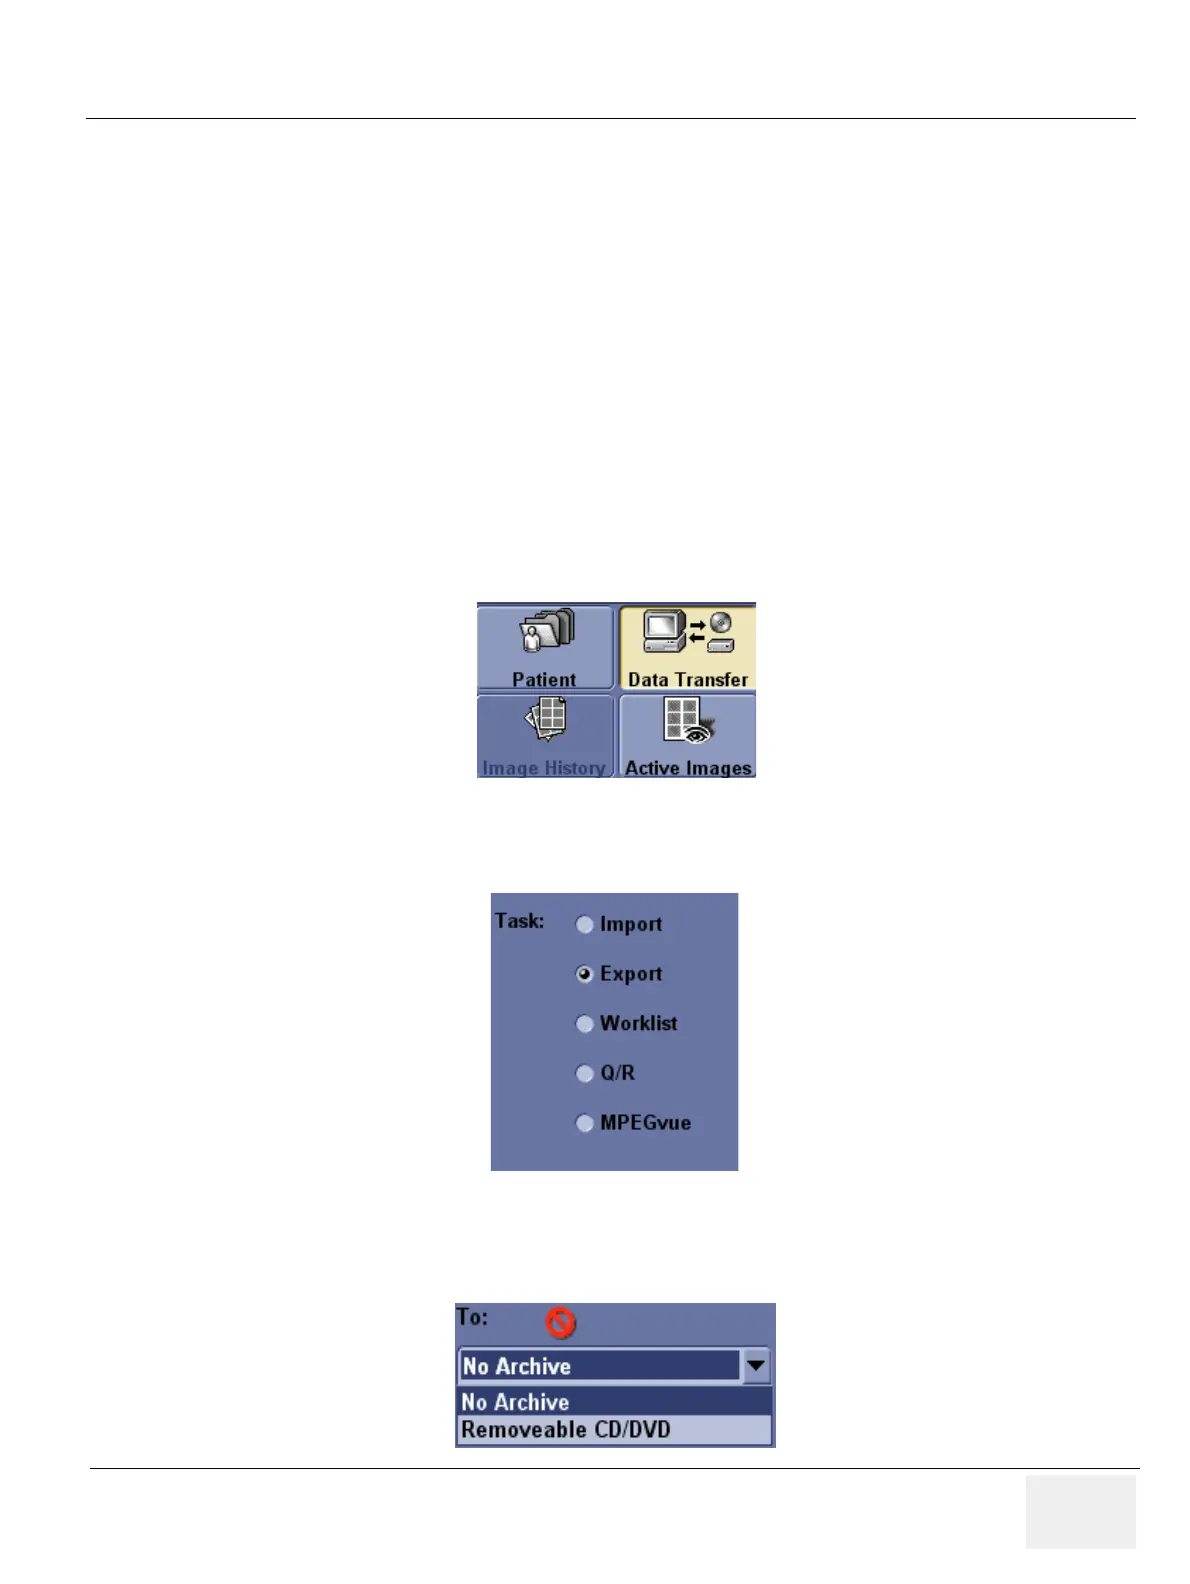
2.) Select Export task Button.
3.) The [From] combo box is not active. It displays Local Archive. The [To] combo box is active.
Select the type of removable media CD/DVD. Then please wait until the patient list is visible.
Figure 8-155 Exam Data Transfer
Figure 8-156 Task button
Figure 8-157 To Combo Box
 Loading...


