EasyManuals Logo
Home>GE>Medical Equipment>LOGIQ P6 Pro Series

GE LOGIQ P6 Pro Series User Manual

GE LOGIQ P6 Pro Series
484 pages
To Next Page IconTo Next Page
To Previous Page IconTo Previous Page
Page #391 background imageLoading...
Page #391 background image
GE HEALTHCARE
DIRECTION 5394152, Revision 5
LOGIQ™ P6/P6 PRO SERVICE MANUAL
Chapter 8 - Page 8-165
8-7-8 Color Printer Fixture Middle installation - UP23MD Printer
1.) Install color printer on the top of the base bracket by screw 4 screws(2306562, FH M3x6 YEL).
2.) Unscrew 2 existing screws from the middle cover.
3.) Screw 1 screw (5176744, BH M4x20 WHT) on each side of the system to fix the Color printer with
base bracket to the system.
Figure 8-253 Color Printer Fixture Middle installation
Figure 8-254 Color Printer Fixture Middle installation

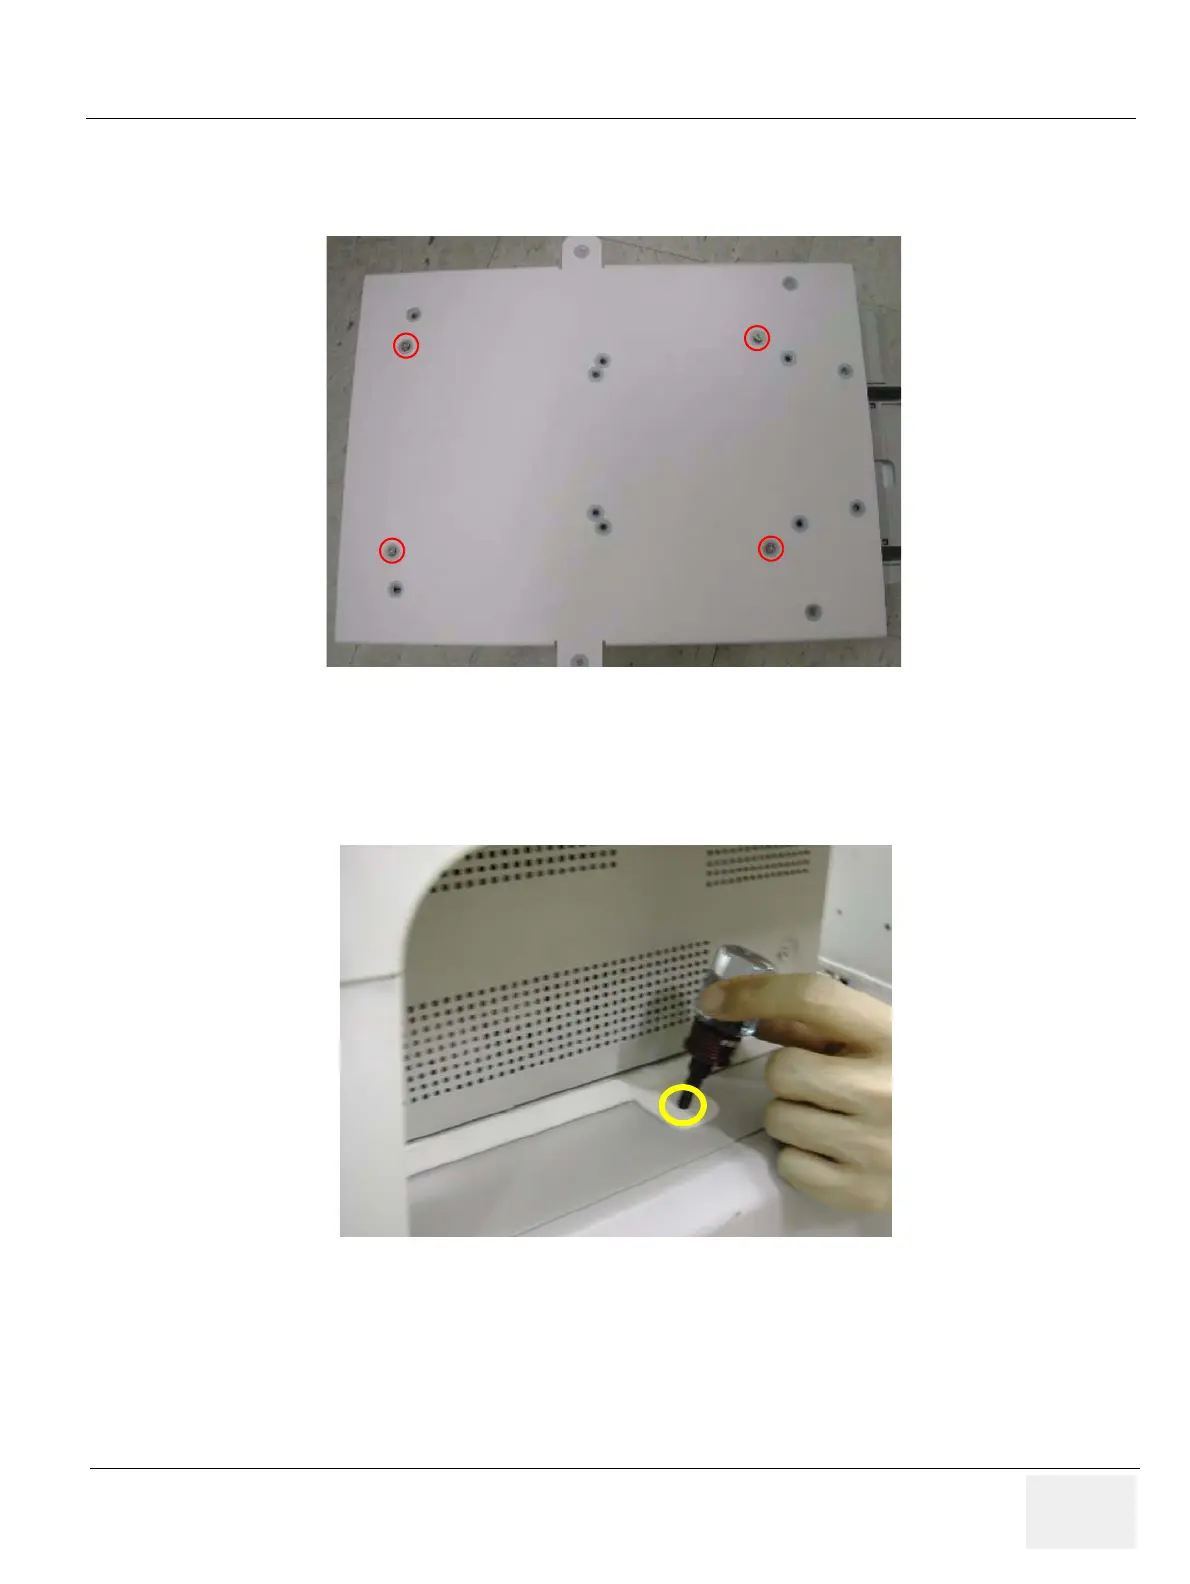
Table of Contents

Questions and Answers:

Question and Answer IconNeed help?

Do you have a question about the GE LOGIQ P6 Pro Series and is the answer not in the manual?

GE LOGIQ P6 Pro Series Specifications

General IconGeneral
BrandGE
ModelLOGIQ P6 Pro Series
CategoryMedical Equipment
LanguageEnglish

Related product manuals