HANDLEBAR
4-72
EAS30203
REMOVING THE HANDLEBAR
1. Stand the vehicle on a level surface.
EWA13120
Securely support the vehicle so that there is
no danger of it falling over.
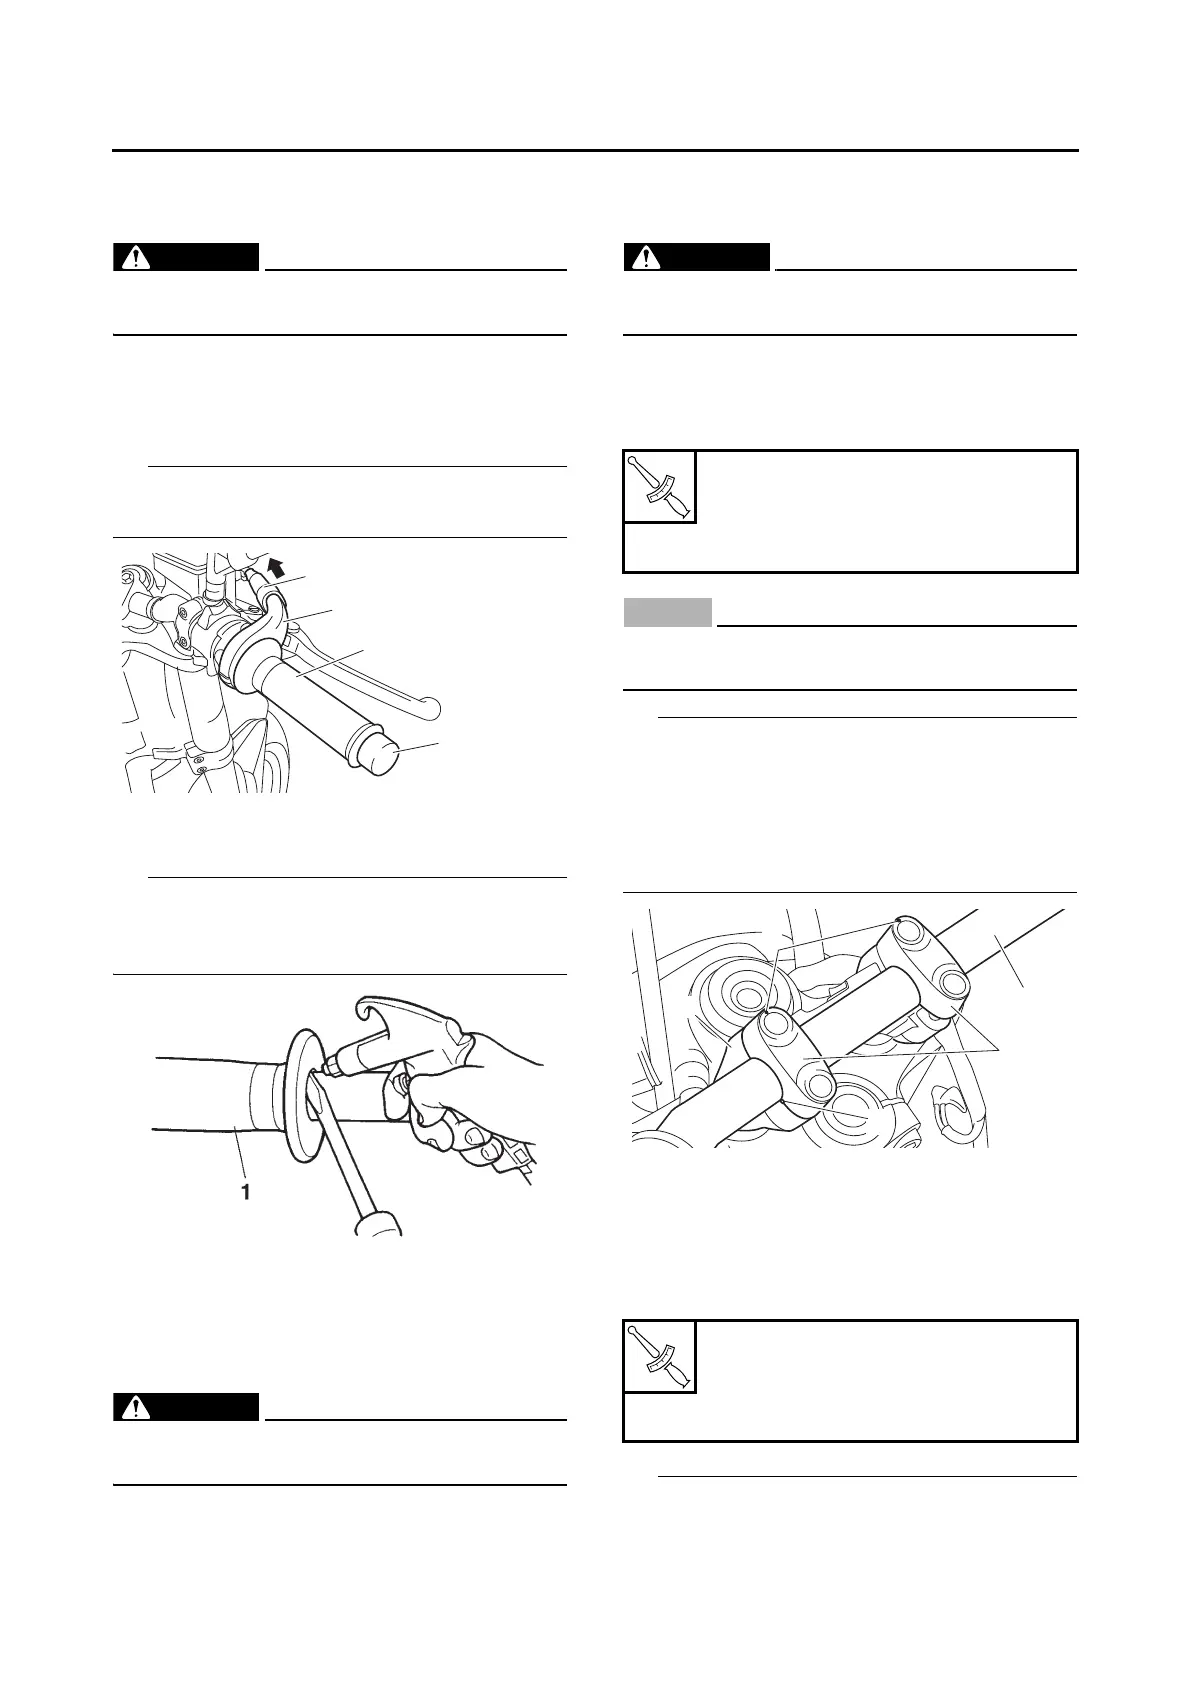
2. Remove:
• Throttle cable housings “1”
• Grip end (right) “2”
• Throttle grip “3”
While removing the throttle cable housing, pull
back the rubber cover “4”.
3. Remove:
• Handlebar grip “1”
Blow compressed air between the left handlebar
and the handlebar grip, and gradually push the
grip off the handlebar.
EAS30204
CHECKING THE HANDLEBAR
1. Check:
• Handlebar
Bends/cracks/damage → Replace.
EWA13690
Do not attempt to straighten a bent handle-
bar as this may dangerously weaken it.
EAS30205
INSTALLING THE HANDLEBAR
1. Stand the vehicle on a level surface.
EWA13120
Securely support the vehicle so that there is
no danger of it falling over.
2. Install:
• Lower handlebar holder
• Handlebar “1”
• Upper handlebar holders “2”
ECA18300
First, tighten the bolts on the front side of the
handlebar holder, and then on the rear side.
• The upper handlebar holders should be in-
stalled with the punch marks “a” facing for-
ward.
• Align the punch mark “b” on the handlebar with
the left side upper surface of the lower handle-
bar holder “3”.
3. Install:
• Clutch lever holder “1”
• Clutch lever “2”
• Clutch lever pivot bolt “3”
• Clutch cable
• Clutch switch “4”
• Align the center of slit on the clutch lever holder
with the punch mark “a” on the handlebar.
Lower handlebar holder nut
32 Nm (3.2 m·kgf, 23 ft·lbf)
Upper handlebar holder bolt
28 Nm (2.8 m·kgf, 20 ft·lbf)
Clutch lever holder pinch bolt
11 Nm (1.1 m·kgf, 8.0 ft·lbf)
Clutch lever pivot nut
7 Nm (0.7 m·kgf, 5.1 ft·lbf)

 Loading...