CHAIN DRIVE
4-103
EAS30229
REMOVING THE DRIVE CHAIN
1. Stand the vehicle on a level surface.
EWA13120
Securely support the vehicle so that there is
no danger of it falling over.
Place the vehicle on a suitable stand so that the
rear wheel is elevated.
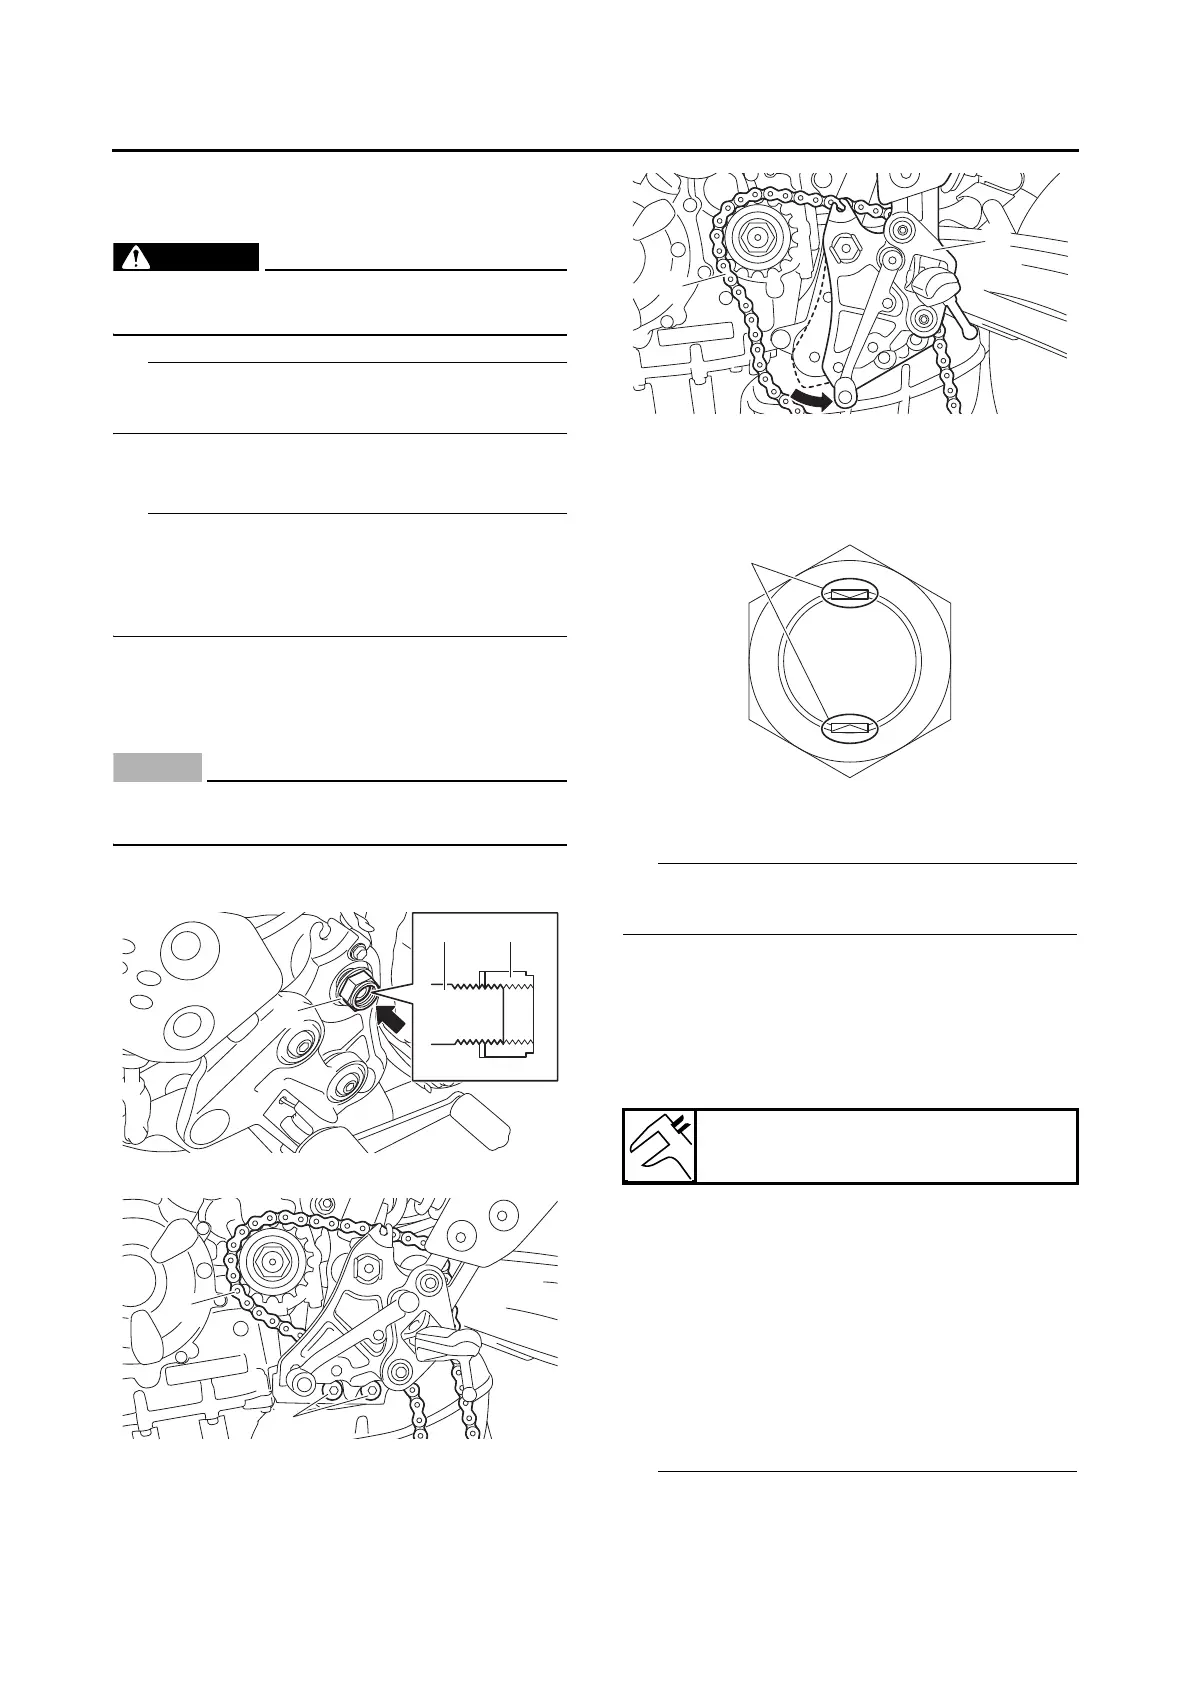
2. Remove:
• Drive chain “1”
Push the rear wheel forward and remove the
drive chain from the rear wheel sprocket. Refer
to “ADJUSTING THE DRIVE CHAIN SLACK” on
page 3-17.
▼▼▼▼ ▼ ▼▼▼▼▼▼▼▼▼ ▼ ▼▼▼▼ ▼ ▼▼▼▼ ▼ ▼▼▼▼▼▼▼
a. Loosen the pivot shaft nut “2” so that the en-
gaged thread length on the pivot shaft “3” is
3–4 ridges.
ECA21200
Make sure that the pivot shaft nut does not
come off the pivot shaft.
b. Tap the pivot shaft nut to push the pivot shaft
to the left.
c. Remove the footrest bracket bolts “4”.
d. Move the footrest bracket “5” rearward, and
then remove the drive chain.
▲▲▲▲ ▲ ▲▲▲▲▲▲▲▲▲ ▲ ▲▲▲▲ ▲ ▲▲▲▲ ▲ ▲▲▲▲ ▲▲▲
EAS31115
REMOVING THE DRIVE SPROCKET
1. Straighten the drive sprocket nut ribs “a”.
2. Loosen:
• Drive chain sprocket nut
Loosen the drive sprocket nut while pressing the
brake pedal.
EAS30230
CHECKING THE DRIVE CHAIN
1. Measure:
• 15-link section “a” of the drive chain
Out of specification → Replace the drive
chain.
▼▼▼▼ ▼ ▼▼▼▼▼▼▼▼▼ ▼ ▼▼▼▼ ▼ ▼▼▼▼ ▼ ▼▼▼▼ ▼▼▼
a. Measure the length “b” between the inner
sides of the pins and the length “c” between
the outer sides of the pins on a 15-link section
of the drive chain as shown in the illustration.
b. Calculate the length “a” of the 15-link section
of the drive chain using the following formula.
Drive chain 15-link section length “a” =
(length “b” between pin inner sides + length
“c” between pin outer sides)/2
• When measuring a 15-link section of the drive
chain, make sure that the drive chain is taut.
15-link length limit
239.3 mm (9.42 in)

 Loading...