4 - 28
WARNING
Before installing, clean all of the internal parts of the brake,
and lubricate them with clean or new brake fl uid.
Never use solvents on the internal parts of the brake.
Recommended brake fl uid
TUTELA BRAKE FLUID TOP4
DOT4
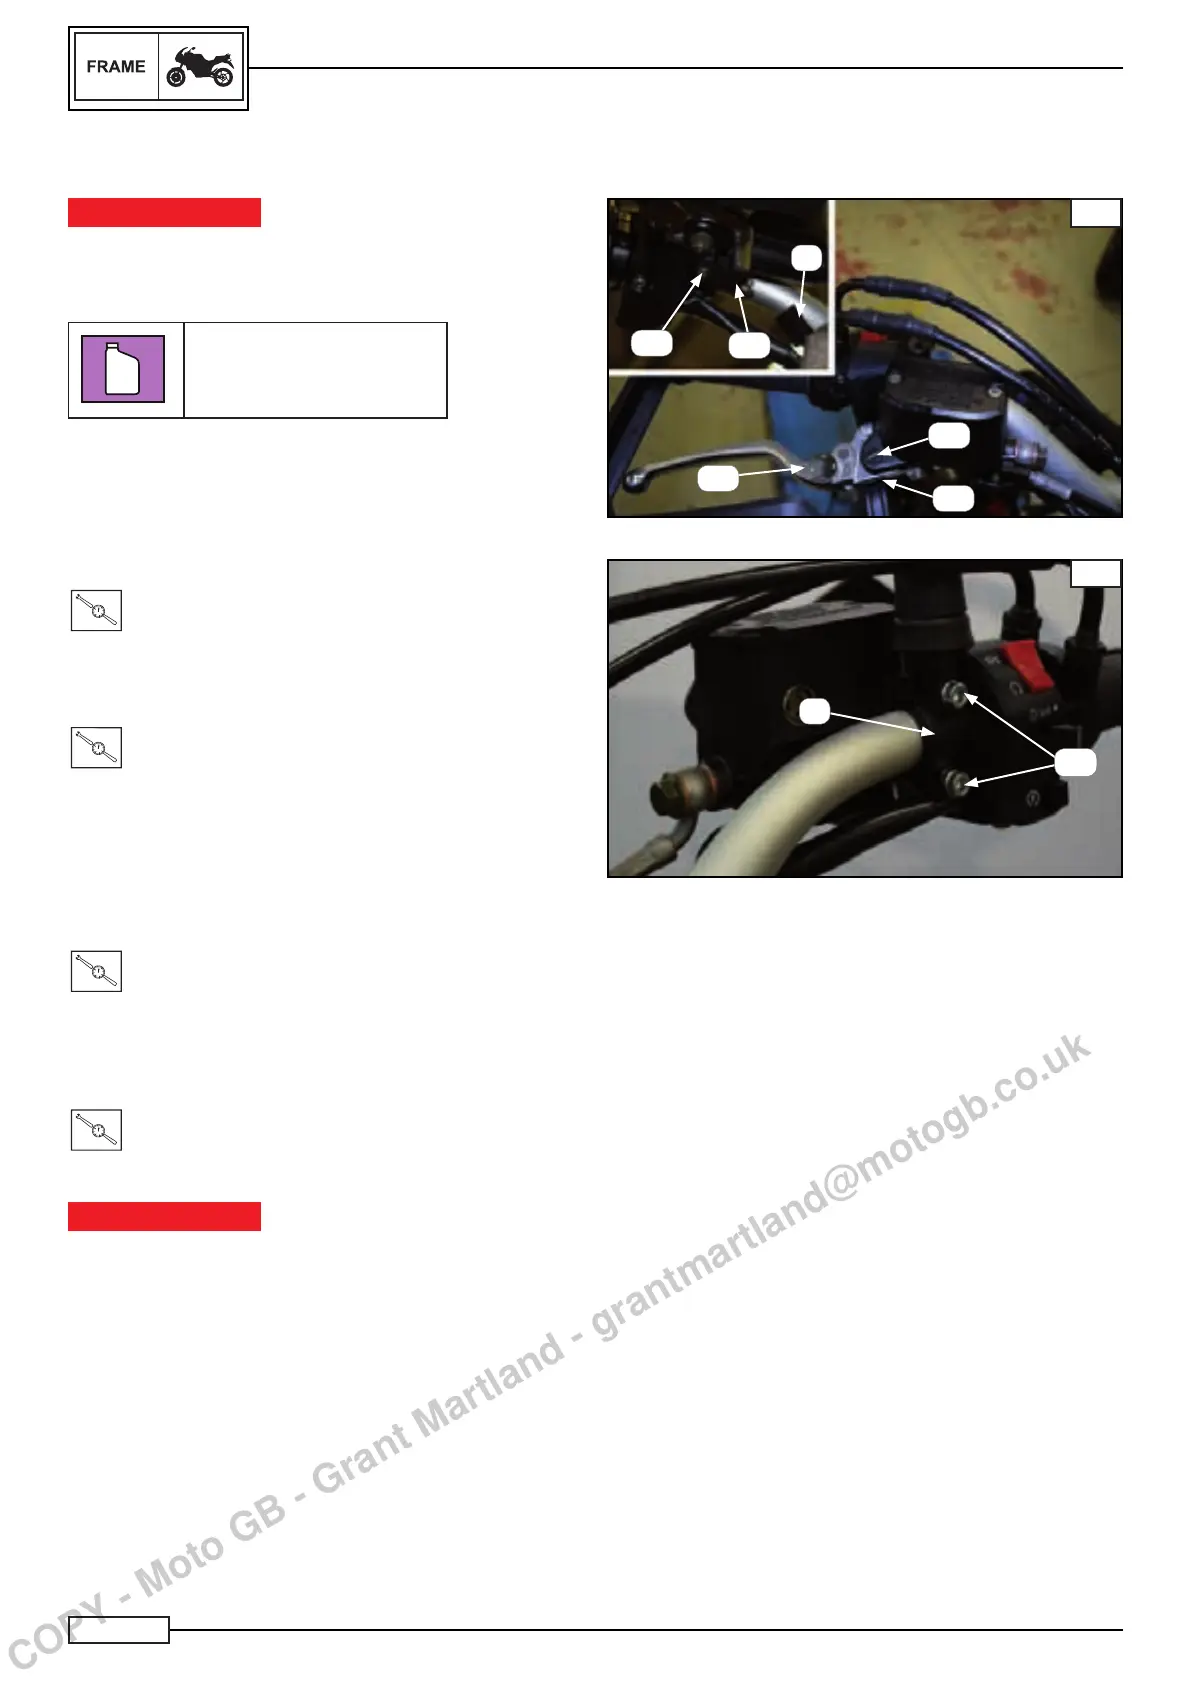
Install:
• position the pump body
• clamp (2*) Fig. B
• the screws (21*)
Tighten to the following torque:
T
.
R
.
Torque 8 N*m
• micro-switch (28*)
• screw (27*)
Tighten to the following torque:
T
.
R
.
Torque 1.5 N*m
• connect the connector of the front brake switch (1) Fig. A.
• Position the front brake hose to the brake pump (10*).
• sealing washer (9*).
• special screw (22*)
Tighten to the following torque:
T
.
R
.
Torque 26 N*m
• Position the front brake lever (25*) Fig. A
• screw (23*) - tighten Fig. A
• nut (26*) Fig. A
Tighten to the following torque:
T
.
R
.
Torque 7 N*m
WARNING
To guarantee the safety of the bike, it is essential for the path
of the brake hose to be correct.
NOTE:_________________________________
Once topping up operations of the brake fl uid has fi nished,
refer to Chapter 3: Periodic maintenance, paragraph “Check-
ing and topping up the front brake fl uid level”.
NOTE:_________________________________
The numbers marked (*) are a part of the table at the begin-
ning of the chapter.
FRONT AND REAR BRAKES
FRONT BRAKE PUMP INSTALLATION
A
B
2*
28*
1
21*
25*
23*
26*
27*
COPY - Moto GB - Grant Martland - grantmartland@motogb.co.uk

 Loading...