4 - 40
FRONT AND REAR BRAKES
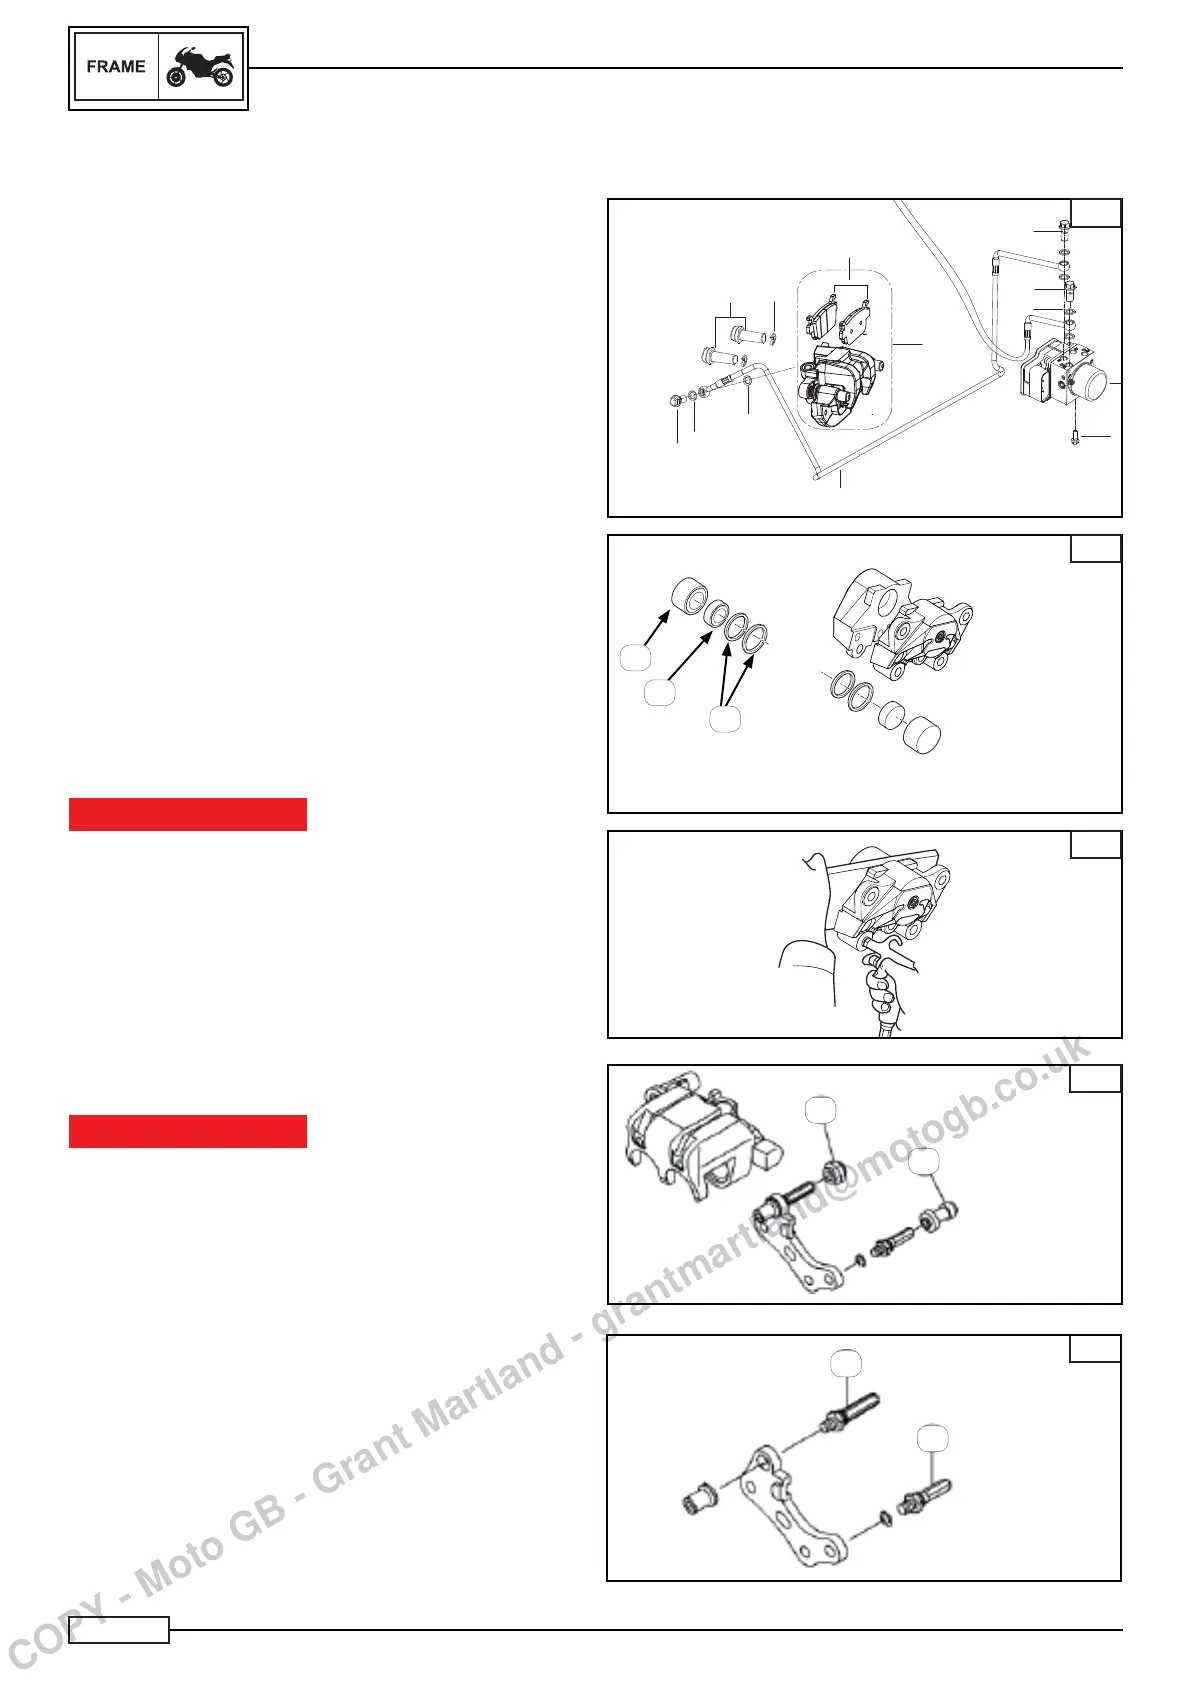
REAR BRAKE CALLIPER
NOTE:_________________________________
Before disassembling the brake calliper, discharge the brake
fl uid from the complete braking system: refer to “Frame/
brake fl uid level check, Chapter 3”.
Remove:
• the screw (20*) Fig. A
• the sealing washers (9*) Fig. A
• the front brake hose (4) Fig. A
• the screws (A) Fig. B
Remove the calliper
NOTE:_________________________________
Insert the end of the brake hose into a container and slowly
pump out and drain the brake fl uid.
Detach:
• the pistons (B) Fig. B
• the seals (C) Fig. B
• (fi rst the oil seals – the smallest seals, then the O-rings –
the largest seals)
• Fix the pistons of the brake calliper with a block of wood
Fig. C
• Blow compressed air into the attachment of the fl exible
brake hose to force the pistons from the brake calliper.
• The sliding pins (3) and (4) Fig. E
• ear protectors against dust (1) and (2) Fig. D
IMPORTANT NOTICE
Never try to prise out the calliper pistons.
Replace:
• the seals (C) Fig. B
• Substitute the seal if it shows signs of the following:
- Brake fl uid leak around the brake pads.
- Brakes overheating.
- Notable difference of wear between the internal and exter-
nal brake pads.
- If the seal and piston are stuck to each other.
Substitute the seals when substituting the brake pads.
IMPORTANT NOTICE
When the repair has fi nished, the brake lever and pedal must
pressed several times so that the pads come into contact
with the brake discs so that the braking distance is fore-
shortened and therefore avoiding an accident with serious
injuries or death. Do not utilise the motorcycle if full effi cien-
cy of the brake pedal cannot be obtained. Full effi ciency is
activated by operating the brake pedal several times so as to
bring the pads into contact with the disc.
NOTE:_________________________________
The numbers marked (*) are a part of the table at the begin-
ning of the chapter.
20
20
4
6
7
9
9
9
1
20
21
29
A
B
C
B
C
D
D
E
1
2
3
4
COPY - Moto GB - Grant Martland - grantmartland@motogb.co.uk
 Loading...