110
FX3UC Series Programmable Controllers
User’s Manual - Hardware Edition
3 Generic Specifications/Installation Work
3.4 Connection between main unit and extension equipment
3.4.2 Connecting method A (Main units and Extension units/blocks connecting)
This subsection explains the procedures for connecting FX2NC/FX3UC Series extension blocks, FX2NC-CNV-
IF or FX
3UC-1PS-5V.
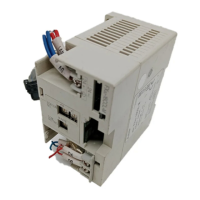
1. Connection procedure
1) Remove the connecting connector cover (A) from the right
side of the main unit or existing extension block.
2) Pull up the connecting hook
d of the main unit or existing
extension block, and connect the hook
c
of the extension
block to be added to the connection hole of the counterpart
(main unit or existing extension block) as shown in the figure
on the right.
3) Pull down the connecting hook
d
of the main unit or
existing extension block to fix the extension block to be
added.
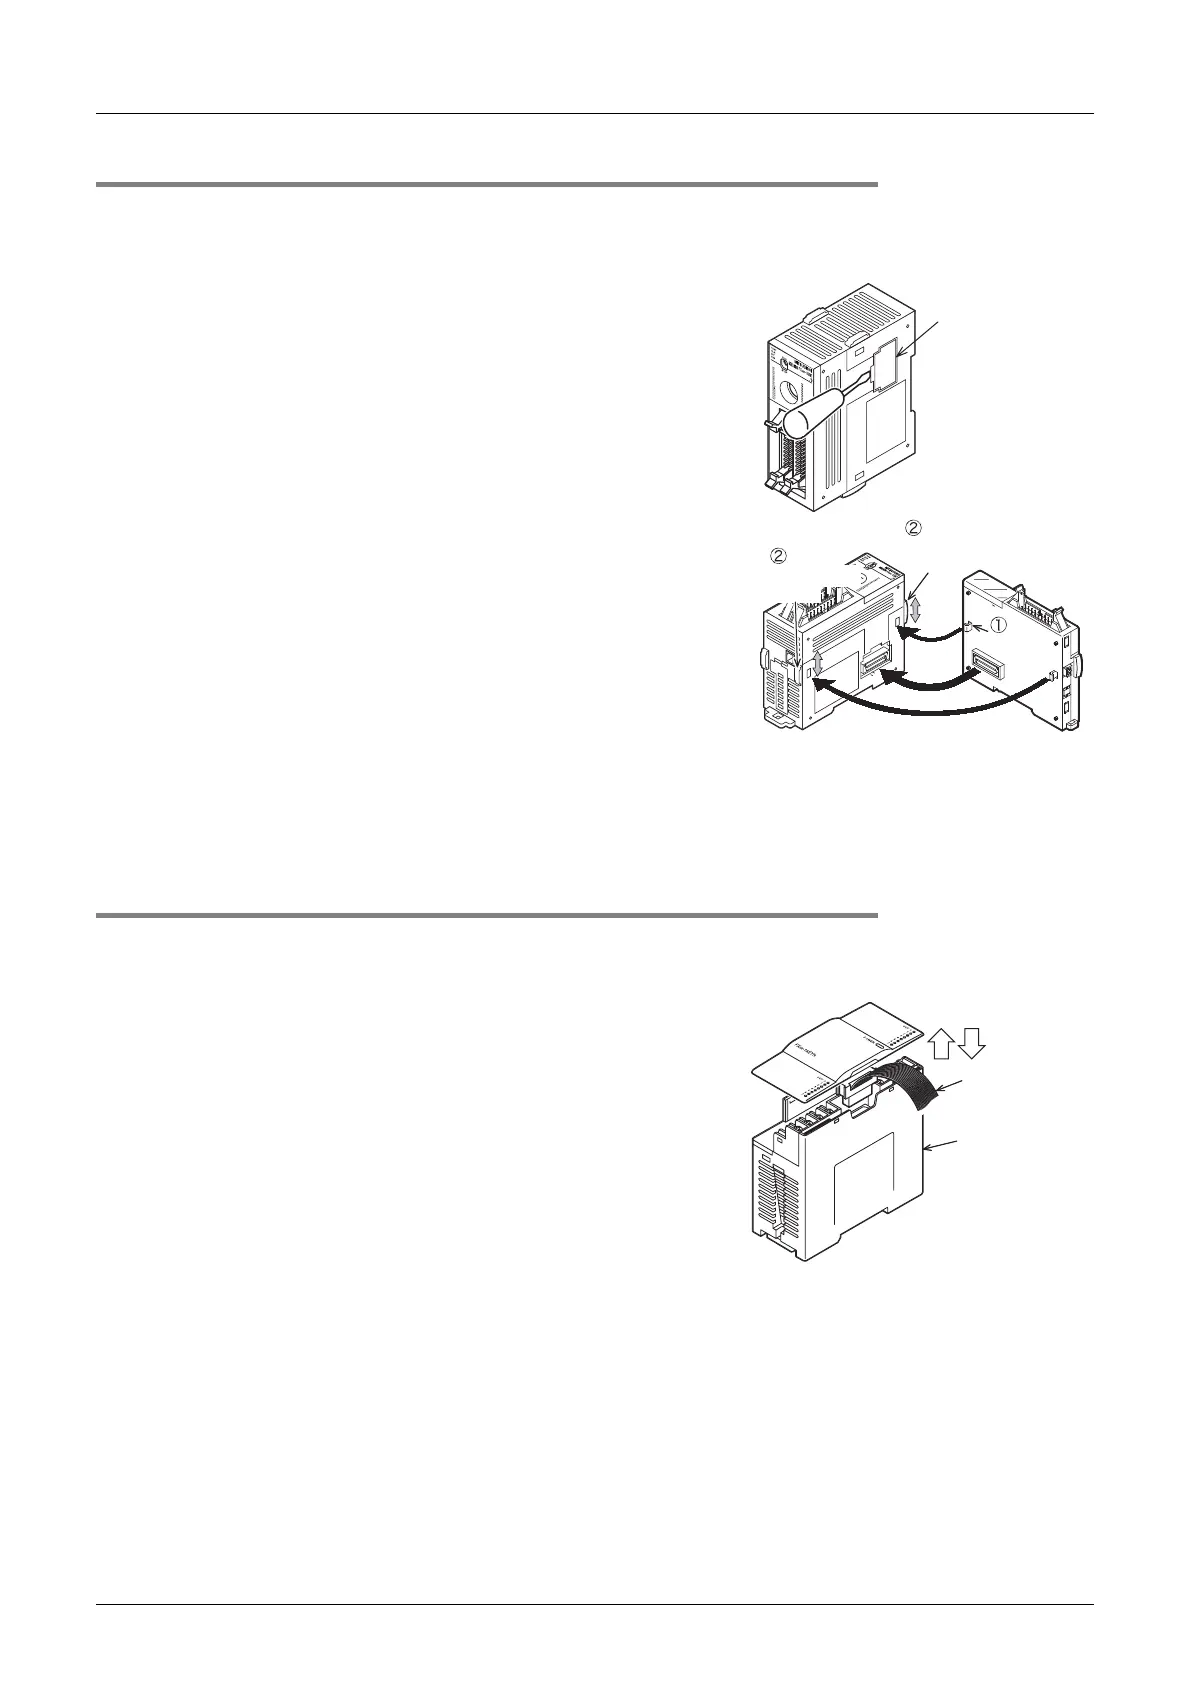
3.4.3 Connecting method B (Connection of FX0N/FX2N/FX3U extension units/blocks)
This subsection explains the procedures for connecting FX0N/FX2N I/O extension blocks or FX0N/FX2N/FX3U
special function blocks.
1. Connection procedure
1) Remove the top cover of the existing unit/block (left side).
- When connecting FX
2N-10GM or FX2N-20GM, remove the
PLC extension block connector cover.
- When connecting FX
2N-1RM(-E), remove the top cover of
FX
2N-1RM(-E).
2) Connect the extension cable of the block to be connected
(right side) to the existing unit/block.
- When the FX
2N-10GM, FX2N-20GM or FX2N-1RM(-E) are
connected, connect the unit to be added (right side) and the
existing unit (left side) with the supplied extension cable.
3) Fit the top cover (except when connecting FX
2N-10GM or FX2N-20GM).
connector
Connecting
cover (A)
hooks
Main unit Extension block
Hook
Connecting
hooks
Connecting
Added units
extension cable
(right side)
Existing units
(left side)
 Loading...