12
Utility
12-30 C300
Utility Chapter 12
Expert Adjustment
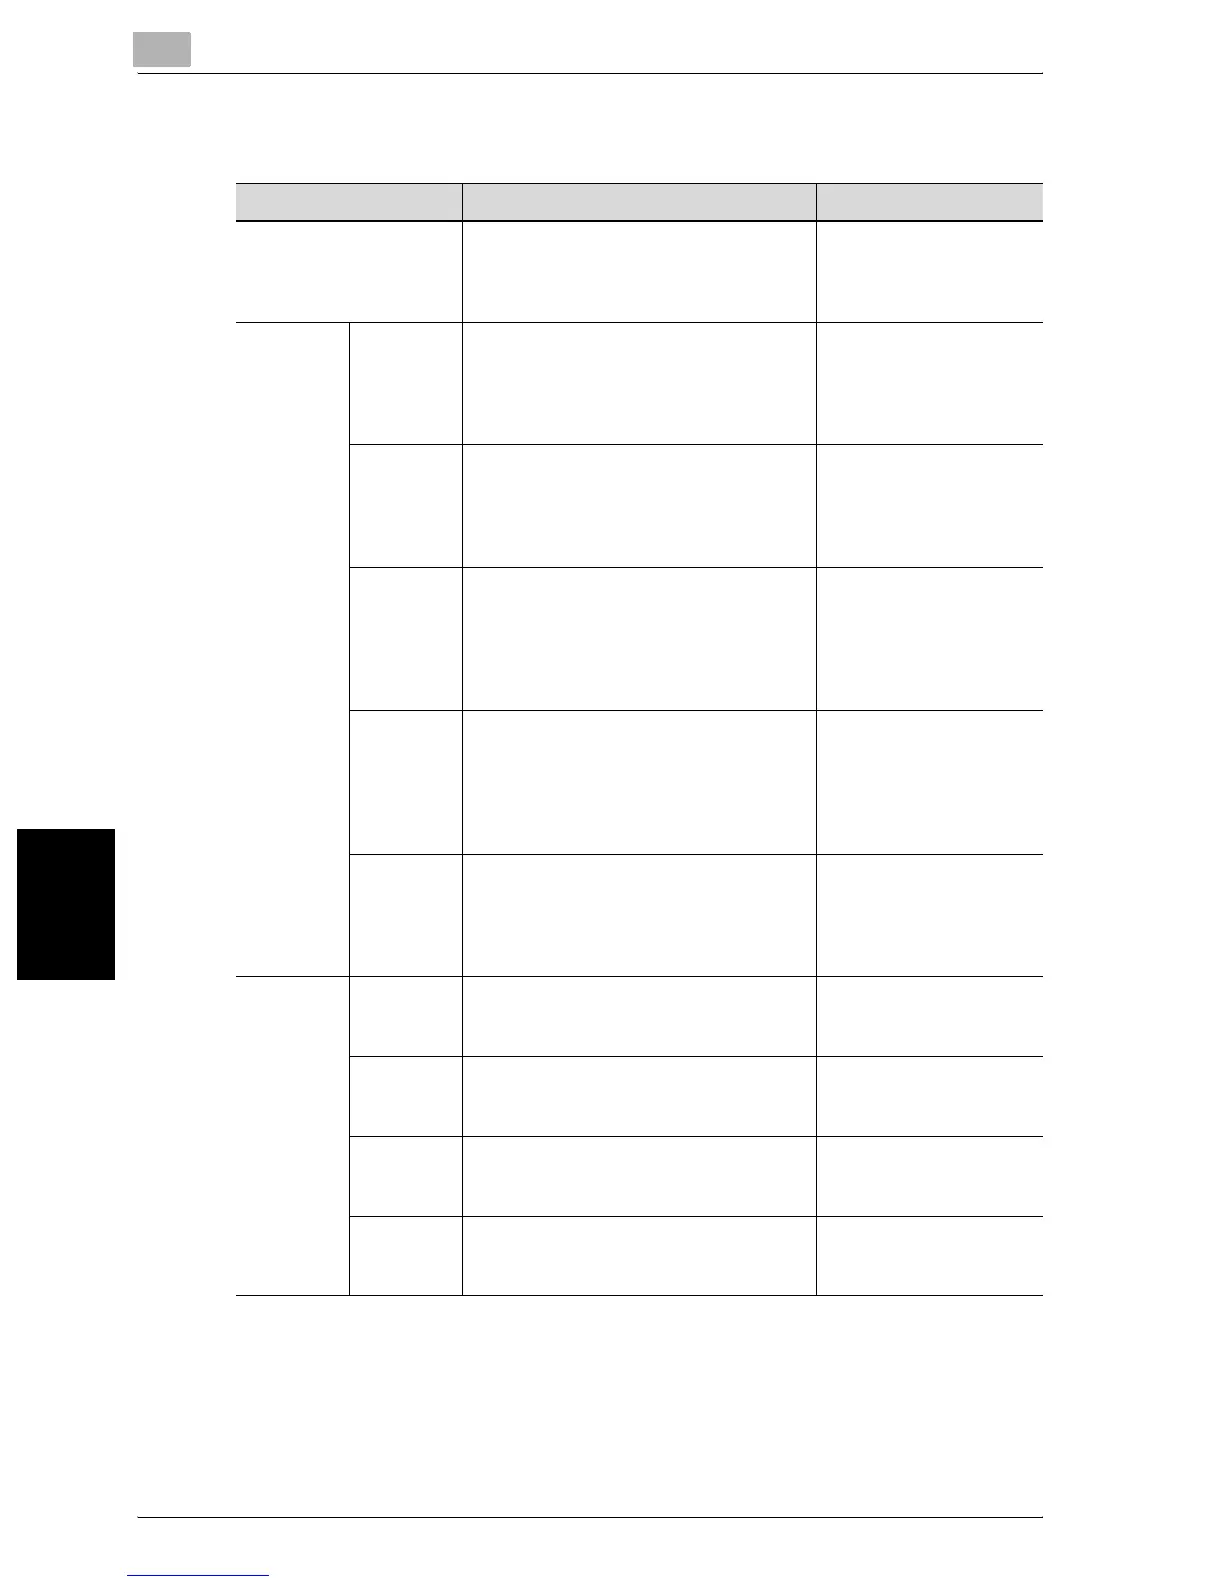
Parameter Description Default Setting
AE Level Adjustment Set the initial value for auto exposure be-
tween 0 and 4. The higher the setting,
the more that the original background is
emphasized.
2 (standard)
Printer Ad-
justment
Leading
Edge
Adjust-
ment
Adjust the starting print position be-
tween –3.0 mm and 3.0 mm at the lead-
ing edge of the paper (with respect to the
paper feed direction). Adjustments can
be specified for each paper type.
0.0 mm
Centering Adjust the starting print position be-
tween –3.0 mm and 3.0 mm at the left
edge of the paper (with respect to the
paper feed direction). Adjustments can
be specified for each paper tray.
0.0 mm
Centering
(Duplex
2nd Side)
Adjust the starting print position be-
tween –3.0 mm and 3.0 mm at the left
edge of the paper for the second side
during automatic double-sided copying.
Adjustments can be specified for each
paper tray.
0.0 mm
Media Ad-
justment
If the print image is flawed (missing print,
white spots, or uneven printing) due to
the characteristics of the type of paper
that is used, adjust this parameter be-
tween –5 and +5 according to the paper
type.
–
Erase
Leading
Edge
The width of the area erased from the
leading edge (margin) can be adjusted to
4 mm, 5 mm, or 7 mm. For details on
making this adjustment, contact your
technical representative.
4 mm
Finisher
Adjust-
ment
Center
Staple
Position
Adjust the center stapling position be-
tween –10 mm and 10 mm for printing
with the “Fold & Staple” setting.
0
Fold Posi-
tion
Adjust the center folding position be-
tween –10 mm and 10 mm for printing
with the “Half Fold” setting.
0
Punch
Horizontal
Position
Adjust the horizontal position of the
punched holes between –10 mm and
+10 mm.
0 mm
Punch Re-
sist Loop
Size
The hole-punching shift for double-sided
printing and outputting cover pages can
be adjusted in 1 mm increments.
0 mm
 Loading...