SECTION 35 - HYDRAULIC SYSTEM
35-106
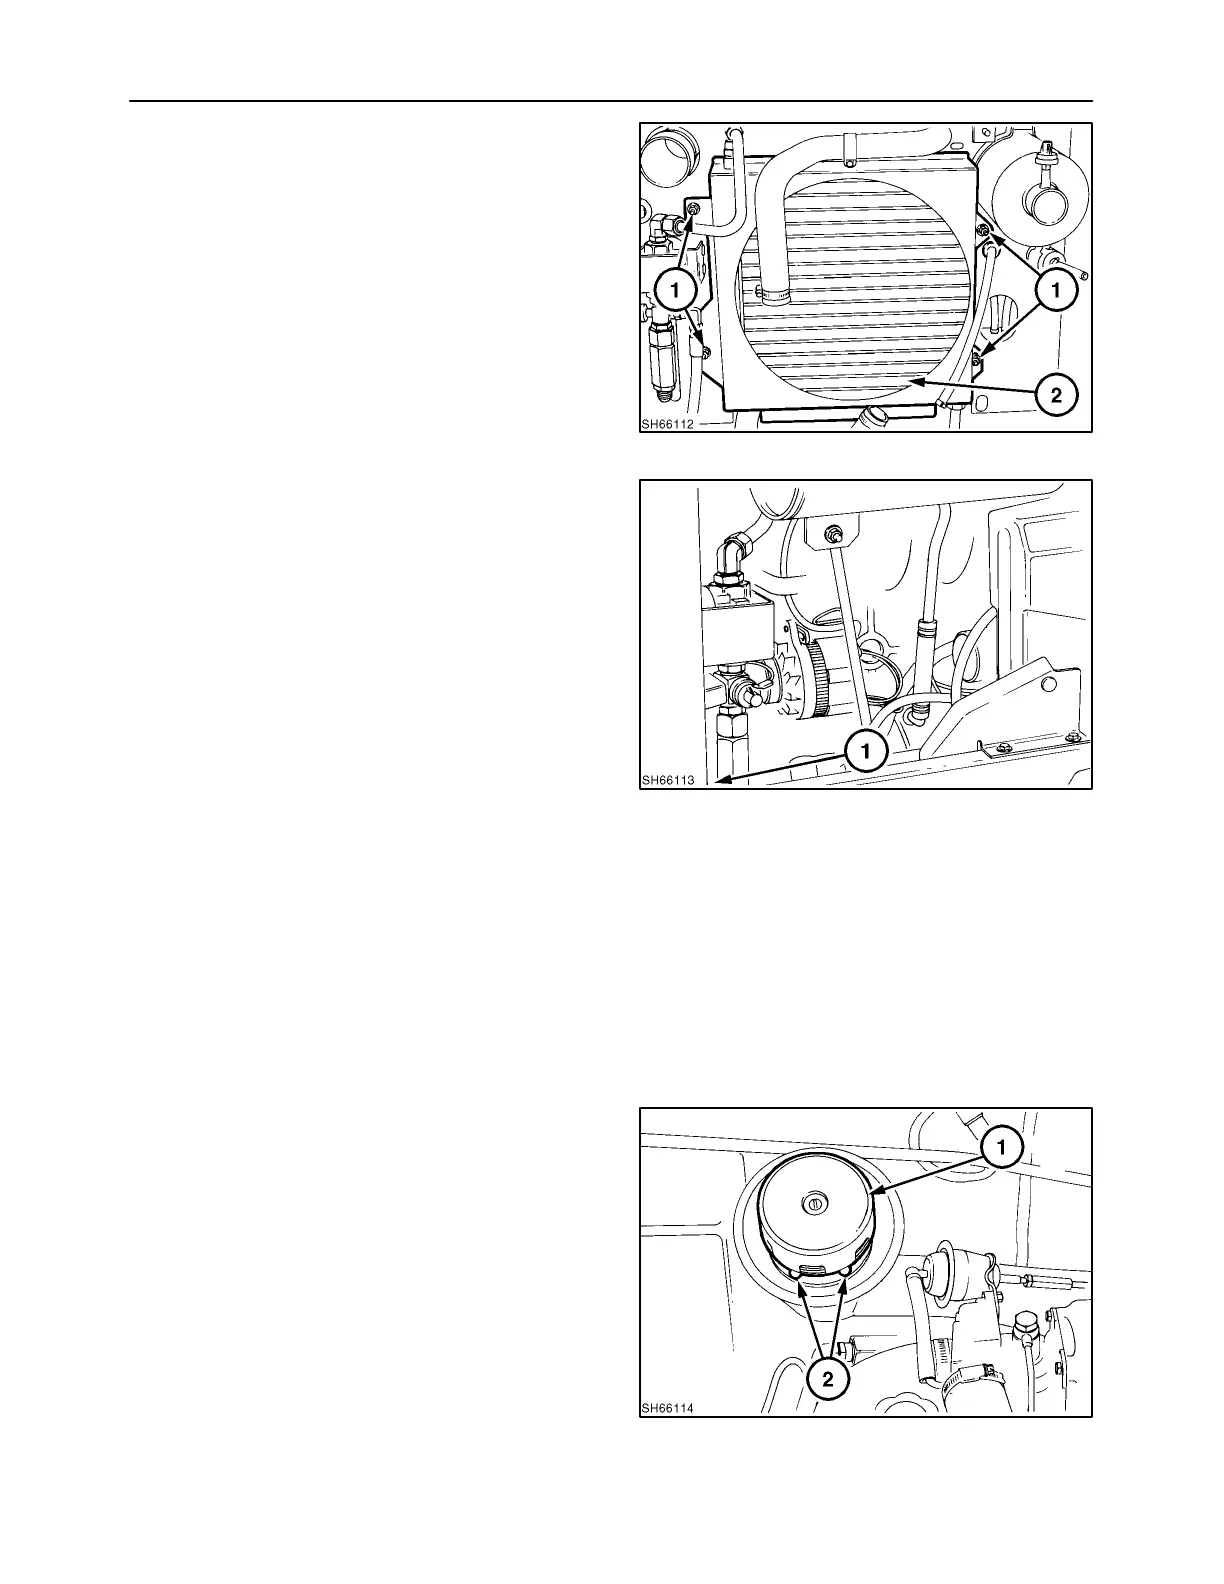
8. Remove the fan shroud retaining hardware, 1, to
access the oil cooler.
9. Remove the oil cooler, 2, retaining hardware to
separate the cooler from the radiator.
203
REASSEMBLY
1. Reattach the oil cooler to the support with the
previously removed hardware.
2. Reinstall the support with the oil cooler and radia-
tor attached into the frame.
3. Position the support square with the loader frame
at 1, and install retaining hardware and tighten
securely.
4. Reconnect the hydraulic lines to the cooler.
Tighten the lines to seat to fittings, then loosen
lines and retorque.
5. Reconnect the radiator lines and refill cooling
system with 50/50 water-antifreeze mixture.
6. Reconnect the filter hydraulic lines. Tighten the
lines to seat to fittings, then loosen lines and re-
torque.
7. Reconnect the filter sensor wires.
8. Check hydraulic oil level and add 10W-30 oil if
required.
9. Start the unit, operate the hydraulic system,
check for oil leaks and coolant leaks, and repair
as required.
10. Check the oil level and engine coolant level and
add as required.
204
Op. 35 300
OIL RESERVOIR
The hydraulic oil reservoir fill is accessed through the
top engine shield. The fill cap assembly is the hydrau-
lic system breather and is equipped with a screen to
help prevent contamination into the system.
Op. 35 300 28
Filter/Breather Cap Cleaning
To clean the breather cap, 1, remove the cap from the
reservoir and back flush the cap assembly with a
clean solvent. Blow dry with low- pressure air.
To clean the fill screen, remove the six screws and
washers, 2, and lift the screen assembly from the
reservoir neck.
205

 Loading...