SECTION 44 - AXLES AND WHEELS
44-14
REINSTALLATION
1. Clean the final drive case.
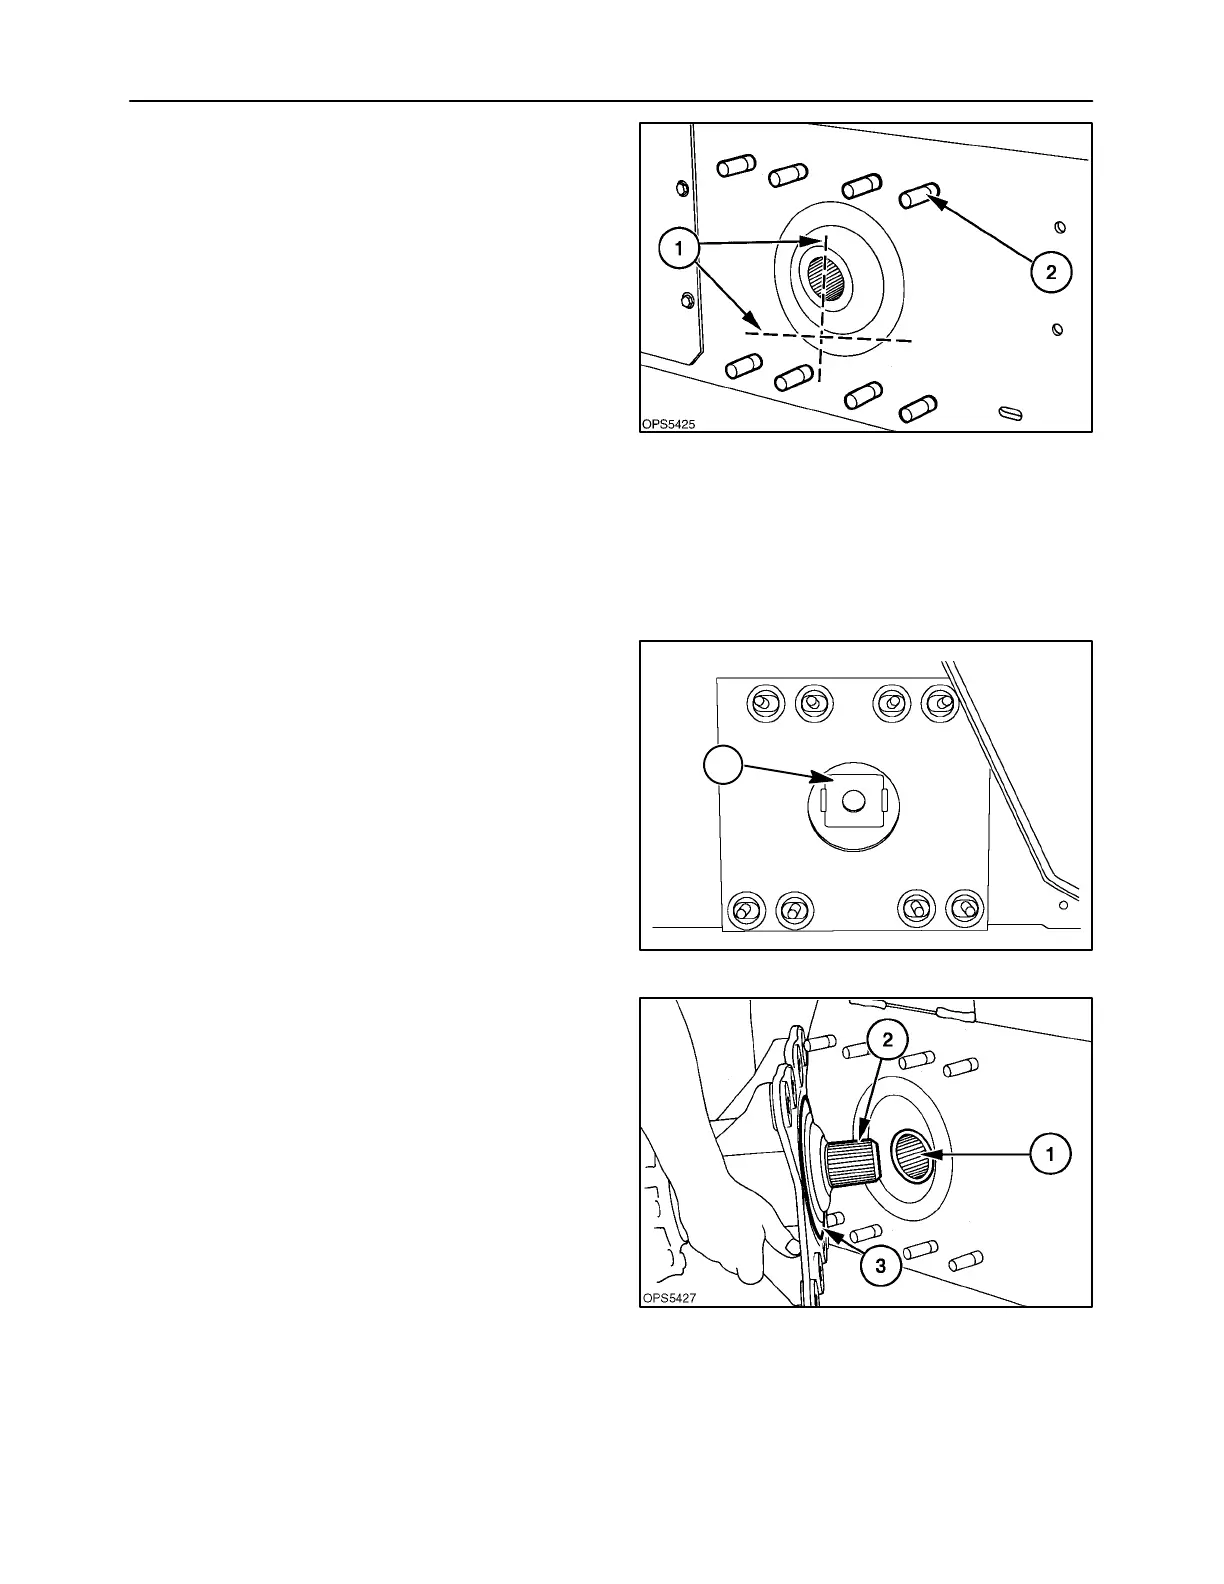
2. Inspect the axle opening in the case to insure it
is flat for a good seal between the case and axle
housing. To check surface flatness, lay a straight-
edge across the axle opening in the horizontal
and vertical planes, 1. Straighten if required.
3. Inspect the axle assembly retaining bolts, 2, and
replace if damaged.
– To replace a stud, the old stud can be driven
out with a hammer and suitable driver.
– Thoroughly clean the inside and outside of
case in stud area.
– Wipe the new stud with a wicking-type seal-
ant. The new stud can be installed into case,
using 3/4″ thick spacer over the stud and
then use the nut and a flat washer to pull the
stud in place.
– Wipe around the stud with a wicking-type
sealant to insure an oiltight seal.
24
4. The axle shaft pivots inside a pilot plate, 1. In-
spect for damage.
1
25
5. Position the drive sprocket, 1, in the axle open-
ing. Make sure the drive sprocket is placed in the
drive chain properly.
6. Lift the axle housing assembly and mate the
splines on the axle shaft, 2, and the drive sprock-
et and slide together. Lifting the axle housing as-
sembly over the retaining studs pilot the center of
the housing, 3, into the hole in the case and slide
housing tight against the case.
NOTE: When installing the final drive axle, the axle
housing must lay flat against the frame and the pilot
must rest on the edge of the frame opening.
26
 Loading...