5.34
9928487 R01 - 2018 RANGER XP 1000 Service Manual
© Copyright Polaris Industries Inc.
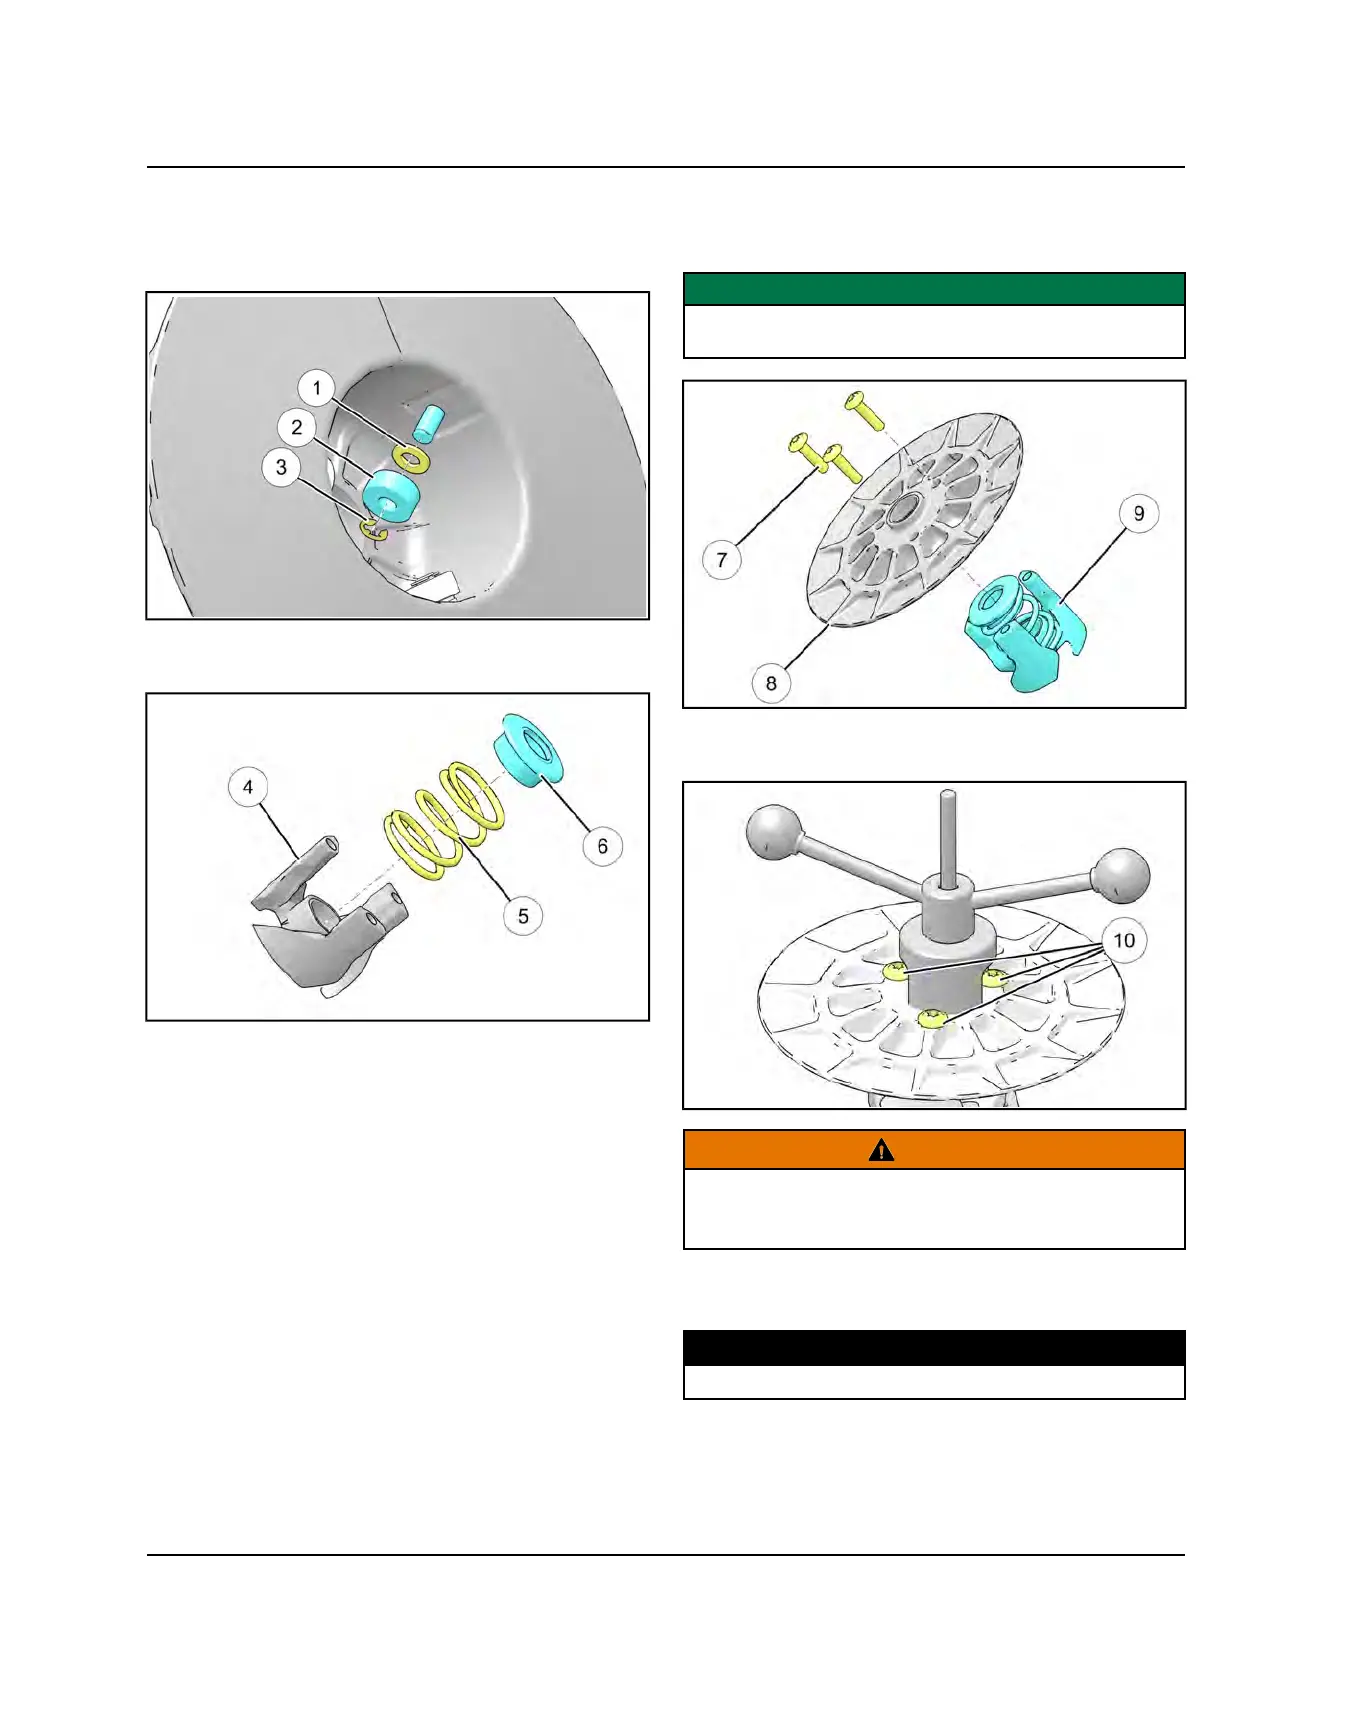
DRIVEN CLUTCH ASSEMBLY
1. Re-install washer
q
, roller
w
, and e-clip
e
Ensure e-
clip is fully seated and roller rotates freely.
2. Install clutch spring
t
and clutch spring cap
y
on the
helix
r
. Ensure the clutch spring is fully seated.
3. Re-install the retaining fasteners
u
and movable
sheave
i
onto the helix
o
using previous hole
orientation.
IMPORTANT
Using previous hole orientation will ensure the driven
clutch maintains balance.
4. Using clutch compressor PU-50518 compress the
driven clutch assembly.
CAUTION
The helix cover is loaded by the spring. Not using a
proper compressor may result in personal injury or
damage to the clutch.
5. Torque the three T50 torx fasteners
a
to
specification.
TORQUE
32 ft-lbs (44 Nm)
6. Once back together, verify the alignment marks made
during disassembly are properly aligned.
7. Install the stationary and movable sheave on the
vehicle. See PVT Inner Cover Assembly, page 5.13
PVT SYSTEM

 Loading...