10
9928487 R01 - 2018 RANGER XP 1000 Service Manual
© Copyright Polaris Industries Inc.
10.23
4. Pull the rear of the roof out firmly and lift it up. Slide
the roof forward and off the vehicle.
5. For installation, reverse removal procedure. Torque
the fasteners to specification.
TORQUE
Roof Fasteners:
42 in lbs (5 Nm)
TORQUE
Overhead Light Fasteners:
18 in lbs (2 Nm)
REAR PANEL REMOVAL / INSTALLATION
NOTE
Two people should work together to remove and install
the rear panel windshield.
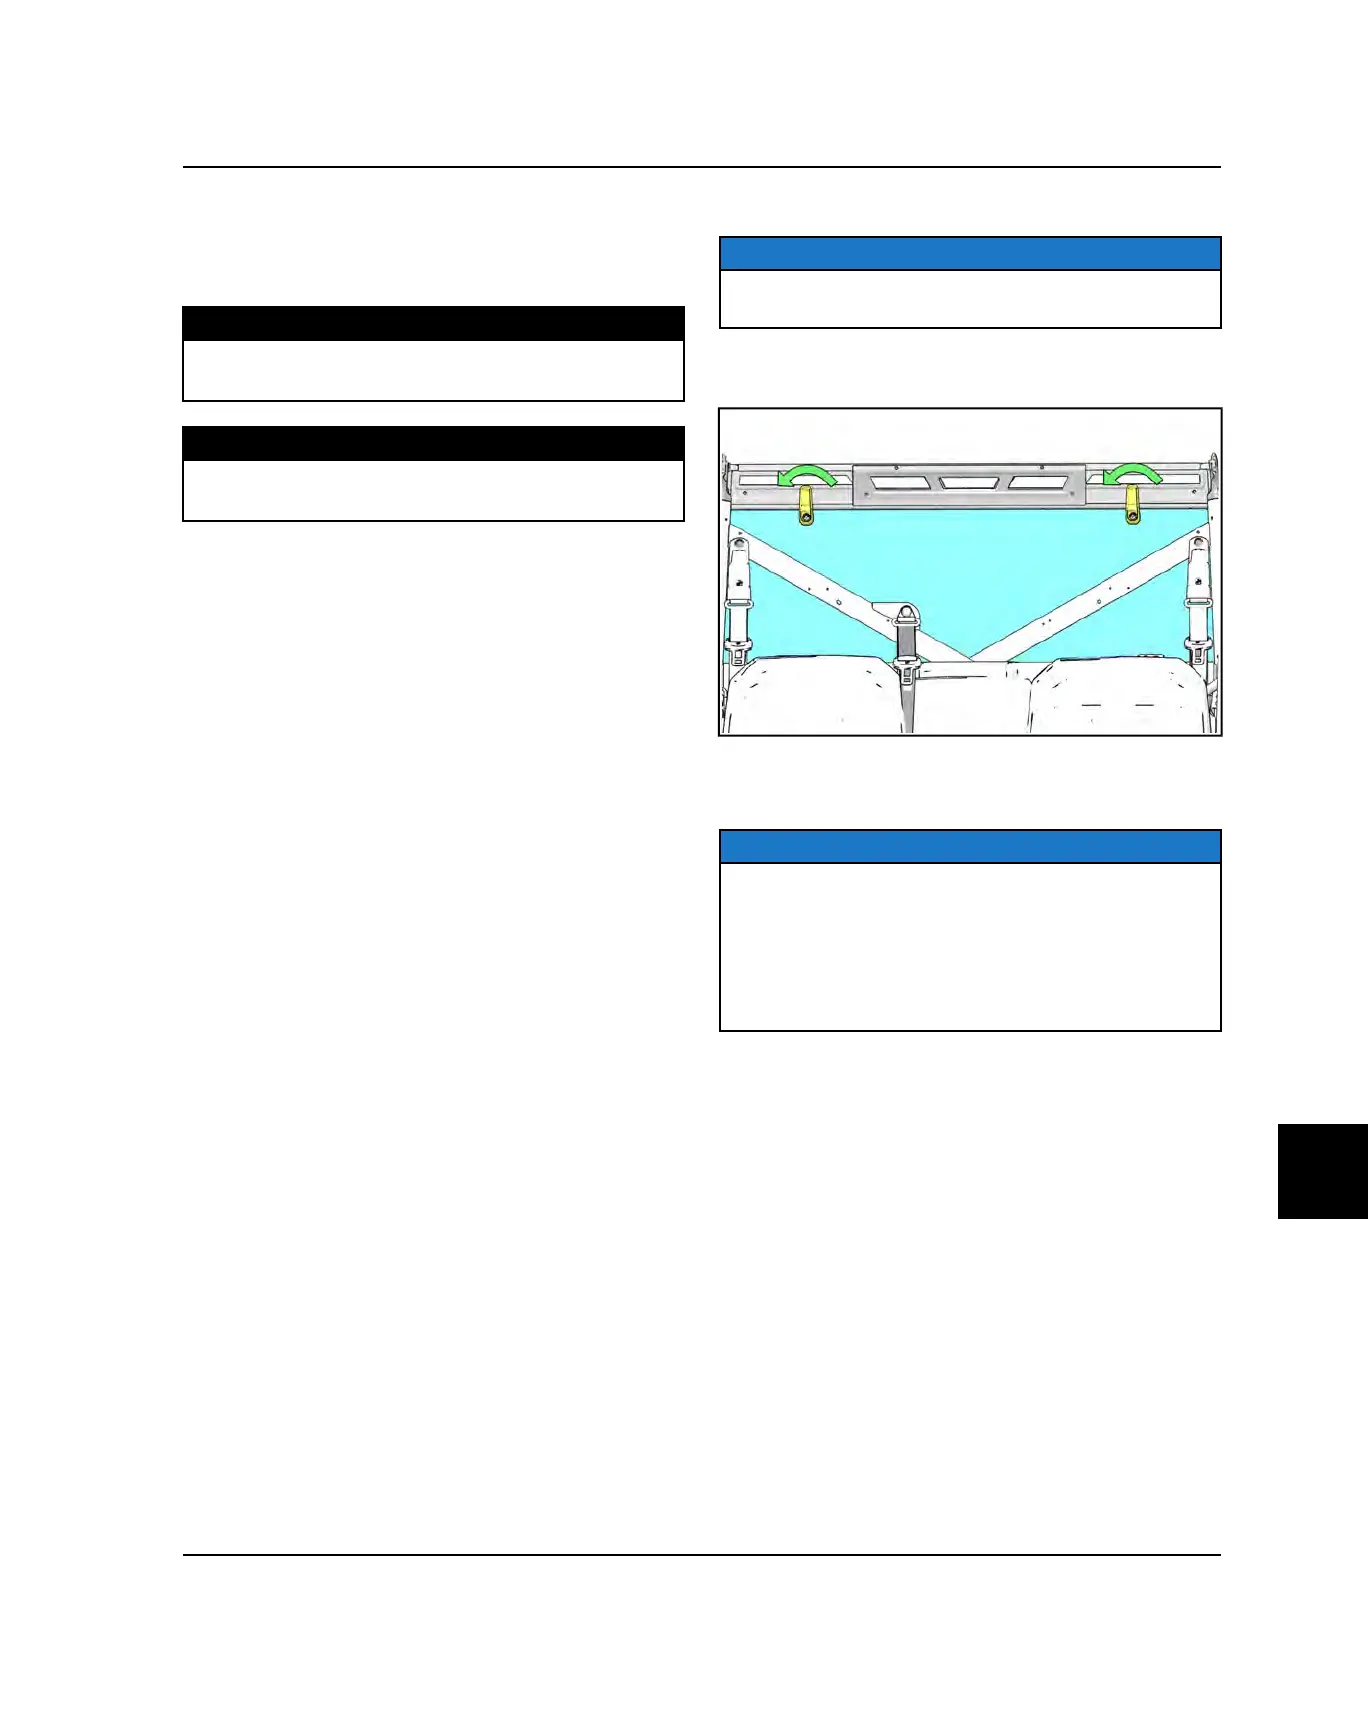
1. Rotate the LOCK & RIDE handles counterclockwise
into the unlocked position
2. Rotate the top of the rear window slightly away from
the vehicle, then lift the windshield up and away from
the vehicle.
NOTE
Store windshield in an upright position in a location
where it will not be bumped into and where it will not be
subject to things falling on it. Polaris recommends that
the lower frame of the glass be set onto a wood or other
semi-soft support structure to prevent unexpected
movement and potential breakage of the window during
storage.
3. Reverse the removal procedure for installation. Turn
the LOCK & RIDE handles clockwise to the locked
position to secure the windshield.
BODY / FRAME

 Loading...