Hood / Fenders / Doors: 9J-4
Front Door Assembly Removal and Installation
S5JB0A9A06006
Removal
1) Remove front fender referring to “Front Fender
Components: ”.
2) Disconnect door harness lead wires at each coupler.
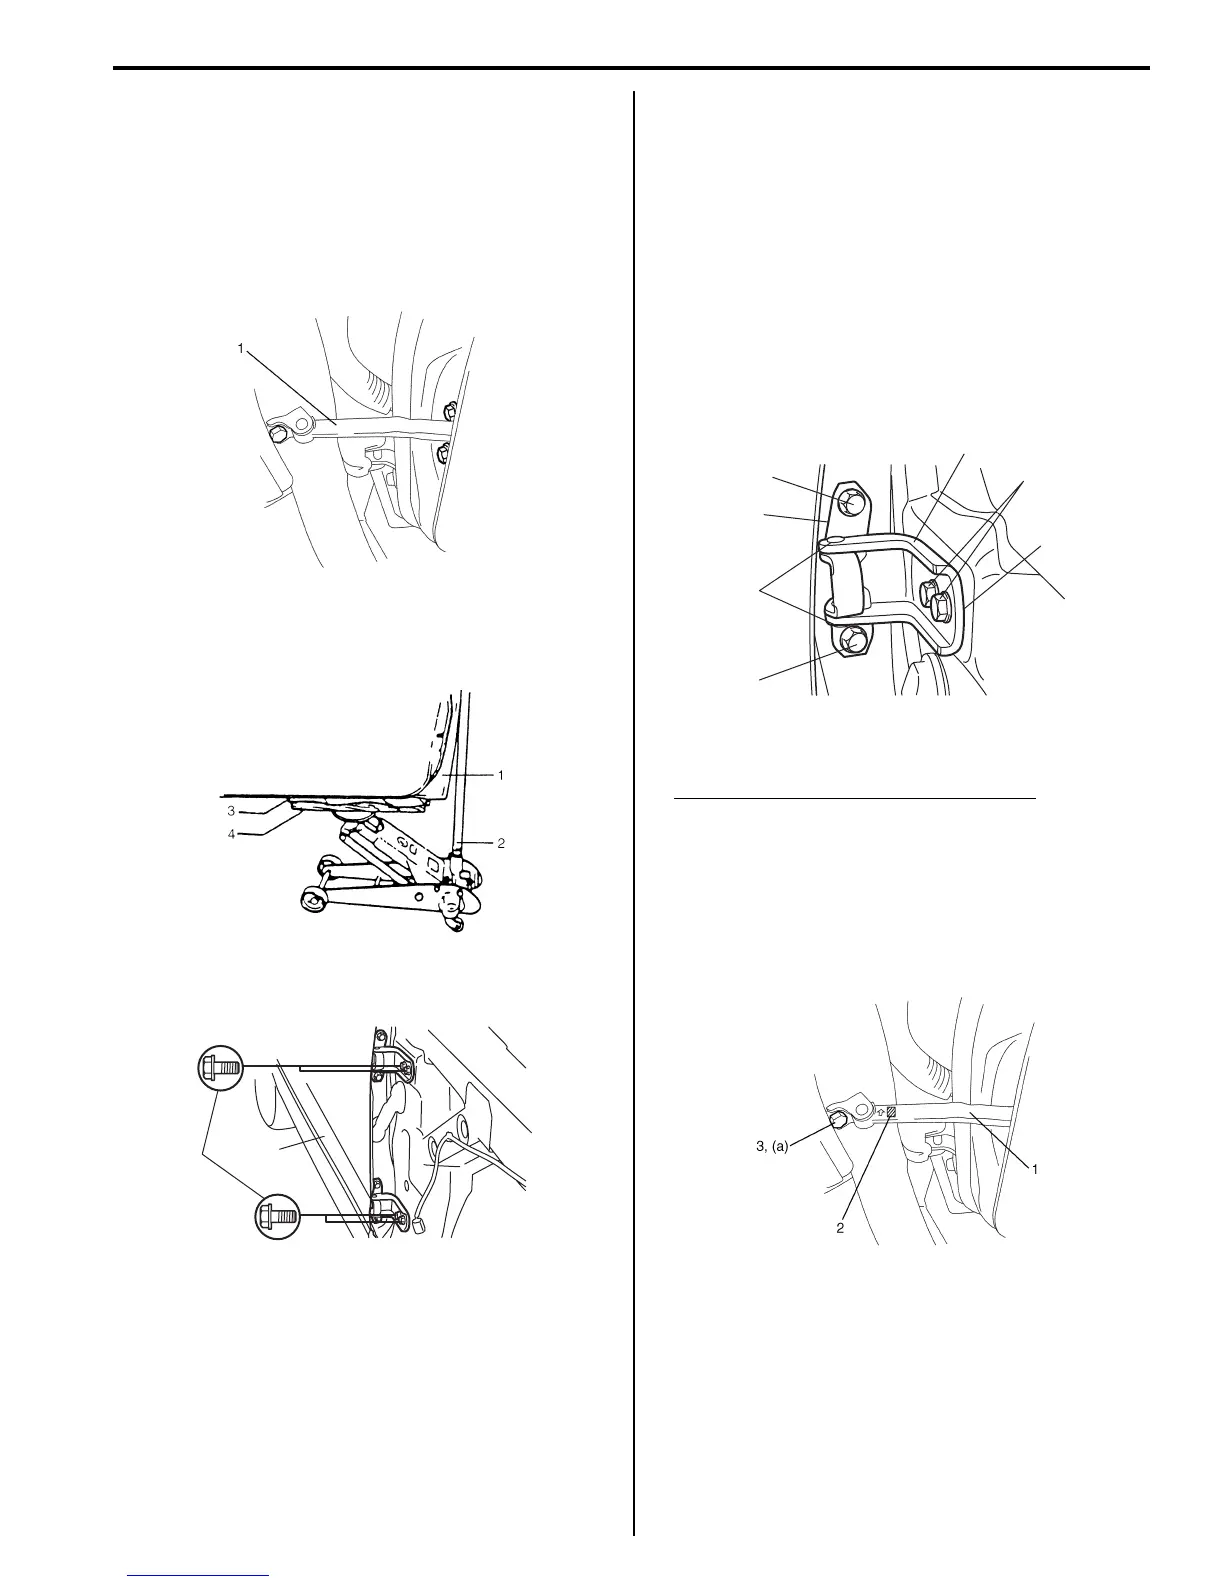
3) Remove door open stopper (1).
4) Support door panel (1) using a jack (2) with rags (3)
and a piece of wood (4) placed between jack (2) and
panel (1) as shown.
5) Remove door assembly (1) by loosening hinge
mounting bolts (2).
Installation
Reverse removal procedure to install door assembly
noting the following instructions.
• When replacing door, coat replacement door inside
with wax for proper anti-corrosion treatment. Refer to
“Sealant Application Areas: in Section 9L”.
• Apply sealant to contact face “A” of hinge (1) and
apply grease to rotating part “B” of hinge (1).
“A”: Sealant 99000–31110 (SUZUKI Bond
No.1215)
“B”: Grease 99000–25010 (SUZUKI Super Grease
A)
• Tighten hinge bolt to specified torque.
Tightening torque
Door hinge mounting bolt (body side) (a): 27 N·m
(2.7 kgf-m, 19.5 lb-ft)
Door hinge mounting bolt (door side) (b): 23 N·m
(2.3 kgf-m, 17.0 lb-ft)
• When door open stopper (1) is installed, make sure
punch mark (2) is upward.
Door open stopper installing direction
Left side door: L punch mark is upward
Right side door: R punch mark is upward
• Tighten door open stopper bolt (3) to specified torque.
Tightening torque
Door open stopper bolt (a): 27 N·m (2.7 kgf-m,
19.5 lb-ft)
• Adjust door latch striker position referring to “Front
Door Lock Assembly Removal and Installation: in
Section 9F”.
• Adjust front door cushion so that door becomes flush
with side body.
• After installation, open and close the door to check
looseness.
I4RS0A9A0005-01
I2RH019A0003-01
2
1
I5JB0A9A0006-01
1
(a)
(b)
(b)
“A”
“A”
“B”
I5JB0A9A0007-01
I4RS0A9A0008-01

 Loading...


