2C-8 Rear Suspension:
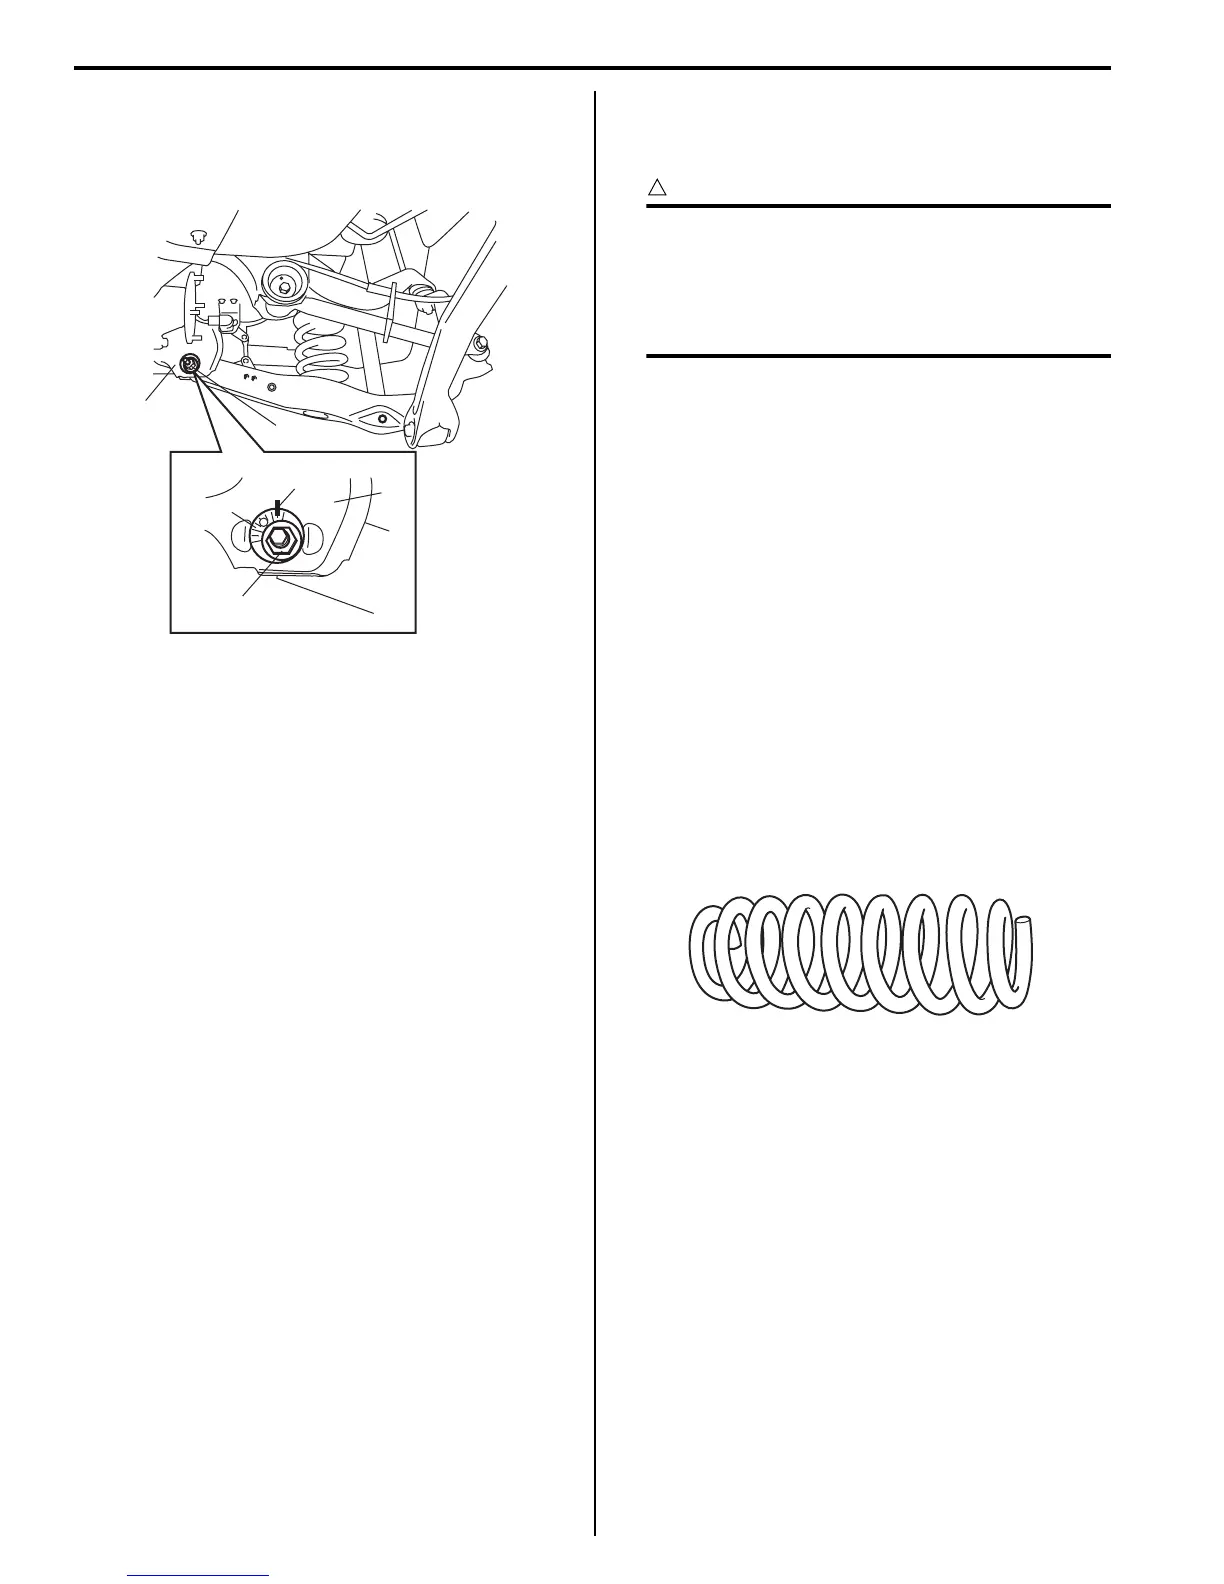
6) With marks (1) on lower arm washer (2) and rear
suspension frame (3) marked before remove aligned
to each other, tighten lower arm mount nut (4)
temporarily by hand.
7) Install rear shock absorber referring to “Rear Shock
Absorber Removal and Installation: ”.
8) Connect rear height sensor link (if equipped) to lower
arm for left side referring to “Height Sensor Removal
and Installation (If Equipped): in Section 9B”.
9) Install wheel with nuts and lower vehicle.
10) Tighten wheel nuts to specified torque.
Tightening torque
Wheel nut: 100 N·m (10.0 kgf-m, 72.5 lb-ft)
11) Tighten lower arm outer bolt and lower arm mount
nut, shock absorber bolts to specified torque with
vehicle weight on suspension.
CAUTION
!
• It is the most desirable to have vehicle off
hoist and in non-loaded condition when
tightening them.
• Tighten Lower arm washer with match
marks aligned.
Tightening torque
Lower arm outer bolt: 135 N·m (13.5 kgf-m, 98.0
lb-ft)
Lower arm mount nut: 135 N·m (13.5 kgf-m, 98.0
lb-ft)
Shock absorber upper bolt: 60 N·m (6.0 kgf-m,
43.5 lb-ft)
Shock absorber lower bolt: 90 N·m (9.0 kgf-m,
65.0 lb-ft)
12) Check rear toe and camber adjust it as necessary.
For check and adjustment procedures, refer to “Rear
Wheel Alignment Inspection and Adjustment: ”.
13) Adjust headlight auto leveling system, refer to
“Initialization of Auto Leveling Headlight System: in
Section 9B”.
Rear Coil Spring Check
S5JB0A2306028
• Inspect for cracks, deformation or damage. If any,
replace defective part.
1
2
3
3
4
4
I5JB0A230010-01
I5JB0A230016-01


