1D-32 Engine Mechanical:
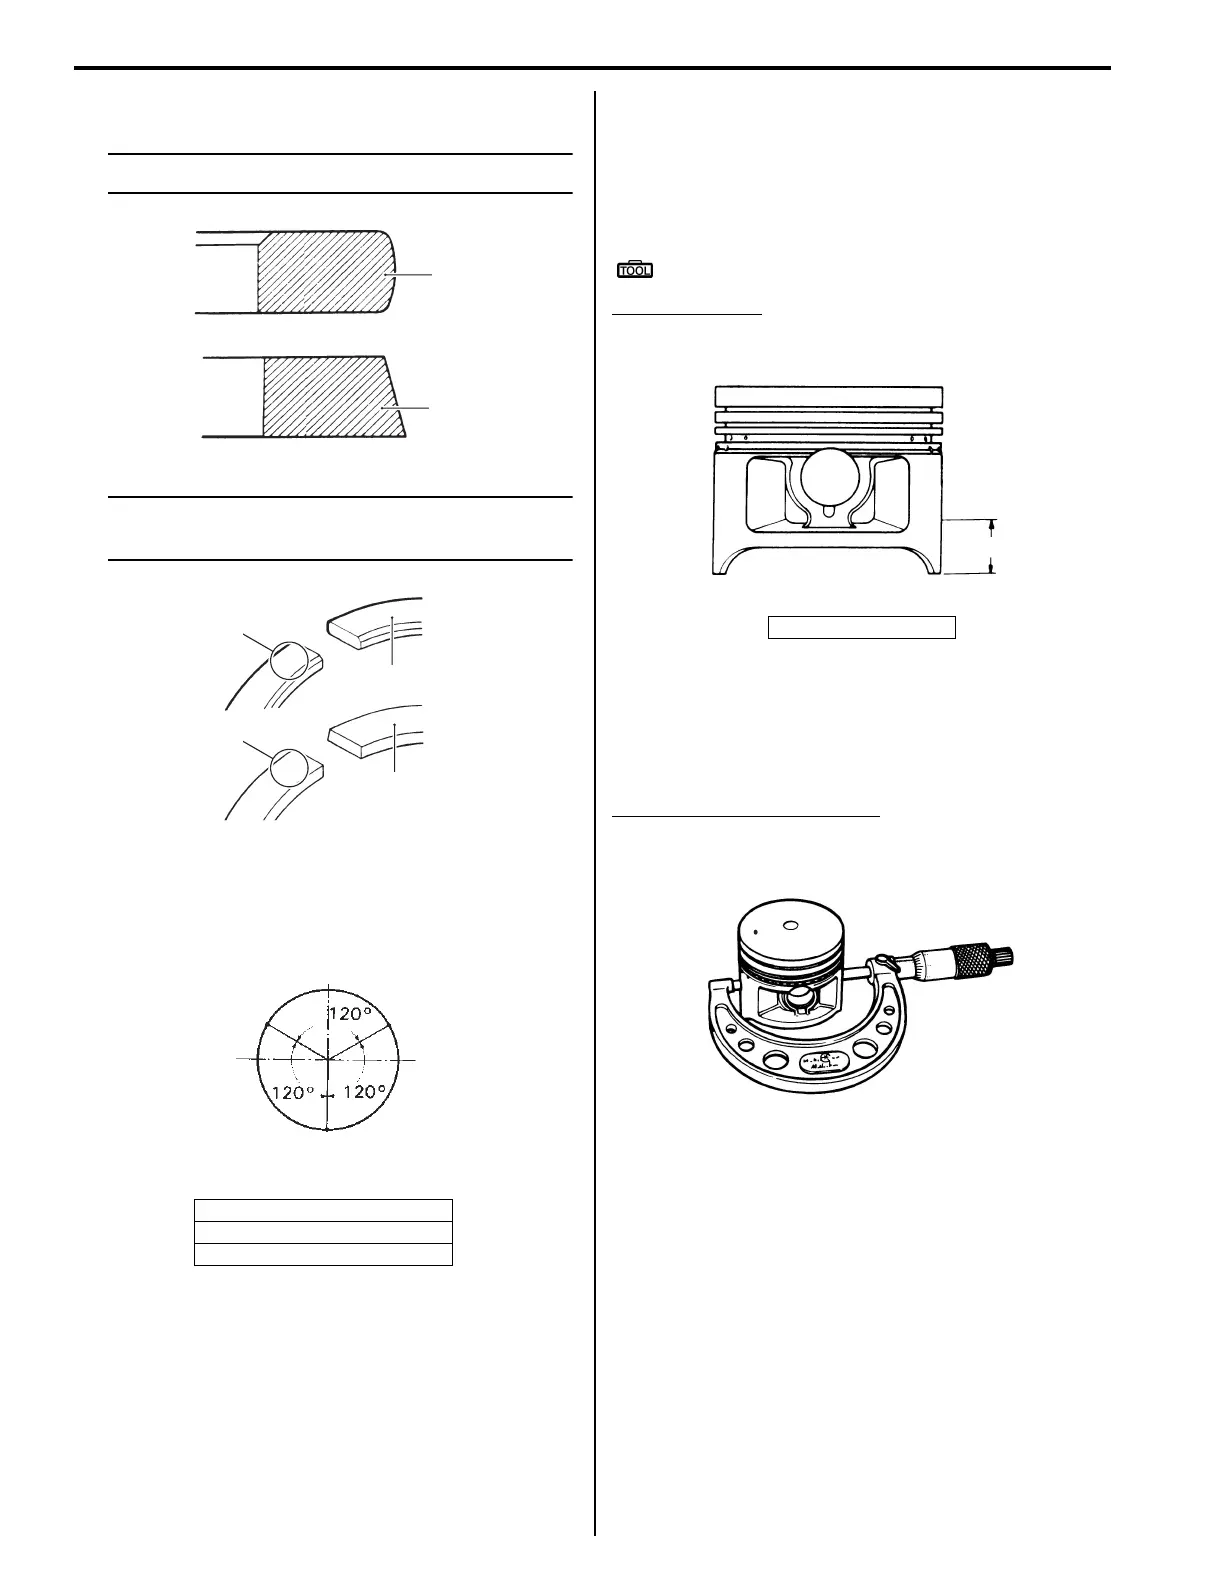
b) Install the 2nd ring (3) and 1st ring (4) to piston.
NOTE
1st ring (4) and 2nd ring (3) differ in shape.
NOTE
Face the stamped mark “C” upward when
assembling.
2) Position the gaps of the three rings and side rails as
shown. Before inserting piston into the cylinder,
check that the gaps are so located.
3) Install the piston and piston pin. Refer to “Engine Top
Side Assembly (Page 1D-13)”.
Piston and Piston Ring Inspection
B827H11406032
Piston Diameter
Using the micrometer, measure the piston outside
diameter at the place shown in figure. If the
measurement is less than the limit, replace the piston.
Special tool
: 09900–20210 (Micrometer (100 – 125 mm))
Piston diameter
Service limit: 81.880 mm (3.2236 in)
Piston-to-cylinder Clearance
Subtract the piston diameter from the cylinder bore
diameter. If the piston-to-cylinder clearance exceeds the
following limit, overhaul the cylinder and use an oversize
piston, or replace both cylinder and the piston.
Piston-to-cylinder clearance
Service limit: 0.120 mm (0.0047 in)
Piston oversize: 0.5
“D”: 2nd ring and lower side rail
“E”: Upper side rail
“F”: 1st ring and spacer
3
4
I827H1140086-02
R
R
3
4
“C”
“C”
I827H1140087-02
EX
IN
“D”
“E”
“F”
I831G1140181-03
“a”: 15 mm (0.6 in)
“a”
I827H1140088-01
I827H1140089-01

 Loading...